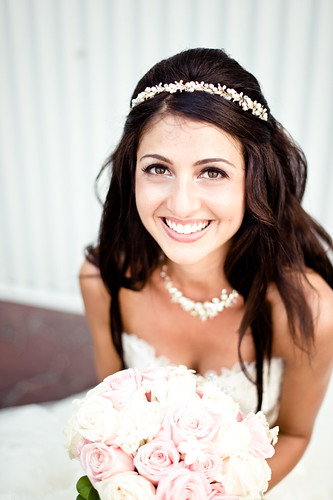
Photos of gorgeous bride, Michelle, are now up at artistrhi.com. Michelle's Big Day topped off whirlwind wedding week this past August, and what better way than to literally top things off than by getting married in Vegas!!! All the wedding details (the ceremony at the Wynn, the reception at Caesar's Palace, her dress, her Louboutin shoes) were just like Michelle - all class!

Check out the photos from Michelle's professional photographer on artistrhi weddings and a couple of behind-the-scenes photos below:

Note: A cuppa Starbucks is an essential part of the kit. :)

Michelle's lovely maids of honour and sisters are
ready...now, time to get the Bride all dolled up!

Posted by Rhia Amio, Make-up Artist www.artistrhi.com | 9:00 AM | , , , | 0 comments »

WEDDING | Ronalyn

2009-09-28

Behind the scenes from the lovely bride Ronalyn's wedding day are now up at artistrhi.com! Rona's Big Day was wedding #4 during whirlwind wedding week and it was another beautiful day with an equally gorgeous bridal party. In case you think you're seeing double in the photos, you kind of are...Rona's maid of honour was her twin sister! Having a twin sister worked out really well for Rona's bridal trial - we made Rona and her twin sis stand beside each other for an instant before and after with no camera required! :)

Congrats Rona! Thanks for letting me share in your Big Day!

Posted by Rhia Amio, Make-up Artist www.artistrhi.com | 8:00 AM | , , , | 2 comments »

The latest e-session with photography-meister Claudia Hung is now up at artistrhi.com! This e-session was unique for a couple of reasons:

1. The awesome couple, Flora and Daniel, had booked Claudia all the way from Hong Kong (Miss Hung is worldwide, baby!) and
2. We improvised and did the make-up outdoors, in a parking lot using Claudia's hatchback trunk!

Congratulations Flora and Daniel - you guys look amazing and thank you both for being so gracious! Check out the pics to see more of the lovely couple!

Posted by Rhia Amio, Make-up Artist www.artistrhi.com | 12:00 PM | , , , , | 0 comments »

inspired_artistrhi

In doing make-up, I get the opportunity to:
1). work with awesome people (whether it be clients, photographers, other artists) and
2). do what I love.

I love getting feedback - whether it be positive or negative - both sides of the coin are necessary to keep growing and improving. Occasionally (well, more often that I'd expect!), I'll receive a note that puts a smile on my face, motivates me, and really helps to remind me why I do what I do. It's easy to become engrossed in the 'work' aspect of pursuing a goal, especially when you assign every waking moment you have to it (success doesn't happen overnight after all!). You can get caught up in wanting more and more success and end up focusing too much on the larger end goal, while overlooking all the (seemingly) smaller accomplishments you achieve along the way. Yet, when you receive such gracious feedback from those you collaborate with and from those you have yet to meet, it's simply an amazing feeling to know that this thing you love to do can be of help and even inspiration to others.

This is what it's all about.

Thank you all for inspiring me and helping me make sense of my world!

---

(speaking of inspiration...)

What inspires you? Tell me via email to rhia[at]artistrhi[dot]com (and either follow artistrhi on Twitter or become an artistrhi fan on Facebook), and you could win a full set of Gwen Stefani's Harajuku Lovers Fragrances. Please see here for further details.

Posted by Rhia Amio, Make-up Artist www.artistrhi.com | 11:50 AM | , , , | 2 comments »

Q: hi Rhia,

My lip gloss just won't stay put - it tends to bleed into the fine lines around my lips. Are there any tricks that make-up artists use to help make gloss last longer? What do you think of those super long lasting lip colours that have a colour on one end and a shiny lip seal on the other side? Are they worth a try? I love the look of gloss, but not an hour after I apply it! I hope you can help!

---

A: Good question. You're right - gloss gives an instant glam and youthful look to the lips, but only of course, when it stays in place! Give these make-up artist tricks a shot to get your gloss on:

1. Apply concealer on the lips.
How to: Use a tiny bit of your matching skin tone concealer all over your lips and blend it slightly outwards just beyond the border of the lips. Smile as you apply it so the product is evenly blended into any fine lines.

What it does:
Applying the concealer will give your gloss a base to hold onto and increase its longevity. Blending the concealer slightly outside the edge of the lipline will help act as a barrier to prevent the gloss from setting into those tiny lines around the mouth.

Bonus: Using a concealer will neutralize your own natural lip colour, and the colour of the product you're applying will appear more true to form.

2. Use a coloured lipliner.
How to: Use a lipliner that matches your shade of lip gloss or choose a neutral colour that blends well with your skin. Trace the lips with the liner and fill in towards the centre of the mouth. Use a q-tip or a lip brush to blend the lipliner well into the lips. Smile so you can distribute the product evenly across the lines of the lios.

What it does: Same principle applies here. A lipliner acts as a great base for a lip gloss (or even lipstick) to cling to. The gloss and colour on the lips will stay in place longer when re-inforced with lipliner as a base.

Bonus: The great thing about using a coloured lipliner is that when you eat, take a sip of coffee, the gloss may fade, but your lips will be left with some colour courtesy of the lipliner (versus gloss on its own).

3. Use a reverse lipliner.
How to: Use like an eraser. Trace around the areas of the mouth where you don't want to see colour. Smile to stretch out the fine lines and blend well using a clean brush or a q-tip. You can also achieve this with a tiny lip brush and your matching skin tone concealer.

What it does: It acts as a barrier and blocks colour from seeping into the fine lines around the mouth.

Bonus: Great for precision work and clean-up after applying your gloss. Can also be used to fill in the whole lip and double as a base for lipcolour. (Be sure to choose a creamy-textured lipliner - last thing you want to do is drag your lips and encourage those fine lines!)

Other things to consider:
  • Sticky might be a better choice.
    Nobody likes when their hair gets caught in their sticky, glossed up lips. But if you're lip gloss just isn't staying put, you might have to opt for more of a sticky based (rather than a gel) formula to keep it in place.

  • Super long-lasting 12+ hour formulas need touch-ups too!
    Unfortunately, I haven't had much success with these long-lasting lip formulas. I find that the formula has a tendency to dry up the lips, and that after about 4 hours, the product still looks like it needs a touch-up anyway! It's much more difficult to start over once this lip colour is applied, as the super long-lasting colour really does stain your lips. I prefer lush, glossy lips rather than flaking, glossy lips so I'm a definite pass on these so-called "long-lasting" products!

  • Don't overdo the product.
    It's easy to overdo it on the gloss - who doesn't love more shine?! Yet, when it comes to darker coloured glosses (i.e. reds, maroons) either layer a base (such as lipliner, lipstick, concealer) underneath the gloss first or use 2 coats of gloss max. Darker colours, because they are darker, will stand out more if they seep into the fine lines or feather around the mouth. Using a base or limiting how many layers you apply will help counteract this.
Hope that helps! Gloss it up!

If you have a make-up related question you'd like to ask, shoot an email to me at rhia[at]artistrhi[dot]com. I look forward to hearing from you!

Posted by Rhia Amio, Make-up Artist www.artistrhi.com | 8:00 AM | , , , , | 0 comments »

cj-08152009-479
Check out artistrhi.com for pics of the super stunning bride, Christine! Claudia Hung was the master photographer behind these shots and all I have to say is...she did it again!! Amazing, amazing photos, but it always helps when we both had such an awesome subject to work with.

More to come from whirlwind wedding week!


For Toronto/GTA brides-to-be, check out the Claudia Hung Weddings & Artistrhi Make-up ongoing collaboration!
claudiahung_artistrhi_header

Posted by Rhia Amio, Make-up Artist www.artistrhi.com | 7:30 PM | , , , , | 0 comments »

WEDDING | Colleen

2009-09-19

Check out artistrhi.com for wedding #2 of 5 during August's whirlwind wedding week! (Yes, I like my alliteration). This time around it was the wedding day of my beautiful friend, Colleen (you may recognize Colleen from being one of my make-over models). I've known Colleen since university and she's a genuine sweetheart. I remember her saying to me three years ago (pre-engagement) how I would be doing the make-up for her wedding...man, how time flies! It was a blast getting Colleen all dolled up, but as you could see with her before and after, my 'work' here was effortless!

Colleen - congratulations Mrs.! Thanks for letting me share in the Big Day (into night) and for your continuous support of artistrhi! xoxo

Related posts:
BEAUTY SHOT | Colleen
WEDDINGS

Posted by Rhia Amio, Make-up Artist www.artistrhi.com | 5:00 PM | , , , , | 0 comments »

Check out the professional pics of the gorgeous bride Kaysey, courtesy of Where Heaven Meets Earth Photography. On a related note, wahoo! I made the wedding album (...and my good side!). See more at artistrhi.com.

:)

Posted by Rhia Amio, Make-up Artist www.artistrhi.com | 8:30 PM | , , , | 0 comments »

Kaysey's beautiful Big Day in August was the start of my busiest period this wedding season - 5 weddings in 6 days! I'm plowing through the photos as we speak, so expect many more Wedding updates in the next few weeks.

Kaysey and her ladies were an absolute pleasure to work with - I could feel the excitement in the room as soon I arrived even though I had everyone awake at 5:45AM!. They all looked gorgeous, and I'm glad to have played a small part in helping them get ready.

The day was perfect weather-wise (can't say that it's been a great summer for Toronto weddings) and Kaysey's wedding even made the 6PM news!! Big Day indeed! Congrats again Kaysey - thanks for the fun morning, and of course, letting me be a part of your amazing day!

Related posts:
WEDDINGS

Posted by Rhia Amio, Make-up Artist www.artistrhi.com | 8:00 PM | , , , | 0 comments »

Here are the before and after results of a bridal trial with Krystal. Krystal's wedding is approaching fast...this Saturday in fact! I went to high school with Krystal and hadn't seen her since. It was really great to catch up with Krystal (it has been 10 years!) and to see that she's doing so well with wedding et al, and of course, looking so great!

Key components to her look were liquid liner, false eyelashes and mascara - the combination of these products really helped to make Krystal's beautiful eyes stand out! Remember when doing up the eyes, it doesn't just stop at the eyeliner and mascara. For a complete and polished look, fill in the areas of the brow that may be sparse and apply concealer to camouflage any uneven skin tone under the eyes.

More pics to follow as we prep for Krystal's Big Day!! :) Stay tuned!

Posted by Rhia Amio, Make-up Artist www.artistrhi.com | 9:00 PM | , , , | 0 comments »

Q: What is the best primer?

A: In terms of what the "best" primer is, I can only speak from experience with primers that I have used on myself and/or clients. Usually, I test run everything on myself (I have fairly normal skin on good days) as a measuring stick because:

1) I’m a beauty junkie so I have to!
2) so I know how (well, if) the product works and
3) so I can describe it to clients.

I like to do my research, read up on products through magazines, make-up artist boards and online reviews and also ask other fellow make-up artists and beauty junkie pals before I set out to buy something. I have tried a few primers in my lifetime, but usually once I find something that I like, I’m pretty faithful to it until it gets discontinued or until it doesn't work the same.

The two primers currently in rotation for my own use and for clients are:

1. Cargo blu_ray™ High Definition Mattifier (approx. $28 CAD)
This mattifier became my trusted everyday primer when my previous go-to, Smashbox's Photo Finish Foundation Primer, just wasn't doing it for me anymore. Although Smashbox's primer had worked well before, I was beginning to find that my skin would get shiny nearly right after I had just finished my morning application.

Cargo's mattifier comes from the line's range of products specialized for use under the scrutiny of HD and blu-ray lenses. The result is a line of products that gives flawless and natural results, so even when enlarged to full resolution, the skin (and not the make-up) appears only better.

When applied initially, Cargo's mattifier works well as a primer. It smoothes out the skin, minimizes pores and fine lines, and tones down excess shine. You can also use it instead of powder - atop bare skin or atop your foundation. Most importantly, it keeps the T-zone in check until the usual midday touch-up. This primer has become a personal favourite, and a favourite of my bridal clients who need their make-up to go the absolute distance.

2. Embryolisse Lait-Crème Concentrè / 24-Hour Miracle Cream (approx $30 CAD)
Embryolisse is a fashion industry favourite with fans that include models to make-up artists! This multi-purpose cream quadruples as a moisturizer, primer, make-up remover and shaving cream! (Yes, even your boyfriend can use it. Multi-purpose indeed!)

The primer and moisturizer combo is perfect for when I'm in a rush, and it's a definite must-have when I'm travelling. It hydrates the skin, leaving it with a soft and silky smooth feel while not being greasy. A touch-up isn't needed til the usual midday expiration and it easily removes my make-up come nightfall - all this from one nifty bottle! Definitely recommend this one for its quality and practicality.

My take on other primers that I've tried:

Smashbox's Photo Finish Foundation Primer (approx. $40 CAD)

You only need a tiny amount of this primer, which in past years has been a favourite of beauty fanatics (including the big guys like Allure and Sephora). I personally find the formula too greasy and that my foundation looks the same later in the day when I don't apply it. At about $40CAD for the bottle, I'd definitely pass on this one.

Smashbox Photo Finish Foundation Primer Light (approx. $40 CAD)
In an attempt to give Smashbox's primer a chance to redeem itself (there must be all the buzz about it for some reason, right?), I decided to give the Light version of the formulation a try. The results were definitely less greasy than the original formula, but no great difference in lasting power of my foundation throughout the day. Another pass on this one!

MAC Prep + Prime Skin

This MAC primer contains silicones that sit atop the skin and help to smooth out the surface and minimize pores. Also works well for toning down oily skin, but doesn't really help with redness control as the product description says (you need some cover-up make-up for that one!). Overall, a decent primer, but at that price, I'd still opt for something that wows me :)

MAC Matte
MAC Matte's a staple in my kit. The clear gel formula works great to instantly tone down excess oil, such as in the T-zone and cheeks. It can be used before or even after foundation, in place of powder. Great to use on-set too - when in studio under hot camera lights, the skin (especially the T-zone) can tend to get shiny. To combat this, use a sponge to lightly pat MAC's Matte on the shiny area and let it set...alleviating the need to constantly reapply powder for touch-ups and risk looking cakey!

Conclusion (of sorts...):
The best primer can really vary with skin type. If you have normal skin, you'll be compatible with nearly all of the primers mentioned. If your skin tends to be on the oily side, I would stick to the primers with more of a mattifying formula, such as Cargo's blu_ray™ HD Mattifier or MAC's Matte. If your skin is on the dry side, Smashbox's Photo Finish or Embryolisse would be good options.

Whatever you choose, most places offer samples so don't be afraid to ask. Remember, if a product's worth buying, it's worth trying so samples should be readily available!

Hope that helps!

If you have a make-up related question you'd like to ask, shoot an email to me at rhia[at]artistrhi[dot]com. I look forward to hearing from you!

Posted by Rhia Amio, Make-up Artist www.artistrhi.com | 11:30 PM | , , , , | 0 comments »

With all the weddings this past season, I've definitely missed doing creatives. Don't get me wrong - doing make-up for weddings is always fun, but creatives let you really push your own artistic bounds and do make-up looks that are otherwise non-conventional (a different kind of fun!). Similar to fashion runway make-up, make-up for creatives usually aren't looks that everyday people like me (in other words, non-models) would wear on the street. Well, you could rock it with the right attitude, but expect some double-takes from passers-by!

The Metal Eyes creative is definitely 80s inspired, and we've seen a return to that decade's aesthetic for both fashion and make-up trends this Fall 2009. With so many trends and so many products, it's easy to feel overwhelmed trying to nail the season's it look. Remember the thing with trends is that they're meant to inspire and not to be interpreted literally. To easily add a little 80s glam to your look without blowing the budget, sprinkle a little glitter atop your usual eyeshadow routine, or switch to a coloured eyeliner versus using your usual black. Interpret the trends in your own way and experiment. If you don't like it, you can wash the make-up right off AND you can take comfort in the fact that you didn't invest in the sharp shouldered boyfriend's jacket look (yes, the style you thought you'd never wear again)!

Posted by Rhia Amio, Make-up Artist www.artistrhi.com | 8:00 AM | , | 0 comments »

WEDDING | Nataly

2009-09-14

Check out artistrhi.com for recently uploaded photos of gorgeous Nataly's wedding day! I've known Nataly from high school so it was an absolute pleasure and honour to do the make-up for the day. We went for a full-on glam bride look (love it!) so I was really able to play up the make-up! See more of the beautiful bride and her lovely bridesmaids here.
Congratulations again, Nataly!! Thank you for letting me be a small part of your Big Day :)

Posted by Rhia Amio, Make-up Artist www.artistrhi.com | 8:00 AM | , , , | 0 comments »

The lovely Maggie wanted her bridal look to reflect the natural beauty that she is. To get the look, I concentrated on evening out the skin tone by using foundation (Maggie's own custom-made Prescriptives) and concealer. I stuck to a palette of neutral colours to naturally enhance Maggie's beautiful features, but give her a polished look fit for her wedding day.

I'm looking forward to Maggie's wedding day which is fast approaching next weekend...I'll be sure to post pics of this beauty as soon as I can...for now, back to working on pics from August!

Posted by Rhia Amio, Make-up Artist www.artistrhi.com | 1:15 AM | , , , | 0 comments »

Q: I’m going back to university in a week, and wonder if there are any products you would recommend that could help save some time but make me look great in the morning!

A: I am probably the worst person to talk to about a “quick” morning beauty routine. While I was away at university, I would purposefully sacrifice sleep or be late for class - all in the name of getting my full 40 minutes of make-up in the morning! But of course there are those days where you’re absolutely pressed for time and 40 minutes isn’t exactly reasonable. Fortunately, there are many products that do double-duty (and some steps you can skip) to help spare you time in the morning, and more importantly, get you looking fabulous and wide-eyed (even when that venti latte hasn’t kicked in just yet)!!

Try these get-ready tips when pressed for time in the morning:
1. Use a tinted moisturizer.
A tinted moisturizer adds a hint of colour and moisture to the skin in one easy step. No need for a brush - just blend the product well into the skin using your fingers!
Approximate time needed: under a minute

2. Use a concealer.
I find that with age (ahem, experience) and late nights of blogging my undereye circles can be quite pronounced come the morning. One of my absolute morning make-up must-dos is concealer – I look alien without it. Since my undereye circles are particularly complex, I actually use two products to help brighten the area up: a) Peachy-pink concealer to lighten the dark brown/purples undertones of the circles (try Laura Mercier's Secret Concealer)and then b). a flesh-toned concealer to blend the neutralized area with my own skin tone. I find using concealer makes the world of difference on my own face - if I had even less time to get ready, concealer is still one of those products that I would be sure to sneak in!
Approximate time needed: 3 minutes

3. Add some eyeliner + mascara.
Line the upper eyes to help open up the eye area and make the whites of the eyes appear brighter. (Big-eyed beauties can usually get away with just curling the lashes and adding mascara, but my eyes need a little more attention!). You can use whichever you prefer: a pencil, gel or liquid liner. I always recommend a gel or liquid liner simply because they last. Curl your lashes and top with 2-3 coats of your go-to mascara.
Approximate time needed: 5 minutes

ARTIST TIP: To keep the eyeliner long-lasting, apply a layer of eyeshadow primer in a neutral colour atop the eyelid.

Products to try: Cover Girl's Line Exact - the felt tip of this product makes lining the eyes as easy as using a marker! Recommended for novice to pro liquid liner users.

4. Add an instant glow with a luminscent bronzer.
I use a large-sized powder brush to apply bronzer in the 3-shaped motion along the forehead, cheekbones and underneath the jawline. Then, I dust any excess along the bridge of the nose. Keep the bronzer concentrated on the prominent areas of the face (think of where the sun hits the face first) and don't overdo it. Remember with bronzer, less is more and orange is just...bad.
Approximate time needed: under 1 minute

ARTIST TIP: Dust a layer of loose translucent powder on the face first for the bronzer to glide on smoothly.

Products to try: NARS Bronzers - these glide on like a dream! The product itself is highly pigmented so a couple of swipes with the brush is all you need.

5. Dust a peachy-pink blush on the apples of the cheeks.
Peachy-pink is a universally flattering colour (just think Orgasm by NARS - the much-loved product by industry insiders and beauty junkies!). Simply smile to make your apples of the cheeks more visible and add blush using a brush. Blend well. The effect is a soft and healthy glow that adds an instant warmth to your morning complexion.
Approximate time needed: 1 minute

Products to try: NARS Orgasm. Just like their bronzers, NARS blushes glide on smoothly, making them super easy and pretty much foolproof to blend.


6. Skip the lipliner and lipstick. Just gloss it up!
Use a gloss with a bit of colour instead of lipliner and lipstick, which can be way more time consuming. When choosing a gloss, opt for a colour that is two shades darker than your own lip colour. Remember that the gloss will glide on sheer, so a colour that looks darker as a gloss will work with your own natural lip colour and appear more transparent. As the day goes on, the gloss will be easier to touch up as well.
Approximate time needed: 1 minute

Products to try: MAC's Lychee Luxe, Maybelline Pink Sorbet. These peachy pink glosses are flattering on nearly all skin tones and will work well to complement your blush colour!

So there it is in about six (ok, more) steps. It’s not exactly a five-minute routine, but what I do like to stress is to focus on your favourite feature and make that stand out. If it’s your eyes that you like to draw attention to, focus on eyeliner, mascara and some gloss. If your lips are your favourite feature, go in with your lip brush, lip liner, lipstick or lip gloss (or all of the above!) and add some mascara to the lashes. If you’ve got great skin to show off, add some bronzer and blush for a gorgeous glow!

Beauty doesn't have to be complicated - just take a few minutes for yourself in the morning and you'll be amazed at how much better you can feel throughout the day!

MORE TIPS:
Here are a couple of things you can do to ease the morning routine:

Groom your brows.

A well-maintained arch is sometimes all the make-up you need. Good brows frame the face and polish off any make-up look. To get good brows, check out this post.

Maintain a proper daily cleansing routine and apply moisturizer after washing your face.
You won’t feel the need to use foundation when your skin is naturally glowing. Maintaining a consistent cleansing routine is essential to glowing skin. (We all know the aftermath of not removing last night’s make-up: raccoon eyes + increased chance for break-outs!) Proceed to apply moisturizer after each time you wash your face.
Hope that helps!
Rhia

If you have a make-up related question, please feel free to email me at rhia[at]artistrhi[dot]com.

Posted by Rhia Amio, Make-up Artist www.artistrhi.com | 2:00 PM | , , , | 0 comments »

Check out hlcontests.ca for more ways to win the HL Fragrance Set! Individual criteria for entry eligibility will vary, so please direct any questions you may have to the respective blogger hosting the contest.

You have until October 7th , 2009 to enter the artistrhi hosted HL Fragrance contest. See the rules and regulations here:
Enjoy!

Posted by Rhia Amio, Make-up Artist www.artistrhi.com | 8:00 AM | , , , , | 0 comments »

TGIF!! It's Friday so I'm going to (try to) keep the text light:

Here are more edited pics from the Almost Famous shoot (which you can also find on Toxic Vision's Facebook fan page). With the help of the lovely Christine Buijs, I actually just had these printed out recently on 11x14's for my portfolio.

It's been a while since I've actually had photos physically printed, particularly with the onslaught of all the online photo-share utilities like Facebook, Flickr, and Twitter. I'm sure you know what I mean - everybody has instant access to your pictures so you don't feel the need to print anymore! But it's an amazing feeling to just have your work in actual print and to know that you played a small part in the finished product. More to come! Enjoy the pics for now :)

af2_artistrhi

af_artistrhi1

Posted by Rhia Amio, Make-up Artist www.artistrhi.com | 6:00 PM | , , , , | 0 comments »

WEDDING | Hun-Sun

2009-09-10

The past two posts were pretty text-heavy, so it's time to lighten it up with some pictures! Photos from Hun-Sun's Big Day this past August are now up at artistrhi.com. Despite the early morning for all the ladies involved, everyone was excited and raring to go! I always love the buzz of being behind the scenes and am fortunate to have such awesome clients at all times of the day...I mean c'mon, it's not easy to wake up at 5 in the morning and have someone poke a brush at your face!! I had a great time with these ladies - just take a peek at Hun-Sun's beautiful smile - it's contagious.

Congratulations Hun-Sun! Thank you for letting me share in your special day :)

----

REMINDER
On a side note, don't forget to enter the Harajuku Lovers Fragrance contest if you haven't already! Please refer to the Official Rules and Regulations for contest eligibility. Good luck!

Posted by Rhia Amio, Make-up Artist www.artistrhi.com | 10:00 PM | , , , | 0 comments »

Harajuku Fragrance giveaway on artistrhi!
a little bit about the fragrance from the official site:
Harajuku (harajookoo) n. 1. A style and attitude of Japanese girls from Harajuku, Tokyo. n. 2. Anything goes: outrageous, layered, and eye-catching.

Harajuku Lovers Fragrance: n. 1. A fatal attraction to cuteness.

Inspired by the electric street scene of the Harajuku shopping district in Tokyo, the Harajuku Lovers fragrance collection captures the lyrics and iconography from Gwen Stefani's albums. These unique fragrances, in their adorable doll-decanters, will appeal to anyone with a "fatal attraction to cuteness." Choose the girl that best fits your personality, but (trust us!) after meeting one, you'll have to have them all!

artistrhi
has teamed up with Matchstick Marketing and Coty Canada to bring you this contest, where you can win the entire set of Gwen Stefani's HL Fragrances (retail value of $250.00 CAD)! The contest runs from September 9, 2009 at 12:00PM EST to October 7th, 2009 at 11:59PM EST. Winner will be announced on October 9th, 2009. Only one entry allowed per person. Prize will be delivered to contest winner directly from Matchstick Marketing. Read the Official Rules and Regulations for full contest details.

To enter, you'll have to:

  1. Read the Official Rules and Regulations listed below in the comments (3) section.

  2. Gwen Stefani has said that "Harajuku Lovers can be anything that inspires me". Leave a comment on this post or email me (with the subject line: HL Fragrance Contest) to let me know what inspires you.

  3. Do ONE of the following if you haven't already:
    a). Become a Facebook fan OR
    b). Follow me on Twitter.
Contest is officially underway on Wednesday at 12PM EST. I look forward to hearing your responses! Good luck everyone!!

Posted by Rhia Amio, Make-up Artist www.artistrhi.com | 4:05 PM | , , , , , | 3 comments »

I was interviewed by blogger and freelance writer extraordinaire, Cheryl Santamaria, for a feature article on Women on Business. The article details the importance of using the Web as a tool for advertisting, both for budding entrepreneurs and established companies.

Working as a freelancer in make-up, I realize that there's so much that I've learned along the way just by doing (rather than picking up from the classroom) especially on the business side. In the early days, when I first attempted to market myself to a large audience, aside from word of mouth, the Internet was my best advertising friend. I used livejournal, a free web-based journal to help me document different make-up looks I did on myself and on friends. Nowadays, if you're an aspiring make-up artist, there are many more user-friendly resources available to you on the Web. Sites like Blogger (where this blog is hosted), Yola and Dripbook allow you to build your own blog/site with little to zero programming knowledge required. Social media-based sites like Twitter and Facebook allow you to send instant updates to those on your subscriber/friend list and further spread the word online. The best part about all these sites mentioned is that the basic layouts are free of charge to use!

So, if you're just starting out and looking for your best promotion tool, take good quality photos to document your make-up work. Print out a few business cards (you don't have to spend a lot of money, and can do this on your home computer), send out a mass email to your contact list, post it to your Facebook status or update your Twitter. Let your web presence be known and essentially you can initiate your own 'e-word of mouth'.

Posted by Rhia Amio, Make-up Artist www.artistrhi.com | 4:00 PM | , , , , | 0 comments »
Related Posts with Thumbnails