
 Q: I love the red lip look you did for the model in this photo. I love to wear red lips myself, but I never seem to have any luck when trying to wear red lipstick (or darker lipstick colours for that matter!) How do I keep the lipstick from bleeding into the tiny lines around the mouth?
A: Great question. Red lips are a gorgeous look--but since they make such a bold statement and draw immediate attention--they have to be done right! The tricky thing with darker lipstick colours is that when they smudge or shift into the fine lines, they're waaay more obvious than neutral lipstick colours. Here are a couple of tips to keep in mind when rocking those red lips:
1. Use a matching-coloured lipliner.
Outline the lips with lipliner - you can either follow the shape of your natural lipline or ever-so-slightly draw just outside/inside the lipline to enhance/trim lip size, depending on what you prefer. Use a lip brush to blend the lipliner in towards the centre of the mouth - this will help the lipstick have a base to adhere to. It also ensures that if the lipstick fades, you'll still have some colour left on the lips and avoided the dreaded "ring-around-the-mouth" look.
2. Blot and re-apply.
After applying lipliner and a couple of coats of your red lipstick, use a one-ply tissue to blot your lips. Re-apply the lipstick to finish. Again, this will ensure a bit of colour remains on the lips and maximize the length of its wear as the day goes on.
3. Use a reverse lipliner.
A reverse lipliner is simply a neutral skin-toned colour pencil that can be used to refine the shape of the lips, once lipstick has been applied. Applying a reverse lipliner (like my beloved one by Cargo) will also help to create a border around the lips. This border will help prevent the darker colour from migrating to where it's not supposed to! Make sure you have a fine, sharpened point and trace just outside the lipline's natural border - and voila - red lips as neat as when you initially applied them! (Be sure to blend out the reverse lipliner well, or you'll end up with a lighter ring around the mouth!) The reverse lipliner also works great as a touch-up tool - just pop it into your purse for any touch-ups required later in the day.
4. Use lipgloss sparingly.
Try to avoid applying excessive gloss all over your red lips - remember that gloss is wet in texture, so it has a natural tendency to move. To alleviate this, dab just a bit of shiny gloss on the centre of the bottom lip to add dimension and create the illusion of fuller lips.
Hope this helps!
See related posts:
GET THE LOOK | Red Lips
ARTIST TIP | It's a Fine Line with Reverse Lipliner
Q & A | How do I make lipstick last longer?

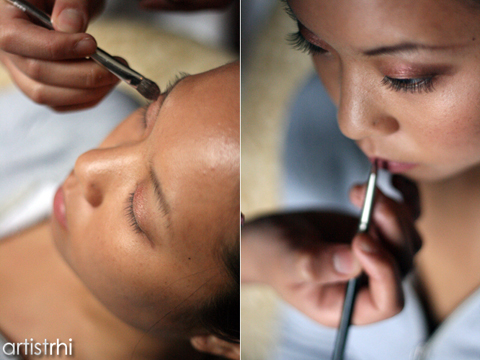
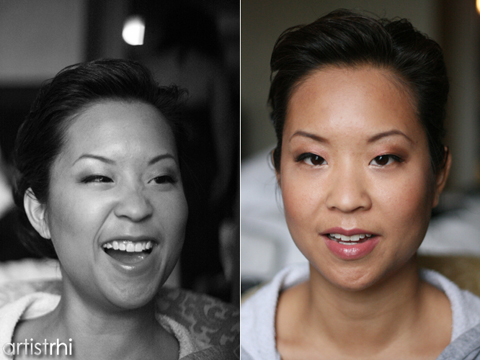
 Katie rockin' the pencil thin brows plus jewels on the eyelids look. You know, just adorned in her usual Sunday's best ;)
 Closer-up view of the thinned out brows + individual jewels placed on the lashline (yes, I'm slightly biased, but I love this look!)
 Ada workin' the thin brows plus feathers
 @studio: Team Cheema and Ada (elongating those legs)!
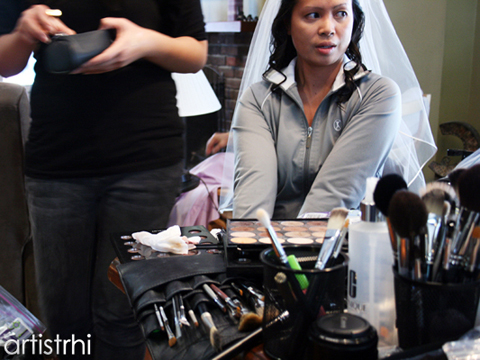

 I spoke of the refreshing properties of rosewater the other day with MAC’s Fix+Rose, but you don’t necessarily have to go to a major cosmetics counter to get the effect. This Artist Tip came courtesy of my awesome airbrushing teacher, Paulina, who herself is an experienced Professional Make-up Artist and savvy make-up consumer. Rosewater and Glycerin is one of those underestimated homemade concoctions you would probably look past in your grandmother’s make-up cabinet, but the all-natural formula is a treat for your skin! Spritz the product a couple of times on the face before applying lotion for a soothing mist that helps to revitalize and moisturize the skin. You can also spray it on the face after you apply make-up to help the make-up settle into the skin (works best when used after applying glycerin-based make-up products). You can find rosewater and glycerin at your local health food store, at a steal at under $10 per bottle! Grab a bottle – your skin will thank you.
Related posts:
PRODUCT REVIEW | MAC Dazzleglass and Rose Romance Collections
ARTIST TIP | All
I'm thrilled to post that I will be collaborating with Claudia for future upcoming engagement shoots (aka e-sessions). When booking your e-session with Claudia, be treated to a complimentary mini make-up application courtesy of yours truly! Wooooo!
Here on the artistrhi blog, you'll be able to see the results of our E-sessions on a new segment of posts entitled "ENGAGED". Of course, you'll also be able to view them on Claudia's site and blog.
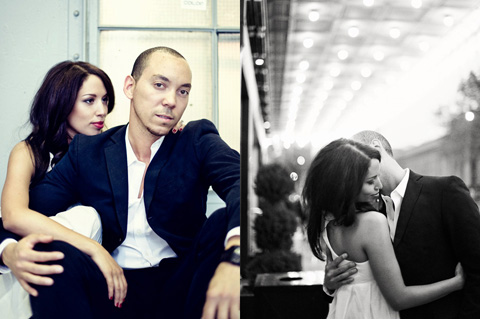
We had our first e-session this past Wednesday with the stunning couple, Julie and Trevor. Below is a behind the scenes shot that I snuck - the lengths that awesome photographers go to to get their shots! Here's Claud doing her thing along Front Street, in front of the Royal York. Final pics to come in a bit :)
![]() A few years back, when trying to master my own camera (that I use for my Beauty Shots), I quickly learned that stand-out photography is more than just good lighting and a pretty face. A breath-taking image (you know those ones that really capture your attention) has the power to freeze a moment in time and capture a sense of emotion.; it has the ability to invoke that emotion within the viewer, and inspire.
A few years back, when trying to master my own camera (that I use for my Beauty Shots), I quickly learned that stand-out photography is more than just good lighting and a pretty face. A breath-taking image (you know those ones that really capture your attention) has the power to freeze a moment in time and capture a sense of emotion.; it has the ability to invoke that emotion within the viewer, and inspire.
One photographer who I have been fortunate to work with who does just that (well, and then some!) is the insanely talented Claudia Hung, Toronto-based Editorial and Wedding Photographer.
Gorgeous images are one thing, but what makes it even better that is Claudia is a real down-to-earth gem to work with! I've experienced first-hand how she interacts with everyone to make sure they're comfortable, and it conveys in the final images. People aren't posed - they're in the moment and that's what makes her stuff so compelling.
If you’re in the market for a photographer for your special event, you need only look at her portfolio - the images speak for themselves.
Be warned - she books up fast!
To contact Claudia and to see more of her talent in action, check out:
Editorial
Weddings
Wedding Blog

 Q: I work full-time, but make-up has always been something that I loved to do. I would like to go to school for it, but I have commitments to work and to my family. I’m looking at part-time programs at different make-up schools, but there are just so many to choose from! Can you provide any recommendations or speak of your experience?
A: Thanks for the question! I can only speak from personal experience and about the classes and programs that I have taken, but I do remember being just as anxious researching a quality make-up school in Toronto. Fortunately, I really lucked out as all my choices exceeded my expectations! I'm a firm believer that you get what you put into something, and being that I've been passionate about doing make-up all my life, I wanted to ensure I maximized what I was learning from the classes.
In order to get a better feel for a school or program, I would recommend calling around to your school of choice to set up a visit. While you're at it, you can ask to sit in on one of the classes briefly - just to get a proper sense of the environment and the instructors. Pay attention to the facilities and even the other students (are they engaged in what they're learning? Do they look like they're having fun?) Your final choice in school will centre around a number of variables (quality of teaching, reputation, convenience, cost, certificate or course program, location, etc).
I answered a similar question like this in a previous post, and hopefully you'll find the info there useful as well:
Q & A | Choosing a Make-up School in Toronto
Hope this helps!
Make-up Learning and Upgrading at Wink Speaking more on personal experience, I just completed an airbrush make-up class at Wink Make-up Academy, and would absolutely recommend for anyone to go there! Wink offers introductory make-up classes for beginners and specialized classes (for airbrushing, special effects, portfolio building, etc) for more seasoned make-up artists who are looking to expand their repertoire. The individual class size cap is eight students, so the instructors have the time to ensure you feel confident in what you've learned before you move on (and that sometimes gets lost in larger class sizes). The classes are offered at different times to accommodate day, evening and weekend schedule, and the instructors are knowledgeable, friendly, enthusiastic (insert numerous positive adjectives here)... seriously, what is there not to love?! I'll also be starting a hair class to update my skills in a couple of weeks - maybe I'll see you there! ;)
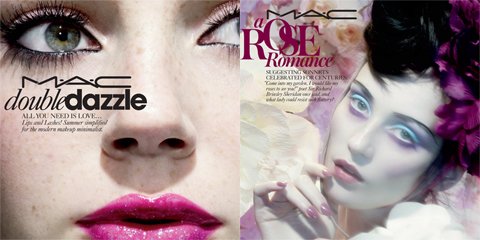
 The ad campaign for a second collection, Rose Romance, completely drew me; I just had to see what the collection was about from looking at the promo items! The collection features a few limited edition items and permanent staples to the MAC line-up. The colours of the collection are more subtle (think romantic), which are perfectly in tune with the lighter make-up routines we turn to for the warmer seasons ahead.
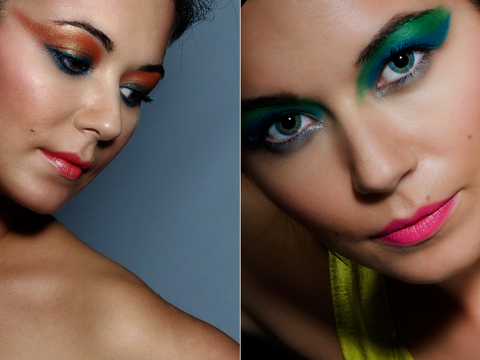
 Q: I took a look at the MAC Zuca case the other day in store and it seemed to look smaller then I thought, can it really hold a lot? I have a ton of stuff and really need to update my kit to something thats plane friendly, organizes and holds alot. Does the ZUCA pro seem like a better case? I'm debating whether or not to buy the MAC sport zuca at the store or the online ZUCA Pro.
A: For the ZUCA bag, the dimensions are the same. It's the same bag re-branded for MAC, and comes with clear-topped containers that really help with organization and accessibility to your make-up items. I do carry an extra set bag when I use the ZUCA bag, but it pretty much fits all the make-up I need. The containers can be filled to the brim and then zipped shut, which you can't always do with the trays of some other kits. To be plane friendly, a bag also has to fit certain dimensions, and the internal organization of the ZUCA bag is a great way to maximize its space.
If you decide to go with the ZUCA Pro off the site, it does come with plush containers as well, but from what I understand the tops aren’t transparent. It's totally up to you which one you go with but I believe the ZUCA Pro is on back-order right now, and the one through MAC immediately sold out on the MAC Pro site from what I hear from other bloggers. Keep in mind the duty taxes you'll have to pay if you're ordering online from zuca.com since we're in Canada. That played a huge factor in the ZUCA case I got as I've been researching since November. I'm glad I held out - the ZUCA MAC bag totally fits my needs!
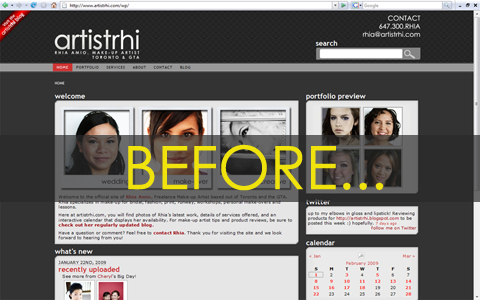
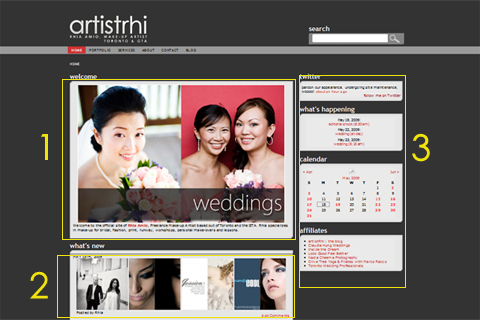
For all the lovely brides-to-be out there, you can now also find artistrhi Wedding Make-up Tips on Toronto photographer Cliff Spicer's site (see below for a screen cap)! I actually have yet to work with Cliff, so it's really quite an honour that he is featuring some of my stuff on his own site/blog. Cliff is a talent behind the lens AND he also goes that extra step of acting as a source of knowledge for inquiring couples that are prepping for the Big Day. Awesome.
Thanks Cliff for letting me share the tips with your readers! Hope we catch each other this wedding season :) screen cap courtesy of www.cliffspicer.com
See the original post on Toronto Wedding Professionals - your e-source for all things wedding!
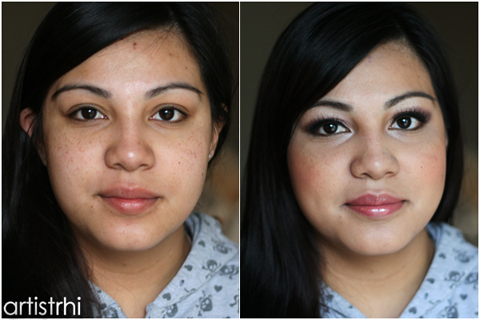
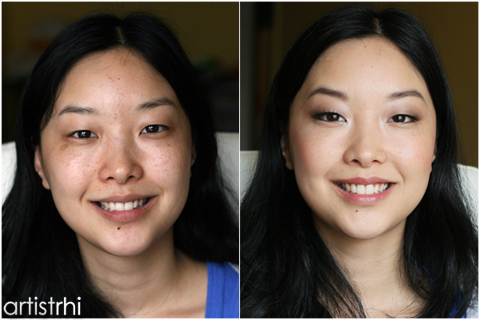
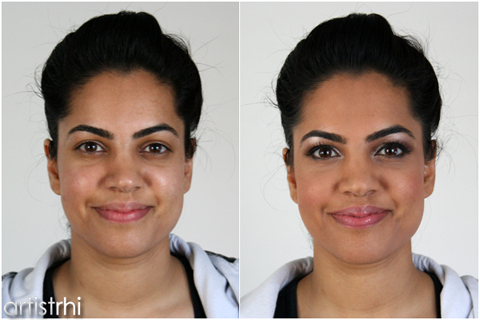
Aside from applying foundation on your Wedding Day, an important part of putting your best face forward actually involves a little concealing. Using a quality concealer can help to eliminate the appearance of those little “problem” areas (like blemishes and undereye circles) that tend to stand out on camera. Foundation helps to balance out the skin overall, but if you’re like me, you need something a little more heavy duty to address the areas of concern! Enter concealer.
Just to make it easy on us, concealer (just like foundation) comes in different forms. The most common are a liquid concealer and a thicker concealer with a putty-like consistency. The best concealer texture for you will depend on the area you’re trying to cover up. Covering up Under the Eyes
For underye circles, a creamy liquid concealer works best; it covers up the area without producing a cakey finish. Use concealer sparingly underneath the eye - too much concealer on this area of the face can draw negative attention to the undereye area, which completely defeats the purpose of the product you’re applying! If you have darker undereye circles, I would recommend first applying a pink or peach toned concealer to initially brighten the undereye area. Follow with your skin tone matching concealer for a flawless even-toned finish.
Camouflaging Blemishes
A liquid-based concealer will have too much “slip” to adhere to the oily surface of a blemish; a thicker cream-based concealer will have the right amount of stick to build up coverage that lasts. To conceal blemishes, choose a colour that matches your skin tone exactlly or one that is just a shade darker than your own tone. A darker shaded concealer helps create the illusion that the raised area of a blemish is receding – just be sure to blend into your foundation well so that the effect is seamless!
Powder And Go
Set your concealer application with powder. Under the eyes, use only a light veil of powder to avoid a cakey build-up. On concealed blemishes, you can apply powder more liberally, but blend edges well so that it diffuses into the skin. Once the skin is perfected, remember the rest of the make-up is like icing on the cake - great make-up always starts with this clean canvas!
To see more on concealer:
BEAUTY 101 | Basics of Concealer
PRODUCT REVIEW | Concealer is a Girl's Best Friend More make-up tips to come!
Rhia Amio, Toronto Make-up Artist
web: http://www.artistrhi.com
blog: http://artistrhi.blogspot.com
email: rhia@artistrhi.com


 ARTIST TIP
 BEAUTY 101
 BEAUTY NOTE
 BEAUTY SHOT
 BEAUTY BUZZ
 CREATIVE
 ENGAGED
 GET THE LOOK
 KIT ESSENTIAL
 Q&A
Q&A PRODUCT REVIEW
  WEDDINGS
 W NETWORK EXPERT
 Welcome to the blog of Rhia Amio, Make-up Artist, Beauty Blogger and W Expert. At Artistrhi the blog, you will find the latest updates of Rhia's work, reviews of beauty products and make-up artist tips on everything beauty!


