Showing posts with label lips. Show all posts

More W Network Expert Q & A!! :)

Q: I’ve heard that if you wear a strong lipstick colour, you shouldn’t do strong eye makeup and vice versa. Is this true?

A: With make-up, there really are no rules written in stone, but as trends change and the years pass, we learn that there can definitely be mishaps (i.e. think 80s make-up)! What works with make-up on a daily basis is...

Click here to read the full answer!

Top photo: Nadia Cheema

Posted by Rhia Amio, Make-up Artist www.artistrhi.com | 8:00 AM | , , , , , | 0 comments »

CONTEST ALERT!Marcelle Cosmetics is offering one very lucky artistrhi reader the chance to literally GET THE LOOK with their Fall 2009 Ultra Glam collection! Stay tuned for contest details!

In the meantime, I've been test running the items myself (don't worry...you'll get your own brand new Ultra Glam kit!). Here's what the lucky winner will have to look forward to :)

Concealer Palette in Universal BeigeThis (aptly named) universally flattering palette contains four pans of creamy concealer, including a yellow colour correcting shade. I mixed the pink tone (see top left of the pan above) with the yellow (see bottom) to achieve the perfect shade of camouflage for my dark undereye circles. The texture of the concealer was smooth and creamy without being too thick. I was able to build up coverage without the concealer creasing into the fine lines around my eyes. Love!

ARTIST TIP: Apply some of the concealer atop the eyelid to act as a base for your eyeshadow application. This helps to prevent creasing throughout the day, and also helps the eyeshadow appear more intense and truer to its actual colour.

Wet & Dry Eye Shadow Quad in Blue Moon
This palette of blue-greys is a knock-out choice for blue-eyed gals (as in the Marcelle ad above)! Even though in my own smoky eye routine I normally reach for greys, browns and blacks, I really liked the overall look of the palette on my brown eyes. The blues of the palette are neutral enough that they work well with nearly any skin tone. I did have to dig at the navy eyeshadow a bit to get it to appear more intense. The pigment quality of the shadows is decent, but the shadows leave more of a blended and natural finish overall. The palette is a great option for anyone that wants to incorporate a little colour without going overboard!

ARTIST TIP: The beautiful thing about navy is that it makes the whites of the eyes seem brighter (anything that makes me look brighter and more alert scores high in my book!) Use a little water with the navy eyeshadow and it doubles as a brightening coloured eyeliner!

Khol Eyeliner in Soft Black & Liquid Eyeliner Pen in Very Black
A soft, khol eyeliner is essential when doing a smoky eye and Marcelle's doesn't disappoint: it smudges how you want it to but also holds in place making it a perfect choice for a gorgeous smoky eye. Everything stayed put and didn't require a touch-up until my usual check-in of 4 hours. I have very oily lids so I tend to lean towards using liquid eyeliner, as it's less check-up fuss. Thankfully, Marcelle sent over a liquid eyeliner too - see next!

I swear by liquid liner because of its long-lasting abilities, even through sweat and tears! Yes, liquid liner does take a little practice in order to achieve a steady and clean look...but often the choice of product also makes a difference in application. Marcelle's liquid liner is a great choice for both beginner and pro liquid liner users. For the beginner, the full-size of the liquid liner gives your hand steady balance and control over where the line will be applied. For the pro, the super precise felt tip (see pic above - it's as fine as a sharpened pencil!) allows you to achieve a very thin and fine line with ease. It's as simple as using a marker to line your lashes. Easily one of my favourite liquid liners ever!!

ARTIST TIP: For added balance when using a liquid liner, rest your drawing hand on your cheek to counteract any shakinesss.

Volume Precision Mascara - Black
An ultra glam look would never be complete without a glammed up mascara! Mascara is like icing on the cake - everything is just better with it :) Marcelle must have heard about my lash gripes, because they sent over a volume precision mascara to help me achieve a full lush lash. I love the tiny stiff bristles of this mascara brush - I was able to get at all my tiny little lash hairs too! Check it out...another instant fave!
ARTIST TIP: Enhance the ultra glam look with a pair of falsies!! Apply false eyelashes and curl to blend with your natural lashes before applying Marcelle's Volume Precision Mascara.

Vita-Lip Plumping Gloss - NudeA nude gloss is a great choice to balance out a strong eye look. I was weary to try this lip gloss out, because although my lashes need plumping, my lips do not! In fact, usually I try to de-emphasize the size of my lips. I've also had bad past instances with lip plumping formulas - from awful smelling formulas to irritated lip reactions - I usually shy away from a product if it has the word 'plumping' in it. I felt a very slight cooling sensation (like a mild Blistex sensation) when I first applied the gloss, but no overall discomfort nor negative skin reaction. In terms of 'plumping', although it defeats the intended purpose, the effect was (thankfully) not noticeable!

From the looks of the gloss in the tube, the colour appeared to be quite 'bronze' (and probably not a gloss colour I would usually buy). Once applied though, the colour neutralized the naturally red-pink colour of my lips to appear more of peachy nude colour. Overall, this Nude lip gloss makes a great choice of colour - it warms up the face and balances the cool tones of the Blue Moon smoky eye.

So, plenty of information here...stay tuned for the contest details on how to win your own Marcelle Ultra Glam look!!!!!!!! Here's me after having fun with all the products:

:)

Posted by Rhia Amio, Make-up Artist www.artistrhi.com | 8:30 AM | , , , , , , | 2 comments »

One thing that I love about fall is how dramatic make-up always makes a comeback. Whether it be in the form of smoky eyes or dark lips, I'm always one to support a little heavy-handedness. :)

Enter MAC's Style Black line - another limited edition collection in the tradition of MAC releases (in other words, get it before it's gone!). The collection features a selection of black-inspired shades for eyes, nails and even lips. Goth make-up has never been so chic!

EYES

MAC Gilt by Association and Blue Flame Mineralize eyeshadows

I finally had the time to thoroughly test run a few of the items I had picked up earlier this month, and my favourites quickly emerged. Hands down, my top item from this collection is Gilt by Association Mineralize eyeshadow. The multi-dimensional blackened shade has flecks of gold and bronze that make it a universally flattering choice for all skin tones, and a particularly gorgeous colour for those with green eyes.

It's a perfect option to do an evening smoky eye with - the multi-dimensional aspect spares you from having to buy a palette of different shades and from having to blend to your heart's content. Simply apply any of the Style Black Mineralize eyeshadows and smudge with your black eyeliner for a dramatic effect.

Bonus: The eyeshadows work beautifully when applied both wet and dry. When applied dry, the black hues of the shade tend to stand out more. Add a bit of water (or an eyeliner transforming product) and the intensity of the shimmer really pops.

Here are some pics of how the eyeshadow appears on the lids (haven't done one of these in a while!):
MAC Blue Flame

MAC Gilt by Association (my fave from this collection!)

My only regret? ...is not picking up the eyeshadow in Cinderfella! ...and now it's sold out! They don't lie when they call it limited edition!

LIPS

MAC Midnight Media Lipstick, Blackware Gloss, Black Knight Lipstick

Ok, so the products for lips from the Style Black collection are not exactly practical nor wearable for the everyday woman. I picked up a few of the lip items anyway, as a good quality black lipstick isn't the easiest product to find! The nice thing about this collection was that it had choices for getting black coloured lips in a variety of textures! I scooped up Midnight Media Mattene Lipstick, Blackware Gloss and Black Knight Lipstick. Of the three, Midnight Media is the most opaque while Black Knight glides on more sheer (think more like a black stain). Again, no practical use for everyday client appointments but these products will work amazingly well for photoshoots....and of course, Hallowe'en!

ARTIST TIP: The trick with doing any kind of dark colour is to make sure your lips are smooth. Dark colours are unforgiving (see pic at left) and cling to any imperfection on the lips. My bottom lip was dry and you can see how the lip colour can really make the dry texture stand out. Make sure to exfoliate the lips and apply lip balm (especially during these colder months). Before applying the dark shade, pat your lips with concealer to act as a base and barrier for the application...a little concealer on the lips will help to prevent the dark shade you've applied from seeping into the tiny lines in and around the lips.

Posted by Rhia Amio, Make-up Artist www.artistrhi.com | 9:00 AM | , , , , , , | 0 comments »

Q: hi Rhia,

My lip gloss just won't stay put - it tends to bleed into the fine lines around my lips. Are there any tricks that make-up artists use to help make gloss last longer? What do you think of those super long lasting lip colours that have a colour on one end and a shiny lip seal on the other side? Are they worth a try? I love the look of gloss, but not an hour after I apply it! I hope you can help!

---

A: Good question. You're right - gloss gives an instant glam and youthful look to the lips, but only of course, when it stays in place! Give these make-up artist tricks a shot to get your gloss on:

1. Apply concealer on the lips.
How to: Use a tiny bit of your matching skin tone concealer all over your lips and blend it slightly outwards just beyond the border of the lips. Smile as you apply it so the product is evenly blended into any fine lines.

What it does:
Applying the concealer will give your gloss a base to hold onto and increase its longevity. Blending the concealer slightly outside the edge of the lipline will help act as a barrier to prevent the gloss from setting into those tiny lines around the mouth.

Bonus: Using a concealer will neutralize your own natural lip colour, and the colour of the product you're applying will appear more true to form.

2. Use a coloured lipliner.
How to: Use a lipliner that matches your shade of lip gloss or choose a neutral colour that blends well with your skin. Trace the lips with the liner and fill in towards the centre of the mouth. Use a q-tip or a lip brush to blend the lipliner well into the lips. Smile so you can distribute the product evenly across the lines of the lios.

What it does: Same principle applies here. A lipliner acts as a great base for a lip gloss (or even lipstick) to cling to. The gloss and colour on the lips will stay in place longer when re-inforced with lipliner as a base.

Bonus: The great thing about using a coloured lipliner is that when you eat, take a sip of coffee, the gloss may fade, but your lips will be left with some colour courtesy of the lipliner (versus gloss on its own).

3. Use a reverse lipliner.
How to: Use like an eraser. Trace around the areas of the mouth where you don't want to see colour. Smile to stretch out the fine lines and blend well using a clean brush or a q-tip. You can also achieve this with a tiny lip brush and your matching skin tone concealer.

What it does: It acts as a barrier and blocks colour from seeping into the fine lines around the mouth.

Bonus: Great for precision work and clean-up after applying your gloss. Can also be used to fill in the whole lip and double as a base for lipcolour. (Be sure to choose a creamy-textured lipliner - last thing you want to do is drag your lips and encourage those fine lines!)

Other things to consider:
  • Sticky might be a better choice.
    Nobody likes when their hair gets caught in their sticky, glossed up lips. But if you're lip gloss just isn't staying put, you might have to opt for more of a sticky based (rather than a gel) formula to keep it in place.

  • Super long-lasting 12+ hour formulas need touch-ups too!
    Unfortunately, I haven't had much success with these long-lasting lip formulas. I find that the formula has a tendency to dry up the lips, and that after about 4 hours, the product still looks like it needs a touch-up anyway! It's much more difficult to start over once this lip colour is applied, as the super long-lasting colour really does stain your lips. I prefer lush, glossy lips rather than flaking, glossy lips so I'm a definite pass on these so-called "long-lasting" products!

  • Don't overdo the product.
    It's easy to overdo it on the gloss - who doesn't love more shine?! Yet, when it comes to darker coloured glosses (i.e. reds, maroons) either layer a base (such as lipliner, lipstick, concealer) underneath the gloss first or use 2 coats of gloss max. Darker colours, because they are darker, will stand out more if they seep into the fine lines or feather around the mouth. Using a base or limiting how many layers you apply will help counteract this.
Hope that helps! Gloss it up!

If you have a make-up related question you'd like to ask, shoot an email to me at rhia[at]artistrhi[dot]com. I look forward to hearing from you!

Posted by Rhia Amio, Make-up Artist www.artistrhi.com | 8:00 AM | , , , , | 0 comments »

WEDDING | Emily

2009-07-01

June was an amazingly busy month, filled with wonderful brides-to-be! I have lots of pics to work on and upload in the next few weeks so keep checking back or sign up for updates! In the meantime, check out some of the behind the scenes pics of Emily's Big Day. For the full set including before and after photos, see the gorgeous bride on artistrhi.com.ARTIST TIP: Use lipliner to trace the lips, alter the shape slightly (if desired) and act a as a base for lipstick application. A couple of my fave lipliners are MAC's Cremesticks ($16 CAD) and Revlon's Colorstay (approx. $6 CAD and pictured above). The colour of these lipliners glide on creamy, which make them perfect for filling in the entire lip without dragging the skin.

Posted by Rhia Amio, Make-up Artist www.artistrhi.com | 10:30 PM | , , , , , , | 1 comments »

WEDDING | Kieu

2009-06-04

Here are a few shots of Kieu's bridal make-up from a couple of weekends back (yes sorry, I'm still catching up on a bunch of pics!). Kieu has such perfect skin (literally just like a doll's) and gorgeous features...which means my 'work' here was pretty much effortless. We kept the look to soft pink tones to brighten the skin and produce a healthy glow.

For a clean and classic bridal look like Kieu's, try incorporating these key products we used:
1. FACE atelier: This silicone-based foundation sits atop the skin and gives it a soft, dewy finish. Just one layer produces medium coverage and you're camera ready! (NOTE: If your skin is more oil-prone, opt for another foundation. The silicone base will have too much slip to carry you through the day).

2. NARS Orgasm - The name says it all: get that natural flush with a swish of a brush and NARS Orgasm blush (ok, I was trying too hard to rhyme there. That's why my career as a rap artist never flew). Orgasm is a universally flattering colour that works well on many skin tones. Just smile, dust on the apples of the cheeks and blend well!

3. MAC Twig Lipstick and Pink Lemonade Lipglass - Stick to a neutral (rather than fluorescent!) pink and top with gloss for a pucker-ready pout!
----

Congratulations, Kieu! All the best and thanks for letting me take part! :)

See more of Kieu.

Posted by Rhia Amio, Make-up Artist www.artistrhi.com | 9:00 PM | , , , , , | 0 comments »

Q: I love the red lip look you did for the model in this photo. I love to wear red lips myself, but I never seem to have any luck when trying to wear red lipstick (or darker lipstick colours for that matter!) How do I keep the lipstick from bleeding into the tiny lines around the mouth?

A: Great question. Red lips are a gorgeous look--but since they make such a bold statement and draw immediate attention--they have to be done right! The tricky thing with darker lipstick colours is that when they smudge or shift into the fine lines, they're waaay more obvious than neutral lipstick colours. Here are a couple of tips to keep in mind when rocking those red lips:

1. Use a matching-coloured lipliner.
Outline the lips with lipliner - you can either follow the shape of your natural lipline or ever-so-slightly draw just outside/inside the lipline to enhance/trim lip size, depending on what you prefer. Use a lip brush to blend the lipliner in towards the centre of the mouth - this will help the lipstick have a base to adhere to. It also ensures that if the lipstick fades, you'll still have some colour left on the lips and avoided the dreaded "ring-around-the-mouth" look.

2. Blot and re-apply.
After applying lipliner and a couple of coats of your red lipstick, use a one-ply tissue to blot your lips. Re-apply the lipstick to finish. Again, this will ensure a bit of colour remains on the lips and maximize the length of its wear as the day goes on.

3. Use a reverse lipliner.
A reverse lipliner is simply a neutral skin-toned colour pencil that can be used to refine the shape of the lips, once lipstick has been applied. Applying a reverse lipliner (like my beloved one by Cargo) will also help to create a border around the lips. This border will help prevent the darker colour from migrating to where it's not supposed to! Make sure you have a fine, sharpened point and trace just outside the lipline's natural border - and voila - red lips as neat as when you initially applied them! (Be sure to blend out the reverse lipliner well, or you'll end up with a lighter ring around the mouth!) The reverse lipliner also works great as a touch-up tool - just pop it into your purse for any touch-ups required later in the day.

4. Use lipgloss sparingly.
Try to avoid applying excessive gloss all over your red lips - remember that gloss is wet in texture, so it has a natural tendency to move. To alleviate this, dab just a bit of shiny gloss on the centre of the bottom lip to add dimension and create the illusion of fuller lips.

Hope this helps!

See related posts:
GET THE LOOK | Red Lips
ARTIST TIP | It's a Fine Line with Reverse Lipliner
Q & A | How do I make lipstick last longer?

Posted by Rhia Amio, Make-up Artist www.artistrhi.com | 10:41 PM | , , , | 0 comments »

macaprilcollections
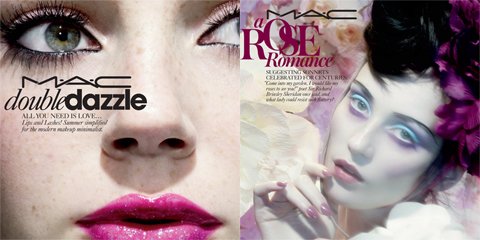
This past April was another lovely month for new MAC Collections. The aptly named Dazzleglass collection is a brilliantly sparkling set of glosses and mascaras. Both the glosses and mascara have finely-milled specks of glitter that catch the light beautifully and give that perfect lighter touch for spring make-up. The sheer glosses can be worn on their own for a glossy sparkle, or can be layered over your favourite lipstick for a different look [try Moth to a Flame (a sparkling pearly pink) or Goldylocks (a high voltage gold shimmer gloss)] pictured below . I love that the Dazzleglass formula isn’t overly sticky, as past MAC glosses. Stock up on these while they are available, as they are limited edition!The ad campaign for a second collection, Rose Romance, completely drew me; I just had to see what the collection was about from looking at the promo items! The collection features a few limited edition items and permanent staples to the MAC line-up. The colours of the collection are more subtle (think romantic), which are perfectly in tune with the lighter make-up routines we turn to for the warmer seasons ahead.

Fix+ Rose!
Delightfully, the Rose Romance colllection also comes with a new variation on my beloved Fix+ (a post-make-up moisturizer and setter that adds the perfect glisten to your application. I’m a huge fan!). Fix+ Rose is infused with all the good-for-your-skin stuff as the original formula, but also comes with the refreshing scent of rosewater. The rosewater scent has calming effects on the psyche and on your skin. It’s the perfect finishing touch and treat to your own make-up application or that of your client!

top photos courtesy of MAC Cosmetics

Posted by Rhia Amio, Make-up Artist www.artistrhi.com | 8:00 AM | , , , , , , , , , | 0 comments »

Q: Hi Rhia, I know this may sound silly that I don’t know this, but how often should I be washing my brushes?

A: Hardly a silly question (and the topic is totally in tune with yesterday’s post about spring cleaning!)! I actually get asked this question pretty frequently by clients. Quality brushes are quite the investment, and the problem is that many women aren’t taught how to maintain them properly…and not taking care of them properly can translate into the brushes not lasting as long as they should!

To clean your brushes, use a gentle brush shampoo* and massage it into the bristles to cleanse it throughly. Rinse well to clear the bristles of all shampoo suds. Blot the brush a couple of times on a papertowel to get rid of excess water and sculpt the brush back into shape. Hang over a counter and let air dry overnight.

*Instead of a brush shampoo, you can swap hair shampoo and even dish detergent (international celebrity make-up artist Laura Mercier does this!) to cleanse your brushes.

In terms of frequency for washing brushes, you’ll notice how brushes work and apply better the more you clean them. But let’s be realistic - in the life of the everyday woman, amongst your tall list of things to do daily, brush washing likely isn’t one of your top 10. As a general rule of thumb, you can wash the brushes you use for powders and eyeshadows after multiple uses (I would say at most after every 3 uses, but even that's pushing it!). For cream and liquid make-up products (such as concealers and foudations), you should ideally clean these everyday (or after each use). Again, the more often you clean your brushes, the better the results will be for your make-up application.

Keep these tips in mind to help ensure your quality brushes make you and your make-up look good – for a long time!

Posted by Rhia Amio, Make-up Artist www.artistrhi.com | 11:30 PM | , , , , , , , , , | 0 comments »

Each time a new season rolls around, it’s a great time to filter through your make-up kit to see which items need tossing and replacement. Many of us are guilty for holding onto make-up products past their prime. But for the sake of being sanitary and good to your skin, a little due diligence when it comes to cleaning out your kit is essential. Besides, any excuse to go make-up shopping always works for me!

Here are some telltale signs that your make-up kit is in need of a spring make-over:

1. products start smelling funky
i.e. mascara – Once opened, mascara has a life span of approximately 3 to 4 months. You’ll notice a funky smell once it starts going bad and the formula will be more prone to clumping. Toss.

2. products don’t glide on in the same manner they use to
i.e. powder eyeshadows – If you’re digging away at that eyeshadow and find the pigment just isn’t as potent as it used to be, it’s likely time to replace! Your eyelids will thank you once you start applying that new, creamy eyeshadow that just glides without having to pull at the delicate eye area !

3. liquid products have separated
i.e. foundations – No amount of shaking can get rid of that orange tinge that happens when your foundation has been kicking around for too long. Be good to your skin, and replace your foundation every 18-24 months (or sooner if it looks like it’s separating!).

4. you haven’t bought anything new in a couple of years
No-brainer. Go treat yourself to a fresh new look and properly ring in spring!

For more info on when it’s time to toss, see this post here. Happy Spring Cleaning!

ARTIST TIP: Waaait - don’t throw out everything just yet! Hold on to any MAC containers for the Back to MAC recycling program, where you can get a free lipstick (or equivalent) for recycling your old purchases!

Posted by Rhia Amio, Make-up Artist www.artistrhi.com | 11:30 PM | , , , , , , , , | 0 comments »

Last Friday was a gorgeous day here in Toronto, with unseasonably warm temperatures giving us our first hint of spring! In the world of make-up, spring signals a movement towards lighter and brighter trends in beauty products: the smoky eye gets reinterpreted with fresh spring colours, while sheer glosses take the place of matte lipsticks. The upcoming season is all about being playful with make-up, so give those winter blues the official goodbye and add a little colour to your routine - just in time for spring!

Smoky TealThe spring smoky eye was redefined on the runway at the Gucci Spring 2009 show. Models strutted down the runway with smoky eyes in modern shades of teal under the direction of legendary make-up maven and Key Artist, Pat McGrath. To keep the look 2009 rather than dated, use a pale shade of teal (and avoid white shimmer) when highlighting the brownbone. Add dramatic black eyeliner to define the eyes and smudge away!

How to Wear It: Teal smoky eyes can be a questionable make-up option for places like the corporate office. (Insert visions of Mimi from the Drew Carey Show). Save your efforts for the evening and try this look for a fun night out on the town.


Purple PoutPurple lips were the beauty focus on the runway at Zac Posen. The look was the spring derivative of the dark, black (yes, black) lips that were all the high-fashion rage last fall. To balance the strong lip look, the rest of the make-up was kept soft and subtle.

How to Wear It: Hello newsflash! Runway looks aren’t necessarily intended to look good on us non-model people. But heck, even models have problems pulling off true purple lips (i.e. see above)! From runway to realway, purple isn’t the most flattering colour for the pouts of real women. Instead, try a softer interpretation of the look in stain and gloss formulas with purple-inspired shades of plum and mauve.


Natural BeautyNatural beauty was also a staple look for Spring 2009, as featured on the runways of Tommy Hilfiger and Chloe. Despite appearances, the natural look does require a bit of work to achieve that polished natural look. When done right, you'll have that effortless "I just woke up and I look this good" kind of look.

How to Wear It: Wear this look anywhere - it's as easy as five quick steps!
1. Even out the skin tone with foundation and concealer.
2. Set the application with a light dusting of loose powder
3. Brush brows into place (use clear mascara to keep unruly brows in check).
4. Add a bit of blush to the apples of the cheeks for a wide-awake look.
5. Lastlly, dab a balm on the lips to give some moisturizing shine to the lips!

All photos courtesy of Style.com

Posted by Rhia Amio, Make-up Artist www.artistrhi.com | 11:30 PM | , , , , , , , , | 0 comments »

Up here in the Great North, we're just getting past our (hopefully) last taste of winter. But worldwide, fashion houses are setting the scene for what looks we'll be after come Fall 2009! We go backstage with MAC Cosmetics for this sneak preview Fall 2009 beauty trends:
__________________________________________________________________
RUNWAY BEAUTY TREND: Gray LipsGray-toned lips (Doo-Ri, Rodarte) were the answer to the goth-hot black lips that dominated runways last year. At Doo.ri, MAC Pro Artist Tom Pecheux mixed Black Lipmix with concealer to achieve a gray colour for the lips. (An actual gray lipstick? That remains to be seen!)

From Runway to Realway:
Now, runway looks aren't necessarily intended to look great on the everyday woman, but in this case, even a supermodel hardly makes a gray colour "work". Wear gray on the nails and on the eyes (like at Badgley Mischka), but please let's reserve this look for the runway.

photo on right: www.fashionindie.com

__________________________________________________________________
RUNWAY TREND: Red Lips
At Ruffian, face make-up was clean in order to set the focus on stand-out red lips.

From Runway to Realway:
To me, red lips are a look that never go out of style. Pair it with a stroke of liquid liner on the top lash line and defined lashes for a classic glam look.

photo on right: www.wwd.com

__________________________________________________________________
RUNWAY TREND: Brown Eyeshadow and Clean Skin
Donna Karan is known for her New Yorker practical chic approach to fashion, and the same modus operandi reflected in the runway make-up for her Fall 2009 collection. The focus of the runway make-up look was flawless skin, highlighted with neutral eyes and lips. MAC Pro Artist Charlotte Tilbury used Copper Walnut Pro Gloss mixed with a Bit of Reflects Gold for a fresh look on the eyes.

From Runway to Realway:
DK's runway make-up look is easily achievable - you can likely get the look with products that you already have at home. Use a cream eyeshadow (try MAC Paints) as a base before applying neutral eyeshadow all across the lid. The cream eyeshadow will reduce the chance of your eyeshadow creasing by day's end!

photo on right: www.instyle.com

__________________________________________________________________
RUNWAY TREND: Flashback 80s
Kohl-rimmed eyes are always a great look for the fall season. For Fall 2009, the eyes at Nicole Miller made a bold statement with electric blue eyeshadow. MAC Pro Artist James Kaliardo achieved the look by using MAC Pro Marine Blue Ultra Paint Stick as a base, and then blending MAC Freshwater and Atlantic eyeshadows over the lids.

From Runway to Realway:
Yes, you can wear blue eyeshadow. Save it for a fun night out or opt for a subtle blue eyeliner look for daytime. Pair the look with neutral pink lips to keep the look balanced.

photo on right: www.instyle.com

Posted by Rhia Amio, Make-up Artist www.artistrhi.com | 7:30 PM | , , , , , , , , , | 0 comments »

Q: Hi, I'm a make-up newbie - my daily morning routine consists of Vaseline on the lips and mascara on the eyelashes (when I want to be "fancy"!). I'm trying to venture more into the world of make-up, but there's so much stuff out there!!! What's the diff between a lip balm, a lip conditioner and a lip gloss?

A: Both lip balm and lip conditioner are built to lock in moisture for the lips and protect the lips from the external environment. Once applied, they both provide minimal to sheer coverage. Depending on the formula, you can also have moderate to wet-looking shine from either product.

Gloss is primarily more of a cosmetic product, rather than a maintenance product like lip balm and lip conditioner. Gloss can be clear, sheer, or opaque. It can have moisturizing ingredients, or be purely intended for a shiny aesthetic with a sticky like feel. You can build up gloss more than you can a balm and conditioner, and the look is more finished overall versus when you use just a balm.

Now, which to choose? It's good to always have a lip balm/conditioner handy to help maintain soft and supple lips. Remember, make-up always starts with a good base and any lip products you apply will look better on moisturized, non-chapped lips! Yet, nothing beats the look of a high-shine gloss: light-reflecting effects can create the illusion of larger lips and an instant glamourous look.

Go to your local drugstore to score deals on lip balms (i.e. you don't have to spend much on a balm - think Chapstick, Carmex). Save the majority of your pretty pennies for lovely lip glosses - great finds are available both at the drug store and department store level.

(Yes, choose both!)

Posted by Rhia Amio, Make-up Artist www.artistrhi.com | 11:30 PM | , , , , , | 0 comments »

WEDDING | Libby

2009-02-24

What a fab, but busy, weekend! Saturday kicked off with my first wedding of the season with the gorgeous bride-to-be Libby. Libby was after a classic 40s glam look for her wedding day (think a la Veronica Lake). The result was a look that was definitely red-carpet worthy (and wedding-aisle ready)! Here are the key elements to Libby's Wedding Day Look:
1. Balance the skin out with foundation.
Skin without foundation can be especially noticeable on camera. Foundation gives the skin a flawless and glowing finish, so you're ready for all those flashing lights!

2. Polished brows.
Libby has naturally perfect shaped brows. To polish the look, I filled sparse areas of the brow with a brow pencil and brushed the brows into place.

3. Strong eyeliner concentrated on the top lash line.
Focusing eyeliner application mainly on the top gives a polished look without looking overdone. Eyeliner that encompasses the whole eye can look too strong, especially when paired with bold red lips. I used a combination of gel liner and liquid liner on Libby's eyes to help give it longevity throughout the day.

4. False eyelashes.
Falsies are like the icing on a cake! Every make-up application looks better with a full set of lashes. When done properly, falsies will not only make the lash line look fuller, but will also make the eyes look larger. Love it!

5. Knock 'em dead red lips.
I used Make-up Forever Blue Red #205 to complete Libby's classic glam look. For tips on how to apply red lips, see this post.

Check out www.artistrhi.com to see more of the behind the scenes photos of Libby's Big Day. Congratulations, Libby!!

Related posts:
WEDDING | All Weddings
GET THE LOOK | Red Lips
Q & A | Choosing the Right Eyeliner Product for You

Posted by Rhia Amio, Make-up Artist www.artistrhi.com | 11:00 PM | , , , , , , , | 0 comments »

While on vacation, we all still want to look fab without necessarily being worried about our usual make-up routine. Returning from vacation recently, I realize that I did it again - I had packed way too much make-up and used only half of what I actually brought! There are some definite make-up travel essentials that I'd likely still take to a deserted island with me! Here's my list of essential make-up items when traveling (and hopefully I'll be more efficient when packing the next time, but knowing me...probably not).

1. Multi-Purpose Cream: Embryolisse Lait-Crème Concentrè (24-Hour Miracle Cream)This multi-purpose cream is aptly named. Embryolisse can be used as a moisturizer, make-up primer and make-up remover. The cream also quadruples as an impromptu shaving cream (your boyfriend will thank you for thinking of him as well!). Items with multiple uses mean less to pack in that bag...and who doesn't love that?! Embryolisse is also an industry insider favourite - make-up artists and models are known to swear by this cream for its many uses.

2. Tinted Moisturizer: MAC Select Tint SPF 15
Select Tint doubles as a moisturizer and foundation in one handy bottle. The tinted moisturizer formula offers the most minimal amount of coverage in a foundation, while still helping to lightly even out skin tone. Select Tint also has a built-in SPF of 15, which makes it the practical and perfect choice in attaining that polished look. My forehead has a tendency to catch most of the sun, and by the end of the trip, there are two different shades on my face! I apply Select Tint just on the forehead to brighten the skin tone there, and then I dust some bronzer on my cheeks to deepen the skin tone and bring everything in balance.

3. Blotting Tissues: Tea Tree Oil Facial Blotting Tissues
To keep looking fresh in the hot vacation weather, there's no sense in touching up your shine with more and more powder (which could contribute to clogged pores and break-outs). Instead, scoop up a handy pack of blotting tissues to keep your shine in check. Simply dab a tissue wherever you see an excess of oil build-up, and watch the absorbent tissue do all the work.

4. Bronzing/Highlighting Powder Duo: MAC Mineralize (Dark/Natural & Shimmer)
Use a bronzer and highlighter combo to accentuate your glowing bronzed skin. With the MAC Mineralize Duo, I used the dark matte powder as a contour on the cheeks and as an impromptu eyeshadow to define the crease of the eye. With the shimmery half of the powder, I used a large powder brush to dust it atop the browbone and on the cheekbones. Spotlighted tan? Check!

5. Lip Balm: Burt's Bees Radiance Lip Shimmer
The hot weather was a welcome climatic change for my lips. My lips had seen more than their share of dry and cracked days, courtesy of our Canadian winter season. I usually throw my Kiehl's Lip Balm No. 1 into my purse for its reliable moisturizing and SPF properties, but found that the balm tended to liquify in the extreme heat. Fortunately, I had Burt's Bees Radiance Lip Shimmer as a back-up. The waxy stick withstood the heat better while adding a moisturizing shine to my lips.

6. Liquid Eyeliner: L'oreal Lineur Intense
My failsafe way to beat the heat while keeping my eyeliner in check is to use liquid liner. I've worn liquid liner in extreme heat, and found that nothing beats its lasting power. To help prolong its longevity, I apply a neutral-coloured cream eyeshadow base to tone down my oil-pone eyelids.

Posted by Rhia Amio, Make-up Artist www.artistrhi.com | 12:00 PM | , , , , , , , , , | 0 comments »

Launching this Thursday (February 5th, 2009) is MAC's latest release for lips: Creme Team. The collection builds on the success of MAC's lipstick formulation, Cremesheen, and combines more lipstick colours, lipliners and lip glasses to the mix! The collection's lipstick and lip gloss products glide on sheer to give a creamy and high shine factor to the lips. With the Cremesheen lipliners, you can easily fill in the whole lip area and use it as a base for lipstick application - and you won't have to worry about it being drying to the lips. (Sublime Culture lipliner is already part of my kit!)

I love the texture of the Cremesheen lipglasses: flat without sparkle and not overly sticky (as in past lip glass formulations!). I test ran Cremesheen Glass in Looks Like Sin, a neutral plum colour that worked great for both daytime (worn with liquid eyeliner) and night-time (when paired with a smoky eye).

NOTE: Be warned that if you try to apply the Cremesheen gloss as advertised, you'll likely encounter feathering gloss earlier than expected. The gloss actually goes on quite sheer so my attempts to build up the colour were futile...and messy! Save yourself the trouble and the wasted product - keep the gloss application to two coats max and you're ready to pucker up!

Cremesheen lipsticks will remain part of the permanent collection, but Cremesheen lipglasses are only available until the end of March 2009.

Posted by Rhia Amio, Make-up Artist www.artistrhi.com | 9:00 AM | , , , , , | 0 comments »

Speaking of American Beauty, what an historic time for our neighbours south of the border with a welcome change in Office that will undoubtedly affect the rest of the world! On January 20th, 2009, the world watched as Barack Obama was sworn in as 44th President of the United States. Our attention was also captivated by the new First Lady, Michelle Obama. Broadcasts everywhere focused on what the style icon, Mrs. Obama, would be wearing.

To complete the look, Mrs. Obama brought on trusted Chicago make-up artist and friend Ingrid Myles-Grimes. Myles-Grimes used a palette of neutral colours for a look that would be "read as very natural and polished." The end result was a classy and gorgeous make-up finish fit for the new First Lady. To get your own polished First Lady look, try these tips:

1. If you haven't done so already, shape your brows.
If you're unsure about doing it on your own, have them first shaped by a professional and then tweeze on your own to maintain the shape. Tamed brows frame the face and provide a more polished aesthetic.

2. Fill in brows with brow powder if necessary.

3. A key to Mrs. Obama's polished look is her glowing skin.
Use foundation to even out skin tone and surface and add concealer where necessary (undereye circles, blemishes).

4. Set face make-up with powder.
Use a multi-dimensional powder like MAC's Mineralize Skinfinish line to get rid of shine without looking dull and flat.

5. Skip the blush, but use a powder about 2 shades darker than your own skin tone as a contouring powder.

6. Apply liquid liner to the top lashes only.

7. Curl the eyelashes and apply two coats of mascara

8. Apply a nude coloured gloss.
NOTE: Yes, the natural and polished look is actually a lot more work than it looks! But when done right, people will notice that you’re glowing...and think that it's effortless! Enjoy!

Photo courtesy of Associated Press

Posted by Rhia Amio, Make-up Artist www.artistrhi.com | 9:00 AM | , , , , , , , , | 0 comments »

Check out my final write-up for Make-up Junkie!!Fabulous Feel Liquid Colour glides on smoothly to give opaque colour with high shine. The formula is non-sticky and just like the name - feels quite fabulous on the lips! I test ran Amaretto, a pretty neutral pink-brown colour that works well on different skin tones. The colour stayed true for the most part, but I found a touch-up was required after about 3 hours. The one thing that took me a bit to get used to was the strong fragrance of the gloss. I like subtle scents to my glosses, but found this one initially overpowering. A minor setback, but the look and feel of this gloss is still a steal for $12 USD (approximately)!

Double Lush Mascara Plus Primer I'm not a usual fan of 2-step primer and mascara products, but I was pleasantly surprised by American Beauty's version. I found the formula gave my lashes much needed volume, versus other 2-step mascaras I've tried in the past. I tried out the mascara in Black, but Double Lush is also available in Brown and Midnight, which is a first that I've seen for primer plus mascara products (usually they're only available in Black). I love what Double Lush does for my lashes, and I'd definitely be willing to shell out the $12 US that this mascara retails for.

Ultra-Easy Automatic Eyeliner (Auburn) The simple twist-up and no-sharpen action of this eyeliner definitely makes it ultra-easy. I had the chance to try out Auburn, a gorgeous maroon brown with faint shimmer that looks particularly lovely on blue-eyed ladies. The creamy eyeliner glided on smoothly and lasted well throughout the day to keep my eyes defined (minor midday touch-up was required though!). This eyeliner is perfect for the no-fuss make-up junkie – no need for sharpening – just roll up and apply as desired!

Pretty Bronze Bronzing Powder (High Summer) Get that coveted bronze goddess look with American Beauty’s Bronzer months ahead of the summer season! The sheer tan brown powder accentuated with flecks of gold sparkle. With just a couple of swipes, you can instantly revive that glow and say goodbye to blah winter-skin (all my Canadians are saying amen right now!). The sheer consistency of the powder makes it very user-friendly to work with – it builds and blends well for a more of a natural appearing non-streaky glow. Dust some of the powder along the collarbones or atop the décolletage for the piece de resistance!

Be sure to check out Make-up Junkie for all the latest, greatest (and not so great) in beauty products!

Posted by Rhia Amio, Make-up Artist www.artistrhi.com | 2:00 PM | , , , , , , , , , , , , | 0 comments »

True-to-Dame-Edna form, the eye-catching and mauve-packaged limited edition collection hit MAC stores late December. Inspired by the beauty routine of the Great Dame, the collection is for the glamour girl that likes to make a bold statement with her look. In Dame Edna's own words: "We all need a MAC-over, possum." I couldn't have put it better myself - read up on my review of Gladiola Matte Lipstick and Possum Nose Pink Lipglass from the Dame Edna collection!

Dame Edna MAC Collection - Gladiola Matte Lipstick
The inspiration behind this bright and bold lipstick was clearly Dame Edna's coif (all natural, by the way!). The matte mid-tone blue pink is a super trendy look when paired with cat-eyed liner and false lashes . Dare to wear this colour only if you know how to rock it like the Great Dame (i.e. this colour is not for the subtle)! Pair it with the collection's Hot Frost lipgloss for some added dimension and shine.


Dame Edna MAC Collection - Possum Nose Pink Lipglass

Possum Nose Pink Lipglass is a gorgeous coral gloss that is more of a universally wearable colour than Gladiola above. The sheer bright colour gloss has multidimensional sparkle built-in. I love wearing this gloss for daytime, but find it very similar to a colour already in my kit (as in my earlier review here). You can never have too much of a good thing though and since this colour works for me, it's a welcome addition to my personal touch-up kit!

Photography and Make-up by Rhia Amio

Related posts:
PRODUCT PREVIEW | Dame Edna for MAC

Posted by Rhia Amio, Make-up Artist www.artistrhi.com | 9:00 PM | , , , , , , , , , | 0 comments »
Related Posts with Thumbnails