Showing posts with label face. Show all posts

Riveting is MAC's rocker glam collection for Spring 2010. With heavy metal textures and vibrant loudmouth colours, Riveting is hardly a collection for the fading wallflower. For me, the most anticipated items of this collection have to be the matte nail polishes. It's honestly about time that a make-up powerhouse like MAC finally jumped the matte nail polish bandwagon (...or maybe it's a couple of seasons too late?!). Nail polishes in Studded Matte (think rocker glam silver sparkle but matte) and Wham, Bam Glam (a dark taupe) are definitely the most riveting pieces of this collection for me!

MAC Blush in Dirty Plum
I would have loved to have this blush on me for this shoot with Irem, but this sample came just a couple of days too late! Truth is, this is a lovely shade of plum, but hardly a shade of blush that most people can pull off in real life! Dirty Plum is a shade better suited to darker skin tones, unless of course your aim is to contour a la Grace Jones. :)

MAC's Riveting will be available as of February 18, 2010 at MAC stores and MAC counters.

Posted by Rhia Amio, Make-up Artist www.artistrhi.com | 8:00 AM | , , , , , | 0 comments »

Check out my latest Q&A on the wnetwork on how to cover up acne with make-up! (You know we all do it!)

I know it's bad, and as much as I've resolved against it, I'll be probably be forever poking at my acne (likely until my hormones wear out!). Needless to say, I've had to find the products that truly work when it comes to covering up acne (at all its different stages...and when I've made it worse from picking at it)! Two of my favourite tried and test concealers (that also help me hide my bad habit of picking) are:

1. Vichy Dermablend Concealer
Vichy Dermablend Concealer is a full-coverage concealer that glides on to give opaque-can't-see-the-redness coverage. The creamy consistency dries to a matte finish, and has the right amount of stick to hold onto pimples that are in the early, oily stages of their span. It comes through for me where many other concealers have failed, and also makes my skin appear normal on those problematic days. Hello, love!

2. Stila Perfecting Concealer

Stila Perfecting Concealer is packed with pigment, meaning you only need a tiny dot size for full-on coverage. The initial application is a bit wet, but dries to a semi-matte finish. I find it ideal for use when the skin around the pimple is a bit dry (or in the healing stages) of its lifespan. Versus Vichy's Dermablend, Stila's doubles better as an undereye concealer, as it has more slip.

Of course, you'll find both concealers in my kit...you know, just in case :)

Posted by Rhia Amio, Make-up Artist www.artistrhi.com | 4:00 PM | , , , , | 0 comments »

If you're an avid reader of this blog, you'll know that finding a concealer that truly works is the equivalent of finding the make-up holy grail for me! Even the concealers with the best reviews out there are challenged by my dark circles (yes, that whole New Year's resolution to get more sleep...so not happening just yet!).

I've had to adjust my concealer routine, as things that worked in my early 20s now appear too cakey once applied. What really initially appealed to me about CoverFx's ConcealerFx were the pink and peach based range of tones. Way back in make-up school, my teacher first introduced me to the wonders of orange concealer, in order to colour correct serious undereye circles (i.e. mine!). The faint orange colour worked beautifully to brighten my circles, but the challenge back then was finding that colour in a product on the commercial make-up market. Now thankfully, I can rely on concealers from Laura Mercier, YSL, Make-up Forever and of course CoverFx...all of which you'll find in my personal + client kits! (See told ya, holy grail...)

CoverFx ConcealFx in Medium...just peachy!

What I love about the concealer is how it provides opaque coverage without being cakey or looking dry on the undereye area. The built-in primer helps it stay atop those fine lines (of experience) around the eyes...and to me, that's an instant seller! Overall, the concealer has a lightweight feel and leaves a smooth finish. You need only a tiny dot per undereye area, so be careful to not squeeze too much out of the tube! ConcealFx simply does what it's supposed to do. The quest for a perfect concealer can now be put on pause...again.

Yup, Love in a Tube. Kit essential! Need I say more? :)

top image from coverfx.com

Posted by Rhia Amio, Make-up Artist www.artistrhi.com | 8:00 PM | , , , , , | 0 comments »

Q: What contouring products do you recommend?

A: Before I get into what products I'd recommend, let's go through the basic principles of contouring (and its complement--highlighting) to make sure we're all on the same page! Techniques of contouring and highlighting play on principles of dark and light:

Photo by Nadia Cheema
CONTOURING
When you want to make areas on the face appear smaller, we 'contour' by applying a darker shaded product atop the area.
i.e. to make the nose appear smaller, to add more definition to the cheeks, to slim down the face and make your decolletage pop!

HIGHLIGHTING
When we highlight, we apply a lighter shaded product on the area we want to bring forward. Highlighting works well with contouring, as it helps to exaggerate your contour by contrasting against it.
See this post for more info on contouring + highlighting!

Some products that I would recommended:
MAC's Sculpt & Shape powders (which I think is only available via macpro.com)
This collection of powders are a great option for those looking to subtly contour. These powders are smooth with just the right amount of pigment that your application won't look streaky.

Make-up Forever's Sculpting Kit
Each MUFE Sculpting Kit comes complete with two shades - one shade for higlighting and a darker shade for contouring. The powders are finely-milled and not too pigmented, so no need to worry about a streaky looking finish! The kits are also available in four different colour combinations making it easier to find a pair that works with your own skin.

Being resourceful...

You don't necessarily need to use a product that's specifically marketed for 'contouring' or 'highlighting'. I've used concealers, foundations and eyeshadows as contour/highlight products in the past. Here's how to do it:

1. The real key is always blending (so that's where your finger, brushes and sponges come in handy!). Blend well to get rid of any harsh lines!

2. For contour, be sure to use matte products (i.e. no shimmer!), as any products with reflective particles will look obvious and reveal your contouring secret!

3. Don't choose a shade that's too dark for your contour (i.e. 2-3 shades darker should be sufficient!), as it can make the area you've applied it to look 'dirty' rather than a natural shadow.

4. When using eyeshadow as contour (on areas other than the eyes), lightly dip your brush in some loose translucent powder first before dipping into your eyeshadow. The initial coat of powder will ensure your pigmented eyeshadow doesn't glide on too strong! Blend, blend, blend (yup, it's my mantra!).

Hope this helps!
Rhia

If you have a make-up related question you'd like to ask, drop me an email: rhia[at]artistrhi[dot]com or send me a message through the W Network. I look forward to hearing from you!

Posted by Rhia Amio, Make-up Artist www.artistrhi.com | 8:00 AM | , , , | 0 comments »

I first came across CoverFx BritePrep while doing wedding make-up for the mom of a bride-to-be. The mom had beautiful skin for a mature (50 years old+) lady, but also had slight hyperpigmentation that was of concern to her, especially since she felt it had recently become darker and more noticeable. She asked me to use CoverFX Brite Prep that she had in her own make-up bag, as she said it was the "only" thing she's tried over the years that has helped to brighten the hyperpigmentation.

BritePrep Fx has a serum-like consistency that quickly absorbs into the skin, without being greasy or oily. What I love about the primer is its shimmer appeal - it leaves the skin with a radiant glow that isn't too sparkly. I love using it for clients that need a pick-up from dull, sallow skin (and whose skin doesn't need a little pick-up during the cold winter?) The shimmer finish also works well to brighten dark circles under the eyes - just apply BritePrep Fx first and then finish with your usual undereye concealer.

BritePrep Fx also does the usual helping foundation to glide on and look better, but it doesn't extend the wear of my foundation any longer than other quality primers I've tried. (I typically still have to powder at my 4-hr check-in to look 'fresh' and non-shiny again). The primer boasts advanced anti-aging properties plus an SPF 50. From my own experience, the high SPF does not reflect white with flash photography (making the skin tone appear lighter on the face) as many foundations with SPF do. Mind you, I have yet to try the primer on darker skin tones than on my own (...and just to be safe, I would ask for a sample before fully investing in the product!)

Speaking of price, here we come to the product's main downfall for me -a 30 mL tube of BritePrep Fx retails for approximately $40! In all honesty, the hefty price would likely prevent me from purchasing it again for the personal vs. client kit. Yet given the testimonial of my client and how it worked for her hyperpigmentation along with it's multiple uses (priming, anti-aging and SPF!), BritePrep Fx may prove worth it for some.

Posted by Rhia Amio, Make-up Artist www.artistrhi.com | 7:32 PM | , , , , | 0 comments »

Speaking of awesome products for Hallowe'en make-up, Make-up Forever's Flash Colour palette is a kit essential for any make-up artist. The colours are highly and brilliantly pigmented, gliding on the skin as they appear in the case. Colours are easy to blend and you can get an even greater assortment of colours by mixing your own (see all that stuff on Colour Theory is useful - time to break out the colour wheel!).

The Flash Colour's palette usability extends way past Hallowe'en night. I love using Flash Colours for photoshoots, as the pigmented colour holds true and doesn't get washed out by bright studio lights. To avoid creasing, be sure to set the creamy flash colour either with a layer of translucent powder or coloured pigment for more pop. You can use it all over the face and body, but of course always follow the recommended use labels on the packaging :)

Must-try: MUFE's Flash Colour in Silver - it glides on creamy, but looks like foil! Tin Man Love.

Posted by Rhia Amio, Make-up Artist www.artistrhi.com | 9:05 PM | , , , | 0 comments »

Q: What is the best primer?

A: In terms of what the "best" primer is, I can only speak from experience with primers that I have used on myself and/or clients. Usually, I test run everything on myself (I have fairly normal skin on good days) as a measuring stick because:

1) I’m a beauty junkie so I have to!
2) so I know how (well, if) the product works and
3) so I can describe it to clients.

I like to do my research, read up on products through magazines, make-up artist boards and online reviews and also ask other fellow make-up artists and beauty junkie pals before I set out to buy something. I have tried a few primers in my lifetime, but usually once I find something that I like, I’m pretty faithful to it until it gets discontinued or until it doesn't work the same.

The two primers currently in rotation for my own use and for clients are:

1. Cargo blu_ray™ High Definition Mattifier (approx. $28 CAD)
This mattifier became my trusted everyday primer when my previous go-to, Smashbox's Photo Finish Foundation Primer, just wasn't doing it for me anymore. Although Smashbox's primer had worked well before, I was beginning to find that my skin would get shiny nearly right after I had just finished my morning application.

Cargo's mattifier comes from the line's range of products specialized for use under the scrutiny of HD and blu-ray lenses. The result is a line of products that gives flawless and natural results, so even when enlarged to full resolution, the skin (and not the make-up) appears only better.

When applied initially, Cargo's mattifier works well as a primer. It smoothes out the skin, minimizes pores and fine lines, and tones down excess shine. You can also use it instead of powder - atop bare skin or atop your foundation. Most importantly, it keeps the T-zone in check until the usual midday touch-up. This primer has become a personal favourite, and a favourite of my bridal clients who need their make-up to go the absolute distance.

2. Embryolisse Lait-Crème Concentrè / 24-Hour Miracle Cream (approx $30 CAD)
Embryolisse is a fashion industry favourite with fans that include models to make-up artists! This multi-purpose cream quadruples as a moisturizer, primer, make-up remover and shaving cream! (Yes, even your boyfriend can use it. Multi-purpose indeed!)

The primer and moisturizer combo is perfect for when I'm in a rush, and it's a definite must-have when I'm travelling. It hydrates the skin, leaving it with a soft and silky smooth feel while not being greasy. A touch-up isn't needed til the usual midday expiration and it easily removes my make-up come nightfall - all this from one nifty bottle! Definitely recommend this one for its quality and practicality.

My take on other primers that I've tried:

Smashbox's Photo Finish Foundation Primer (approx. $40 CAD)

You only need a tiny amount of this primer, which in past years has been a favourite of beauty fanatics (including the big guys like Allure and Sephora). I personally find the formula too greasy and that my foundation looks the same later in the day when I don't apply it. At about $40CAD for the bottle, I'd definitely pass on this one.

Smashbox Photo Finish Foundation Primer Light (approx. $40 CAD)
In an attempt to give Smashbox's primer a chance to redeem itself (there must be all the buzz about it for some reason, right?), I decided to give the Light version of the formulation a try. The results were definitely less greasy than the original formula, but no great difference in lasting power of my foundation throughout the day. Another pass on this one!

MAC Prep + Prime Skin

This MAC primer contains silicones that sit atop the skin and help to smooth out the surface and minimize pores. Also works well for toning down oily skin, but doesn't really help with redness control as the product description says (you need some cover-up make-up for that one!). Overall, a decent primer, but at that price, I'd still opt for something that wows me :)

MAC Matte
MAC Matte's a staple in my kit. The clear gel formula works great to instantly tone down excess oil, such as in the T-zone and cheeks. It can be used before or even after foundation, in place of powder. Great to use on-set too - when in studio under hot camera lights, the skin (especially the T-zone) can tend to get shiny. To combat this, use a sponge to lightly pat MAC's Matte on the shiny area and let it set...alleviating the need to constantly reapply powder for touch-ups and risk looking cakey!

Conclusion (of sorts...):
The best primer can really vary with skin type. If you have normal skin, you'll be compatible with nearly all of the primers mentioned. If your skin tends to be on the oily side, I would stick to the primers with more of a mattifying formula, such as Cargo's blu_ray™ HD Mattifier or MAC's Matte. If your skin is on the dry side, Smashbox's Photo Finish or Embryolisse would be good options.

Whatever you choose, most places offer samples so don't be afraid to ask. Remember, if a product's worth buying, it's worth trying so samples should be readily available!

Hope that helps!

If you have a make-up related question you'd like to ask, shoot an email to me at rhia[at]artistrhi[dot]com. I look forward to hearing from you!

Posted by Rhia Amio, Make-up Artist www.artistrhi.com | 11:30 PM | , , , , | 0 comments »

Last week the cancer research branch of the World Health Organization elevated the use of tanning beds to a "carcinogenic" risk - the organization's highest cancer risk category. Surprise, surprise.

Now, I'm just as guilty as the next person for sitting out in the sun for longer than recommended and I've done my share of bed tanning (couldn't get used to it though, the buzzing sound just made it seem all wrong!). I can't deny my love for how a tan gives you a healthy youthful glow, but of course I can't deny how overexposure to the sun increases the risks of melanoma and premature wrinkles! Makes for quite the trade-off.

Thankfully, there are make-up solutions around this scenario! Enter bronzers. I'm huge on bronzers for the instant glow and slimming effect they provide. I use my bronzer all year round, and especially in winter when my skin is at its palest!

Hands-down my favourite bronzers are from NARS. These bronzers glide on smoothly and evenly for a natural looking application. Long-lasting and well-pigmented - they're worth every penny! (See more of my favourite bronzers here).

To apply:
Use a large buffer brush (i.e. MAC's 182 Brush) or a large powder brush to distribute the bronzer on the face. A larger brush will help to evenly distribute the bronzer on the face and thoroughly blend it to avoid a streaky look.

Apply the bronzer on the areas of the face that are more prominent (where the sun would naturally hit). I like to use a "3-shape" motion: apply in a continuous swipe along the temple, back and forth across the cheekbone and then down along the jawline.

We haven't had much of a sunny summer in Toronto, so make the most of that bronzer sitting in your make-up stash! The benefits of bronzer are easy and instant without the risk to your skin!

Posted by Rhia Amio, Make-up Artist www.artistrhi.com | 10:00 PM | , , , , , | 0 comments »

Ok, so I'll be the first to admit that I probably do a better than average job taking care of my skin when it comes to my face...but when it comes to the rest of my body, let's just say that when winter rolls around my maintenance techniques for the rest of my skin that isn't visible also go into hibernation!

So of course on an annual basis, the warmer weather of summer comes around and it's time to fast track my once-covered skin into an acceptable level for public viewing. My usual trusted go-to product is cocoa butter, but ever the fan of trying something new, I opted to use a sample received of MAC's Naked Honey Skin Salve.

Now a month later, my skin is back to a presentable condition with the help of Skin Salve! I especially love using it on rougher areas of the body like the elbows, knees and feet. The product is derived from beeswax, sunflower oil and other organic ingredients that instantly moisturize skin (especially my dry, neglected winter skin). I'd love to see how this product would work in the winter, but of course, it's limited edition!

MAC's Naked Honey Skin Salve retails for $22.50 CAD, and is available at MAC counters and stores for a limited time only.

Posted by Rhia Amio, Make-up Artist www.artistrhi.com | 8:00 AM | , , , , , | 0 comments »

We’ve all been patiently waiting for summer weather, and now that the warmer days have arrived, it’s a good time to re-evaluate our make-up routine. When summer rolls around, it usually means playing up the bronzer, while lightening up on the other products in our daily routine. After all, we should be spending less time indoors getting ready, and more time outdoors enjoying the weather! That being said, we still want to look fab all year round! Try these quick and easy tips to keep you looking and feeling fresh all summer long:

1. Switch to a lighter moisturizer.
Increased temperatures are directly proportional to increased oiliness! Increased oil production means you can either use less moisturizer on the face (just address the areas that are dry) or switch to a lighter moisturizer altogether. If you’re using a light moisturizer, switch to a serum whereas if you’re using a thicker cream, opt for a light moisturizer instead!

2. Don’t skip out on the sunblock.
You may not see the effects immediately, but sun exposure overtime can do a number on your skin. Use a moisturizer with a sunblock in it to help protect against harmful UVA and UVB rays. If your moisturizer is separate from your sunblock, skip on using the moisturizer to avoid a grease-fest on the face. Ideally, let the sunblock absorb into the skin for at least 30 minutes before applying any make-up.

3. Use a mattifier instead of (or before applying) foundation.
For those of us blessed with great skin, a mattifier works well to absorb and reduce excess shine throughout the day. When layered underneath foundation, a mattifier also helps make-up last longer and minimize the need for touch-ups! Use tried and tested Cargo's Blu-Ray HD Mattifier or MAC's Matte on the areas of the face that are most prone to shine.

4. Keep a pack of blotting tissues handy.
Rather than doing a repetitive routine of constantly applying powder whenever oil appears, use blotting tissues to combat shine. To keep your make-up looking fresh, absorb the excess oil with the blotting tissue first and then lightly pat with your powder to polish it off. This method also works best for helping to reduce the chance of break-outs!

5. Don’t overdo it on the powder.
When you pack on too much powder, especially atop an oily surface, it can approach a cakey look. Blot with an absorbing tissue first, and then use a puff or even a brush to lightly pat the powder on oil-prone areas (pay particular attention to the T-zone area). Avoid packing on the powder as your face will only get slicker (and quicker) before the next anticipated touch-up!

6. Don’t sweat it!
During the summer, the look is all about healthy, glistening skin and the bottom line is that it’s tough to keep up a routine of a matte face when the weather is warm. Instead play up the look by adding a spritz of MAC’s Fix+ for an instant dewy glow. Fix+ is also infused with vitamins and minerals that are a real treat for your skin!

Posted by Rhia Amio, Make-up Artist www.artistrhi.com | 10:16 PM | , , , , | 0 comments »

To achieve Jackie's smoldering look, try these key products:
1. MAC Paint Pot in Blackground - I layered this black cream eyeshadow atop black powder eyeshadow on the outer corners of the eye to increase longevity of the eye make-up application. Dark colours become more obvious (than light colours) when they crease, so be sure to apply a base of neutral cream eyeshadow or your concealer atop the eyelids to help the application last longer.

2. Rimmel Eyebrow Pencil in Dark Brown - I've preached about the kit essential factor of this pencil before, but with more intense eye make-up, a well-polished brow is necessary. For Jackie's brows, the pencil was used to refine the shape and add balance to the face. Read more on Rimmel's Eyebrow Pencil here.

3. Maybelline Lash Stiletto Mascara - Curl those eyelashes for an eye-opening effect, and add a couple of coats of Lash Stiletto to take your lashes to new heights. I'm a big fan of switching up my mascara and trying out new all the new ones that hit the market, but Lash Stiletto has been a staple for a few months now. See the Product Review on Lash Stiletto here.

Finish the look by adding a bit of blush and a neutral pink coloured lipstick and/or gloss. The aim here is to keep the rest of the look light, so as not to detract attention away from those smoky eyes!

Posted by Rhia Amio, Make-up Artist www.artistrhi.com | 8:00 AM | , , , , , , , | 3 comments »

WEDDING | Kieu

2009-06-04

Here are a few shots of Kieu's bridal make-up from a couple of weekends back (yes sorry, I'm still catching up on a bunch of pics!). Kieu has such perfect skin (literally just like a doll's) and gorgeous features...which means my 'work' here was pretty much effortless. We kept the look to soft pink tones to brighten the skin and produce a healthy glow.

For a clean and classic bridal look like Kieu's, try incorporating these key products we used:
1. FACE atelier: This silicone-based foundation sits atop the skin and gives it a soft, dewy finish. Just one layer produces medium coverage and you're camera ready! (NOTE: If your skin is more oil-prone, opt for another foundation. The silicone base will have too much slip to carry you through the day).

2. NARS Orgasm - The name says it all: get that natural flush with a swish of a brush and NARS Orgasm blush (ok, I was trying too hard to rhyme there. That's why my career as a rap artist never flew). Orgasm is a universally flattering colour that works well on many skin tones. Just smile, dust on the apples of the cheeks and blend well!

3. MAC Twig Lipstick and Pink Lemonade Lipglass - Stick to a neutral (rather than fluorescent!) pink and top with gloss for a pucker-ready pout!
----

Congratulations, Kieu! All the best and thanks for letting me take part! :)

See more of Kieu.

Posted by Rhia Amio, Make-up Artist www.artistrhi.com | 9:00 PM | , , , , , | 0 comments »

I spoke of the refreshing properties of rosewater the other day with MAC’s Fix+Rose, but you don’t necessarily have to go to a major cosmetics counter to get the effect. This Artist Tip came courtesy of my awesome airbrushing teacher, Paulina, who herself is an experienced Professional Make-up Artist and savvy make-up consumer. Rosewater and Glycerin is one of those underestimated homemade concoctions you would probably look past in your grandmother’s make-up cabinet, but the all-natural formula is a treat for your skin! Spritz the product a couple of times on the face before applying lotion for a soothing mist that helps to revitalize and moisturize the skin. You can also spray it on the face after you apply make-up to help the make-up settle into the skin (works best when used after applying glycerin-based make-up products). You can find rosewater and glycerin at your local health food store, at a steal at under $10 per bottle! Grab a bottle – your skin will thank you.

Related posts:
PRODUCT REVIEW | MAC Dazzleglass and Rose Romance Collections
ARTIST TIP | All

Posted by Rhia Amio, Make-up Artist www.artistrhi.com | 1:00 PM | , , , , | 0 comments »

macaprilcollections
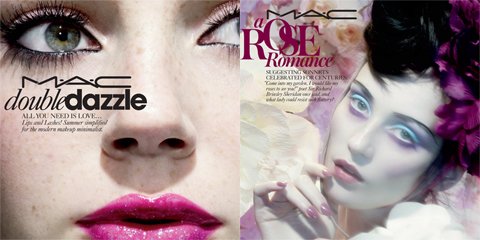
This past April was another lovely month for new MAC Collections. The aptly named Dazzleglass collection is a brilliantly sparkling set of glosses and mascaras. Both the glosses and mascara have finely-milled specks of glitter that catch the light beautifully and give that perfect lighter touch for spring make-up. The sheer glosses can be worn on their own for a glossy sparkle, or can be layered over your favourite lipstick for a different look [try Moth to a Flame (a sparkling pearly pink) or Goldylocks (a high voltage gold shimmer gloss)] pictured below . I love that the Dazzleglass formula isn’t overly sticky, as past MAC glosses. Stock up on these while they are available, as they are limited edition!The ad campaign for a second collection, Rose Romance, completely drew me; I just had to see what the collection was about from looking at the promo items! The collection features a few limited edition items and permanent staples to the MAC line-up. The colours of the collection are more subtle (think romantic), which are perfectly in tune with the lighter make-up routines we turn to for the warmer seasons ahead.

Fix+ Rose!
Delightfully, the Rose Romance colllection also comes with a new variation on my beloved Fix+ (a post-make-up moisturizer and setter that adds the perfect glisten to your application. I’m a huge fan!). Fix+ Rose is infused with all the good-for-your-skin stuff as the original formula, but also comes with the refreshing scent of rosewater. The rosewater scent has calming effects on the psyche and on your skin. It’s the perfect finishing touch and treat to your own make-up application or that of your client!

top photos courtesy of MAC Cosmetics

Posted by Rhia Amio, Make-up Artist www.artistrhi.com | 8:00 AM | , , , , , , , , , | 0 comments »

Q: What do you recommend for cover-up? I'm looking for something light and not super expensive.

A: Perfect question. Spring is the time to lighten up when it comes to make-up, and considering the economic forecast of late, finding products that are affordable are definitely in season as well! (The recessionista chic movement cometh)!

If you have healthy skin and are just looking to add a light foundation to your make-up routine, opt for a tinted moisturizer. A tinted moisturizer will add a hint of colour and help to balance out the skin, creating a more even tone. It provides the most minimal coverage of all foundation types, while still producing a polished glow. Set the application with a light veil of powder. The powder will help to keep the product in place and tone down any excess shine.

Remember to still camouflage those “problem” areas (i.e. undereye circles and blemishes) with your trusted concealer; Even though ‘tis the season to go lighter with face make-up, it doesn’t mean you want to sacrifice that coverage where it counts!!

Recommended products:
Cover Girl Smoothers Tinted Moisture (best value)
Stila Tinted Moisturizer
Laura Mercier Tinted Moisturizer

ARTIST TIP: Use that liquid foundation you’ve been sporting for winter and add your face moistuizer to create your own homemade tinted moisturizer. Use approximately one part foundation and one moisturizer for the mixture (or add more or less moisturizer depending on how thin you want the consistency of the formula to be). Mix well and voila - your very own homemade tinted moisturizer…instantly! (and in true recessionista form!)

Posted by Rhia Amio, Make-up Artist www.artistrhi.com | 11:30 PM | , , , , | 0 comments »

Q: Hi Rhia, I know this may sound silly that I don’t know this, but how often should I be washing my brushes?

A: Hardly a silly question (and the topic is totally in tune with yesterday’s post about spring cleaning!)! I actually get asked this question pretty frequently by clients. Quality brushes are quite the investment, and the problem is that many women aren’t taught how to maintain them properly…and not taking care of them properly can translate into the brushes not lasting as long as they should!

To clean your brushes, use a gentle brush shampoo* and massage it into the bristles to cleanse it throughly. Rinse well to clear the bristles of all shampoo suds. Blot the brush a couple of times on a papertowel to get rid of excess water and sculpt the brush back into shape. Hang over a counter and let air dry overnight.

*Instead of a brush shampoo, you can swap hair shampoo and even dish detergent (international celebrity make-up artist Laura Mercier does this!) to cleanse your brushes.

In terms of frequency for washing brushes, you’ll notice how brushes work and apply better the more you clean them. But let’s be realistic - in the life of the everyday woman, amongst your tall list of things to do daily, brush washing likely isn’t one of your top 10. As a general rule of thumb, you can wash the brushes you use for powders and eyeshadows after multiple uses (I would say at most after every 3 uses, but even that's pushing it!). For cream and liquid make-up products (such as concealers and foudations), you should ideally clean these everyday (or after each use). Again, the more often you clean your brushes, the better the results will be for your make-up application.

Keep these tips in mind to help ensure your quality brushes make you and your make-up look good – for a long time!

Posted by Rhia Amio, Make-up Artist www.artistrhi.com | 11:30 PM | , , , , , , , , , | 0 comments »

Each time a new season rolls around, it’s a great time to filter through your make-up kit to see which items need tossing and replacement. Many of us are guilty for holding onto make-up products past their prime. But for the sake of being sanitary and good to your skin, a little due diligence when it comes to cleaning out your kit is essential. Besides, any excuse to go make-up shopping always works for me!

Here are some telltale signs that your make-up kit is in need of a spring make-over:

1. products start smelling funky
i.e. mascara – Once opened, mascara has a life span of approximately 3 to 4 months. You’ll notice a funky smell once it starts going bad and the formula will be more prone to clumping. Toss.

2. products don’t glide on in the same manner they use to
i.e. powder eyeshadows – If you’re digging away at that eyeshadow and find the pigment just isn’t as potent as it used to be, it’s likely time to replace! Your eyelids will thank you once you start applying that new, creamy eyeshadow that just glides without having to pull at the delicate eye area !

3. liquid products have separated
i.e. foundations – No amount of shaking can get rid of that orange tinge that happens when your foundation has been kicking around for too long. Be good to your skin, and replace your foundation every 18-24 months (or sooner if it looks like it’s separating!).

4. you haven’t bought anything new in a couple of years
No-brainer. Go treat yourself to a fresh new look and properly ring in spring!

For more info on when it’s time to toss, see this post here. Happy Spring Cleaning!

ARTIST TIP: Waaait - don’t throw out everything just yet! Hold on to any MAC containers for the Back to MAC recycling program, where you can get a free lipstick (or equivalent) for recycling your old purchases!

Posted by Rhia Amio, Make-up Artist www.artistrhi.com | 11:30 PM | , , , , , , , , | 0 comments »

Q: Hi Rhia, Thanks for all your tips on using shimmery make-up for my wedding day. I know you said a matte face will always photograph better, but I want a sheer, dewy look to my skin (and without it looking sweaty!). I find when I use all matte products, my skin looks dull and flat. Are there any alternate methods you can recommend so I can still achieve that dewy kind of look while maybe being not-so-dewy? I’d rather not have a flat powdered face for my wedding day photos!

A: Great question. The dewy look is definitely a gorgeous one – who doesn’t want a fresh and healthy glow on their Big Day (or everyday for that matter!)? But on a day like your wedding, it’s definitely a risky look to take on (after all, weddings don’t come around that often and we want to make sure the make-up is done right on such an important day!). In terms of combatting the flat make-up look, try these artist tips for a fresh finish that's a happy medium between a polished matte look and a healthy glow:

1. Moisturize before your make-up application.
Let the moisturizer sink in for at least 10 minutes, but ideally, let it set for 30 minutes before proceeding with your make-up application.

2. Use powder sparingly, paying particular attention to the oil-prone T-zone area.
Use a large powder brush and loose powder to set your initial foundation application. Pack a touch-up kit for later in the day with oil blotting tissues and a pressed powder. Use the tissues to absorb excess oil, and then dab on pressed powder to refresh your look (the pressed powder will cause less of a mess than loose powder, which is good because you'll have your dress on at this point!)

3. If you find the finished look is still too matte-looking for your liking, try using MAC's Fix+.
Hold the bottle an arm's length away from your face and spray a couple of times to add a light mist of moisture to the face. Fix+ is infused with vitamins and minerals that help calm your skin, add radiance and finish your make-up! Lastly, powder down the T-zone once more to make sure this oil-prone zone is in check!

Hope this helps! All the best for your wedding day!

Posted by Rhia Amio, Make-up Artist www.artistrhi.com | 7:30 PM | , , , , | 0 comments »

Q: I really appreciate your review on Vichy's Dermablend Concealer, and I'm excited I stumbled upon your blog! It looks very fun and informative. I do have a question on this concealer. I would love to purchase it, but I'm unsure which shade to get. I'm Asian, but not with pale light skin, yet not exactly considered dark. Just very typical Chinese. Would you recommend the light, or the nude? For concealers, is it safer to go lighter or darker, or are either bad? Thanks!
-nudeface

A: Thanks for the wonderful comments and question. Unfortunately, it's difficult for me to recommend which concealer colour you should use without seeing you in person! But with concealer, going lighter is absolutely fine, provided that it is only a couple of shades from your own skin tone. The reason people primarily choose a lighter toned concealer is to brighten dark undereye areas. With this method, you still have to be sure to blend your skin tone matching foundation atop so that the colour on the face is seamless. If you are trying to conceal blemishes, I would choose a concealer colour that matches your skin tone exactly. Using a lighter toned concealer on this area of the skin would only serve to highlight the uneven surface. Be sure to blend well around the edges for a flawless finish.

I'm of Asian background myself and I mix #20 Nude and #30 Medium to get the right shade for covering up the prominent circles under my eyes. I use the #30 Medium on its own to cover up blemishes. Yes, it's a bit more pricey buying two concealers versus one, but investing in quality foundations and concealers is definitely worth the splurge! Think of it this way: you'll have twice as much product to work with and it will last you that much longer!

Oh the ways I rationalize my love for make-up! Hope this helps!

Related posts:
PRODUCT REVIEW | Vichy Concealer
PRODUCT REVIEW | Concealer is a Girl's Best Friend

Posted by Rhia Amio, Make-up Artist www.artistrhi.com | 11:30 PM | , , , , , , , , | 1 comments »

Last Friday was a gorgeous day here in Toronto, with unseasonably warm temperatures giving us our first hint of spring! In the world of make-up, spring signals a movement towards lighter and brighter trends in beauty products: the smoky eye gets reinterpreted with fresh spring colours, while sheer glosses take the place of matte lipsticks. The upcoming season is all about being playful with make-up, so give those winter blues the official goodbye and add a little colour to your routine - just in time for spring!

Smoky TealThe spring smoky eye was redefined on the runway at the Gucci Spring 2009 show. Models strutted down the runway with smoky eyes in modern shades of teal under the direction of legendary make-up maven and Key Artist, Pat McGrath. To keep the look 2009 rather than dated, use a pale shade of teal (and avoid white shimmer) when highlighting the brownbone. Add dramatic black eyeliner to define the eyes and smudge away!

How to Wear It: Teal smoky eyes can be a questionable make-up option for places like the corporate office. (Insert visions of Mimi from the Drew Carey Show). Save your efforts for the evening and try this look for a fun night out on the town.


Purple PoutPurple lips were the beauty focus on the runway at Zac Posen. The look was the spring derivative of the dark, black (yes, black) lips that were all the high-fashion rage last fall. To balance the strong lip look, the rest of the make-up was kept soft and subtle.

How to Wear It: Hello newsflash! Runway looks aren’t necessarily intended to look good on us non-model people. But heck, even models have problems pulling off true purple lips (i.e. see above)! From runway to realway, purple isn’t the most flattering colour for the pouts of real women. Instead, try a softer interpretation of the look in stain and gloss formulas with purple-inspired shades of plum and mauve.


Natural BeautyNatural beauty was also a staple look for Spring 2009, as featured on the runways of Tommy Hilfiger and Chloe. Despite appearances, the natural look does require a bit of work to achieve that polished natural look. When done right, you'll have that effortless "I just woke up and I look this good" kind of look.

How to Wear It: Wear this look anywhere - it's as easy as five quick steps!
1. Even out the skin tone with foundation and concealer.
2. Set the application with a light dusting of loose powder
3. Brush brows into place (use clear mascara to keep unruly brows in check).
4. Add a bit of blush to the apples of the cheeks for a wide-awake look.
5. Lastlly, dab a balm on the lips to give some moisturizing shine to the lips!

All photos courtesy of Style.com

Posted by Rhia Amio, Make-up Artist www.artistrhi.com | 11:30 PM | , , , , , , , , | 0 comments »
Related Posts with Thumbnails