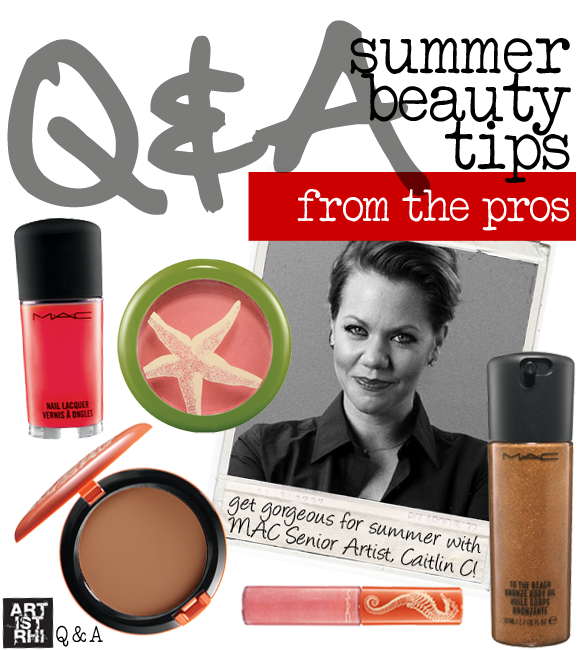
artistrhi had the chance to chat with MAC Senior Artist, Caitlin Callahan for some tips on getting gorgeous for summer! Check out the Q & A below!
1. What are some key products to a quick and easy beauty routine for the summer?
A cream bronzer, tinted moisturizer, lipgloss, waterproof mascara. In the summer I ease off the powders for my clients and myself – the sun reveals all. It’s like God’s own HDTV. Lets see what I have in my makeup bag…Tarnish Eye Kohl, To The Beach Cream Bronzer, Studio Moisture Tint (dark), #109 brush, Splashproof Lash Mascara and Viva Glam V lipglass. Perfect, low-maintenance summer face. For eye shadow, try a Paintpot instead of a powder (Waterproof!!)
2. What are some common make-up mistakes women make when the weather heats up?
Using too much foundation and powder. Lay off! If there’s something that really needs concealing (like the friend that pops up on your chin right before a big date), use concealer. If you’re super oily, use a matte primer before your makeup instead of powder on top.
3. Any make-up tips for those of us that are sensitive to the sun but want that bronzed glow?
Start with SPF 50. Then apply a sheer coat of tinted moisturizer (you can go one shade darker because it’s so sheer.) Then apply bronzer (the cream ones look most natural) – start under you cheekbones and sweep towards your nose. As the product wears off your brush, apply to forehead, apples of cheeks and a touch on the nose. Super sunkissed.
4. I've been told powder can look too "heavy" during the summer season, but I have a very oily T-zone so I feel like I need it especially during the summer. Can I improve my skin care routine or are there other products that can help me combat shine?
See above. Start with MAC Matte through the t-zone after you’ve applied moisturizer. You’ll see what happens…it’s amazing!
5. My make-up seems to slide off with the summer heat! Any tricks of the trade to help prevent my eyeshadow from creasing and my foundation from melting?!
Primers are magical. But I’d also recommend easing off on the foundations and powders. Choose a Paintpot that you love (faves: Indianwood, Rubenesque and Artifact).
The latest MAC collection, To the Beach, is summer inspired and available as of May 29th at MAC stores and MAC counters. Product reviews of the collection's Cream Bronzer to come! I'm loving it so far...I've been on a cream blush/bronzer kick as of late! :)
A huge thanks to Caitlin for answering our beauty questions! Be sure to follow Caitlin on Twitter for more beauty inspiration! :)
Images courtesy of MAC Cosmetics. Image layout by Rhia Amio.
It's been a while since I did a post for my aspiring make-up artist readers - when I came across this Be Your Brand tip in my inbox, I immediately thought it would be useful for anyone working towards their entrepreneurial dreams!
The tip comes courtesy of Victoria Colligan, Founder of Ladies Who Launch - an interactive site where aspiring female entrepreneurs can find tips and inspiration on how to launch their own business. Read the full scoop by clicking on the picture below:
Key points to think about from this tip for all us aspiring freelancers:
- You are a walking business card. You represent a brand.
Think about it - when you go for a job interview, you might practice a few mock questions, but you will always polish up your look if you want to make a good first impression. Same rule goes for when meeting with your potential make-up clients, present yourself well, as that first impression becomes associated with you, your skill level and your brand. I'm not saying to do avant-garde runway make-up to show off your make-up talent - consider your audience and what the job is for (i.e. corporate gig or bridal) - and dress (and do your make-up!) accordingly.
I know it's not always practical to have the time to be the glamorous one, especially for early wake-up calls and for when you're juggling all the things you have to do in a day. But it only takes a few items (i.e. concealer, mascara, coloured gloss, blush - you get the idea!) to take you from 'just-woke-up' to 'I-made-the effort'. As Colligan states, "it’s worth it to spend a little extra time to look clean, crisp and put-together". You are your brand! - It lends credibility to what we are doing and conveys passion around our venture
Dressing the part helps to convey the message that you are a professional and that you take what you do seriously. Talk the walk, but walk the talk, etc. - Customers are only human and they will subconsciously judge your inside by what they see on the outside.
For an industry based on appearance like make-up, you can't deny that people may judge from the outside in, albeit subconscious. Your overall presentation (and yes, how you do your make-up) will be key to getting your foot in the door and eventually knocking those doors down!
PRODUCT PREVIEW | MAC's Riveting
2010-02-18
Riveting is MAC's rocker glam collection for Spring 2010. With heavy metal textures and vibrant loudmouth colours, Riveting is hardly a collection for the fading wallflower. For me, the most anticipated items of this collection have to be the matte nail polishes. It's honestly about time that a make-up powerhouse like MAC finally jumped the matte nail polish bandwagon (...or maybe it's a couple of seasons too late?!). Nail polishes in Studded Matte (think rocker glam silver sparkle but matte) and Wham, Bam Glam (a dark taupe) are definitely the most riveting pieces of this collection for me!
MAC's Riveting will be available as of February 18, 2010 at MAC stores and MAC counters.
BEAUTY SHOT | Melody
2010-01-26Meet lovely Melody, one of my June 2010 brides! Similar to Caroline, Melody wanted a fresh and clean bridal make-up look.
Here are the keys to getting Melody's fresh and pretty bridal look:
1. Balance out the skin tone with foundation and concealer. Blend well and set it with powder.
2. Smile and dust a peachy-pink blush on the cheeks (i.e. NARS Orgasm, Benefit Coralista)
3. Fill in the eyebrows. (I like to use a pencil and lightly fill in the brows, and then reinforce the pencil with a light application of eyebrow matching powder).
4. Add false eyelashes + mascara.
Wearing falsies is one of those simple things you can do to give the illusion of bigger eyes, without having to overdo your eyeliner/eyeshadow (more eyeliner and eyeshadow can make it look more obvious that you're wearing make-up). It's similar to when you highlight your hair, and people suddenly notice there's something different about you, but they can't put their finger on what...or maybe it's the fact that you'll be batting those lashes more? :)
5. Finish the look with a coral lipstick topped with gloss.
The coral lipstick was actually Melody's own that she uses everyday. We did try other lip colours, but understandably Melody felt best in her coral shade. She asked that we use it during the session, as she wanted to 'look like herself' on the Big Day....and that's absolutely important!! For brides-to-be out there, if you're scheduling your bridal make-up trial and there are certain make-up items you swear by, I encourage you to bring your tried and tested products to your session. It will help you collaborate with your artist on your Big Day look and you'll get better results from the session!
BEAUTY 101 | Make-up for Headshots
2010-01-12Here are some make-up tips to help get you picture perfect for that headshot (or even just as an easy everyday look!):
1. Groomed brows.
The power of a good brow should never be underestimated! A well-defined and well-kept brow frames the face, makes it look slimmer and also means you don't have to wear as much eyeliner! Eyebrows that are too thin can make you look aged, while brows that are too thick can be distracting from your best features. Finding that happy medium? See this post for some brow-know-how.
2. Even out skin tone with foundation and concealer.
A photograph can tend to highlight and saturate any uneven tones in the skin (i.e. undereye circles, redness, etc.). For undereye circles, use a peach or a pink based concealer to lift the dark tone and then top it off with your skin tone matching concealer to blend it with the skin.
3. Set with powder and touch-up.
Set your foundation and concealer with powder to help keep it in place. Be prepared to powder the T-zone in case it gets shiny under hot studio lights.
4. Contour the cheekbones with a darker shaded powder and apply a peachy-pink blush for a healthy glow.
Use a contouring powder (or a shade of matte powder that's 2-3 shades darker than your skin tone) and apply it just under the cheekbone to define the face. Blend well. Finish the cheeks off with some blush: a little blush adds contrast and helps to make sure you don't look washed out in the finished photo. With blush, avoid shimmer textures and also blend well (blending...that's key!).
5. Avoid heavy eyeliner and eyeshadow.
Heavy eye make-up can look dated, but ultimately it draws attention away from the overall picture and what should be the focus of the shot (you!). With heavy eye make-up, suddenly your photo can become 'look at this nice make-up' rather than 'look at this pretty face'. To avoid being overpowered by eyeliner, keep any eyeliner thin and tight to the eye. You can even skip lining altogether, and instead simply push the eyeliner into the base of the lashes to define the lashline and make the lashes appear fuller. Use eyeshadow colours that closely match your skin tone and definitely avoid shimmery/frosty textures. Curl your eyelashes and apply two coats of mascara.
6. Keep the lips neutral and avoid colours that are too 'unnatural' looking.
A safe shade is always no more than 2 shades darker than your own colour. Apply your lip colour and add a hint of lip gloss to add dimension and a healthy shine to the lips.
Now, all you have to do is smile...because that's always gorgeous! :)

Just in case you go a little overboard with the alcohol consumption this evening (it is New Year's after all!), here are a few quick make-up tips to help you nurse (and conceal) tomorrow's hang-over!
1. Moisturize!
If you didn't get the chance to do so the night (or early morning!) before, make sure you thoroughly cleanse the skin and remove any leftover make-up. Hydrate the skin by applying moisturizer, as alcohol dehydrates the body. Don't forget the lips - apply some lip balm to soften them for your lip application later.
2. Say bye to post-party eyes.
Use some eye drops to lessen any redness in the eyes, and an eye cream to help tone down any under-eye puffiness.
Concealer will make all the difference for telltale signs of a late party night (i.e. darkened undereye circles!). Use a peachy-pink concealer to brighten any dark undereye circles, and follow with your skin tone matching concealer to blend it all in.
Avoid eyeshadow colours that are red-based (like purple, mahogany and certain browns). Red-based tones tend to enhance any redness in sleep-deprived eyes. Instead, opt for a black or even a dark blue eyeliner to contrast the whites of the eyes, making them appear brighter. Top the eyes off by curling the lashes and adding 2 coats of mascara for a wide-eyed look.
3. Get (well, fake) glowing skin!
Apply bronzer in this prescribed 3-shape motion to build-up an even glow and bring life back to post-party dull and dehydrated skin. Smile and add some blush to the cheeks - this will help you look awake...even though you may not feel so awake right away!
4. Shine on with gloss.
As the finishing touch, apply a moisturizing gloss in a peachy-pink colour and you'll be ready for a new day...AND a new year!
NOTE | Holiday Shopping - Beauty Wish List
2009-12-09I must be the easiest person to shop for. Similar to an obsession as a young girl with Barbie dolls, with make-up I want it all and I can never have enough. I have plenty of stuff for the both the personal and professional make-up kit, and as cost-effective as I try to be with purchasing make-up items, I’ll inevitably find something new that I love. To ease the feelings of guilt, I use the terms ‘updating the kit' as an excuse to rationalize its purchase! After all, why would I use a product on one of my clients that I can’t say I’ve tried and swear by for myself? Right, Rhia…riiight.
One of the nice things about Christmas shopping is the abundance of gift sets. From fragrances to make-up, there are plenty of deals out there that give you more value for your Christmas shopping dollar. My favourite of all these are of course the make-up gift sets! You can get everything in ‘minis’ - mini brush sets, mini glosses, palettes.
Here are some gorgeous make-up sets that would make great gifts for those lucky, lucky people on your list (ahem...hint, hint…nudge, nudge).
Lancôme Juicy Tubes Holiday Set ($49 CAD)
Often imitated, but hardly duplicated, Lancôme's Juicy Tubes are a make-up classic. The Holiday Set includes eight glosses in shades that are both suitable for everyday wear or for a night on the town! The travel-sized tubes are perfect for popping in your purse or make-up kit, and with 8 shades to choose from you'll have a different one for every day of the week! The set includes two of my personal faves, Touch of Light and Miracle. Touch of Light is a pale cream gloss that looks gorgeous when worn on its own and when layered atop a lipstick. Miracle is a bubble gum pink with high-shine - can you say yum?!MAC Mischief Makers Pigment Sets ($38.50 CAD)
It happened to me the other day where I walked into my local MAC store to refill on ‘necessity’ items for my client kit, but somehow I ended up gravitating towards the holiday gift sets (they were packaged like candy - can you blame me?!). I ended up buying the necessity items I had originally intended AND a couple of gift sets. Well, sorta gifts...uhh, for myself - I mean the kit! There were many mini kits to choose from (believe me, I had to restrain myself from puchasing more!), but I instantly fell in love with the Pigment Sets. For anyone who's ever bought MAC Pigment before, you'll know the product lives up to its name and glides on amazingly intense! Yet for being as multi-purpose as they are, sometimes it's hard to use the entire jar, as you only need a little to get a concentrated look. The Holiday Pigment sets are an awesome value - you get 5 mini pigments for the price of $38.50 (one regular-sized pigment retails for $23.50), and although they're mini in size, the product will go a long way!
MAC also offers sets of mini glosses, mini brushes and palettes all at great prices. The gift options are endless...until they're sold out! Go early to avoid disappointment!
NARS Everlasting Love Palette ($87 CAD)
NARS holiday sets, you had me at hello. Guaranteed any make-up lover will fall in Everlasting Love with this NARS palette! The palette offers a winning combination of colours for achieving the coveted smoky eye plus nude lip look, across a variety of skin tones. Everlasting Love includes NARS best-selling shades Orgasm blush and South Beach the Multiple, along with four eyeshadow shades and four lip shades. Mix and match to your heart's content, and get holiday glam all in the convenience of one gorgeous palette. Time to write that note to Santa... :)
Oh Old Man Winter! Ok, I know we're not officially into winter just yet, but we might as well be with the colder weather AND the summer tan long gone by now!! If your skin is feeling a little lacklustre and you're in need of a little make-up pick-me-up, a cream highlighter is a great make-up product to insert into your routine! Here's my take on some tried and tested highlighters:
Laura Mercier Secret Brightener ($30 US)
Yves St. Laurent ($40 USD)
Industry celebrated and award winning Yves St. Laurent's Touche Eclat is a staple in the bags of make-up artists, beauty editors and models! This creamy highlighter gives smooth beautiful coverage in 4 different shades. Touche Eclat is marked at a hefty pricepoint of $40 USD, but the tube goes a long way (you only need to use a small amount per application!) Besides for a product touted as "8 hours sleep in a pen", the benefits of having it far outweight the costs! What I love about this cream highlighter is that it doesn't have any shimmer to it. I even like to swipe a stripe of it down the middle of the nose and blend it for a streamlined look!
Face Atelier
I swear by Face Atelier's foundations. The silicone-based formula is universally flattering to all skin types, but particularly a great choice for those with dry skin (and we all know with winter, everyone's skin is feeling a bit tighter/drier!). FACE Atelier's Ultra Sheer Pro highlighters are equally as lovable. The silicone-based formula glides on lightweight and blends easily into the skin. You can easily incorporate it into your routine by applying it overtop your foundation or adding it to either your foundation or moisturizer! Mix it with your foundation (ideally also silicone-based) for an instant dewy finish...or add a bit to your moisturizer and apply all over for a healthy and luminous skin glow! Ultra Sheer Pro comes in several tones including Opal (a pearl highlighter), Champagne (a pinky tone that can double as a blush), Peach (can also double as a blush) and Bronze (for a bronzed glow! self-explanatory!). Endless options, but always gorgeous looking skin!!
Benefit's Moon Beam
photo: SephoraImportant note:
Remember, a highlighting product will only work well on hydrated and healthy skin - it's not meant to replace a good moisturizer! :)
Q & A | Toning Down Prominent Cheekbones
2009-11-05
Q: I have naturally prominent cheekbones which I would like to tone down. A lot of articles and videos out there are mostly focused on how to sculpt the cheekbones to make it pop. But in my case, I want it to appear more subtle and I can't seem to find any reference on how to do that. I wonder how you could achieve that? :)
A: First off, count your blessings - I'm sure you know that high, prominent cheekbones are considered an attractive attribute!! :) Those of us lacking prominent cheekbones spend plenty on products (and time!) trying to make our own cheekbones stand out...so, consider us all envious!
Ok, all envy aside, getting to your question...in order to "play down" your cheekbones, you have a couple of options:
1. Play up your other features to bring them 'forward' as well.
Add eyeliner to your top lashline, curl your lashes and add some mascara to make those eyes pop. Gloss the lips up with some shine to draw attention away from your cheekbones.
2. Add some blush.
I've heard this before where sometimes clients think they have "too much cheek". Although you may think it to have the opposite effect, applying blush can help to reduce a cheeky surface area. Depending on your skin tone, choose a peachy pink, soft pink or coral to complement your cheeks (as a reference, use the colour your cheeks turn when you're flushed).
3. If a blush is too bright for your liking, opt for a matte bronzer to accent the cheeks.
A deeper tone will create the illusion of this area of the face receding. Apply in this prescribed motion to avoid a streaky look (rather than a harsh contour, keep the bronzer soft and blended or else you'll end up drawing unwanted attention to the cheeks!)
Hope this helps, YT!
If you have a make-up related question you'd like to ask, shoot an email to me at rhia[at]artistrhi[dot]com. I look forward to hearing from you!
Q & A | Products for Back to School
2009-09-12Q: I’m going back to university in a week, and wonder if there are any products you would recommend that could help save some time but make me look great in the morning!
A: I am probably the worst person to talk to about a “quick” morning beauty routine. While I was away at university, I would purposefully sacrifice sleep or be late for class - all in the name of getting my full 40 minutes of make-up in the morning! But of course there are those days where you’re absolutely pressed for time and 40 minutes isn’t exactly reasonable. Fortunately, there are many products that do double-duty (and some steps you can skip) to help spare you time in the morning, and more importantly, get you looking fabulous and wide-eyed (even when that venti latte hasn’t kicked in just yet)!!
Try these get-ready tips when pressed for time in the morning:
1. Use a tinted moisturizer.
A tinted moisturizer adds a hint of colour and moisture to the skin in one easy step. No need for a brush - just blend the product well into the skin using your fingers!
Approximate time needed: under a minute
2. Use a concealer.
I find that with age (ahem, experience) and late nights of blogging my undereye circles can be quite pronounced come the morning. One of my absolute morning make-up must-dos is concealer – I look alien without it. Since my undereye circles are particularly complex, I actually use two products to help brighten the area up: a) Peachy-pink concealer to lighten the dark brown/purples undertones of the circles (try Laura Mercier's Secret Concealer)and then b). a flesh-toned concealer to blend the neutralized area with my own skin tone. I find using concealer makes the world of difference on my own face - if I had even less time to get ready, concealer is still one of those products that I would be sure to sneak in!
Approximate time needed: 3 minutes
3. Add some eyeliner + mascara.
Line the upper eyes to help open up the eye area and make the whites of the eyes appear brighter. (Big-eyed beauties can usually get away with just curling the lashes and adding mascara, but my eyes need a little more attention!). You can use whichever you prefer: a pencil, gel or liquid liner. I always recommend a gel or liquid liner simply because they last. Curl your lashes and top with 2-3 coats of your go-to mascara.
Approximate time needed: 5 minutes
ARTIST TIP: To keep the eyeliner long-lasting, apply a layer of eyeshadow primer in a neutral colour atop the eyelid.
Products to try: Cover Girl's Line Exact - the felt tip of this product makes lining the eyes as easy as using a marker! Recommended for novice to pro liquid liner users.
4. Add an instant glow with a luminscent bronzer.
I use a large-sized powder brush to apply bronzer in the 3-shaped motion along the forehead, cheekbones and underneath the jawline. Then, I dust any excess along the bridge of the nose. Keep the bronzer concentrated on the prominent areas of the face (think of where the sun hits the face first) and don't overdo it. Remember with bronzer, less is more and orange is just...bad.
Approximate time needed: under 1 minute
ARTIST TIP: Dust a layer of loose translucent powder on the face first for the bronzer to glide on smoothly.
Products to try: NARS Bronzers - these glide on like a dream! The product itself is highly pigmented so a couple of swipes with the brush is all you need.
5. Dust a peachy-pink blush on the apples of the cheeks.
Peachy-pink is a universally flattering colour (just think Orgasm by NARS - the much-loved product by industry insiders and beauty junkies!). Simply smile to make your apples of the cheeks more visible and add blush using a brush. Blend well. The effect is a soft and healthy glow that adds an instant warmth to your morning complexion.
Approximate time needed: 1 minute
Products to try: NARS Orgasm. Just like their bronzers, NARS blushes glide on smoothly, making them super easy and pretty much foolproof to blend.
6. Skip the lipliner and lipstick. Just gloss it up!
Use a gloss with a bit of colour instead of lipliner and lipstick, which can be way more time consuming. When choosing a gloss, opt for a colour that is two shades darker than your own lip colour. Remember that the gloss will glide on sheer, so a colour that looks darker as a gloss will work with your own natural lip colour and appear more transparent. As the day goes on, the gloss will be easier to touch up as well.
Approximate time needed: 1 minute
Products to try: MAC's Lychee Luxe, Maybelline Pink Sorbet. These peachy pink glosses are flattering on nearly all skin tones and will work well to complement your blush colour!
So there it is in about six (ok, more) steps. It’s not exactly a five-minute routine, but what I do like to stress is to focus on your favourite feature and make that stand out. If it’s your eyes that you like to draw attention to, focus on eyeliner, mascara and some gloss. If your lips are your favourite feature, go in with your lip brush, lip liner, lipstick or lip gloss (or all of the above!) and add some mascara to the lashes. If you’ve got great skin to show off, add some bronzer and blush for a gorgeous glow!
Beauty doesn't have to be complicated - just take a few minutes for yourself in the morning and you'll be amazed at how much better you can feel throughout the day!
MORE TIPS:Hope that helps!
Here are a couple of things you can do to ease the morning routine:
Groom your brows.
A well-maintained arch is sometimes all the make-up you need. Good brows frame the face and polish off any make-up look. To get good brows, check out this post.
Maintain a proper daily cleansing routine and apply moisturizer after washing your face.
You won’t feel the need to use foundation when your skin is naturally glowing. Maintaining a consistent cleansing routine is essential to glowing skin. (We all know the aftermath of not removing last night’s make-up: raccoon eyes + increased chance for break-outs!) Proceed to apply moisturizer after each time you wash your face.
Rhia
If you have a make-up related question, please feel free to email me at rhia[at]artistrhi[dot]com.
BEAUTY SHOT | Jackie
2009-06-19
To achieve Jackie's smoldering look, try these key products:
1. MAC Paint Pot in Blackground - I layered this black cream eyeshadow atop black powder eyeshadow on the outer corners of the eye to increase longevity of the eye make-up application. Dark colours become more obvious (than light colours) when they crease, so be sure to apply a base of neutral cream eyeshadow or your concealer atop the eyelids to help the application last longer.
2. Rimmel Eyebrow Pencil in Dark Brown - I've preached about the kit essential factor of this pencil before, but with more intense eye make-up, a well-polished brow is necessary. For Jackie's brows, the pencil was used to refine the shape and add balance to the face. Read more on Rimmel's Eyebrow Pencil here.
3. Maybelline Lash Stiletto Mascara - Curl those eyelashes for an eye-opening effect, and add a couple of coats of Lash Stiletto to take your lashes to new heights. I'm a big fan of switching up my mascara and trying out new all the new ones that hit the market, but Lash Stiletto has been a staple for a few months now. See the Product Review on Lash Stiletto here.
Finish the look by adding a bit of blush and a neutral pink coloured lipstick and/or gloss. The aim here is to keep the rest of the look light, so as not to detract attention away from those smoky eyes!
WEDDING | Kieu
2009-06-04
Here are a few shots of Kieu's bridal make-up from a couple of weekends back (yes sorry, I'm still catching up on a bunch of pics!). Kieu has such perfect skin (literally just like a doll's) and gorgeous features...which means my 'work' here was pretty much effortless. We kept the look to soft pink tones to brighten the skin and produce a healthy glow.
For a clean and classic bridal look like Kieu's, try incorporating these key products we used:
1. FACE atelier: This silicone-based foundation sits atop the skin and gives it a soft, dewy finish. Just one layer produces medium coverage and you're camera ready! (NOTE: If your skin is more oil-prone, opt for another foundation. The silicone base will have too much slip to carry you through the day).
2. NARS Orgasm - The name says it all: get that natural flush with a swish of a brush and NARS Orgasm blush (ok, I was trying too hard to rhyme there. That's why my career as a rap artist never flew). Orgasm is a universally flattering colour that works well on many skin tones. Just smile, dust on the apples of the cheeks and blend well!
3. MAC Twig Lipstick and Pink Lemonade Lipglass - Stick to a neutral (rather than fluorescent!) pink and top with gloss for a pucker-ready pout!
----
Congratulations, Kieu! All the best and thanks for letting me take part! :)
GET THE LOOK | Pretty in Pastels
2009-03-23
If you’re having visions of your mom wearing her Sunday’s best on Easter when I say the word ‘pastels’ – never fear – pastels can be modern too!! Shades like wasabi green and pale pink are the latest shades making waves for spring 2009.
How to Apply:
Working with pastels is super easy, the lightly shaded range of colours are a breeze to blend and not as obvious (as darker eyeshadows) if they start to crease. I like to always begin eyeshadow application by first layering on a neutral-toned cream eyeshadow as a base (see here for more info on cream eyeshadows). Use a brush or a sponge-tip applicator to deposit the majority of the pastel eyeshadow atop the eyelid, and soften the edges by blending into the crease. Apply eyeliner as desired (try a cat eye look to really be in tune with the season’s trends). Curl your lashes and apply two coats of mascara.
Complete the Look:
For the runway look, the rest of the face was kept quite neutral - even the lips were downplayed with concealer applied atop. To interpret the look for the realway, we want to avoid looking washed out and add some definition. Dust on a contouring powder or neutral coloured blush, and top the lips off with a pale pink gloss…and voila - pretty in pastel!
Artist Tip:
One of my fave pastel palettes is by Dior in Mystic Jade (as pictured above). The great thing about going pastel is that you don't necessarily have to purchase it from a department store; you can easily score some deals on products in your local drugmart!
GET THE LOOK | Spring 2009 Beauty Trends
2009-03-10Last Friday was a gorgeous day here in Toronto, with unseasonably warm temperatures giving us our first hint of spring! In the world of make-up, spring signals a movement towards lighter and brighter trends in beauty products: the smoky eye gets reinterpreted with fresh spring colours, while sheer glosses take the place of matte lipsticks. The upcoming season is all about being playful with make-up, so give those winter blues the official goodbye and add a little colour to your routine - just in time for spring!
Smoky Teal
The spring smoky eye was redefined on the runway at the Gucci Spring 2009 show. Models strutted down the runway with smoky eyes in modern shades of teal under the direction of legendary make-up maven and Key Artist, Pat McGrath. To keep the look 2009 rather than dated, use a pale shade of teal (and avoid white shimmer) when highlighting the brownbone. Add dramatic black eyeliner to define the eyes and smudge away!
How to Wear It: Teal smoky eyes can be a questionable make-up option for places like the corporate office. (Insert visions of Mimi from the Drew Carey Show). Save your efforts for the evening and try this look for a fun night out on the town.
Purple Pout
Purple lips were the beauty focus on the runway at Zac Posen. The look was the spring derivative of the dark, black (yes, black) lips that were all the high-fashion rage last fall. To balance the strong lip look, the rest of the make-up was kept soft and subtle.
How to Wear It: Hello newsflash! Runway looks aren’t necessarily intended to look good on us non-model people. But heck, even models have problems pulling off true purple lips (i.e. see above)! From runway to realway, purple isn’t the most flattering colour for the pouts of real women. Instead, try a softer interpretation of the look in stain and gloss formulas with purple-inspired shades of plum and mauve.
Natural Beauty
Natural beauty was also a staple look for Spring 2009, as featured on the runways of Tommy Hilfiger and Chloe. Despite appearances, the natural look does require a bit of work to achieve that polished natural look. When done right, you'll have that effortless "I just woke up and I look this good" kind of look.
How to Wear It: Wear this look anywhere - it's as easy as five quick steps!
1. Even out the skin tone with foundation and concealer.
2. Set the application with a light dusting of loose powder
3. Brush brows into place (use clear mascara to keep unruly brows in check).
4. Add a bit of blush to the apples of the cheeks for a wide-awake look.
5. Lastlly, dab a balm on the lips to give some moisturizing shine to the lips!
All photos courtesy of Style.com
Q & A | Crown Brushes Review Revisited
2009-03-04
Q: hi Rhia, I saw your post about Crown Brushes and was wondering what's your opinion of Crown brushes now that you've had the chance to use them for a while? I'm hoping to build a brush collection for my own everyday use, so I was wondering if I should buy Crown or maybe get brushes from Sephora or MAC? What do you think?
A: Thanks for the question! I still like the brushes for the original purpose I had bought them – to build my make-up artist kit and have back-up brushes for consecutive appointments. After getting the chance to work with them, it turns out my favourites from what I purchased are the foundation brush, large powder brush and kabuki brush. The brushes apply and blend product well, and feel smooth against the skin. One thing I did note when washing the large-sized brushes (blush brush, powder brush) was that the dye bleeds slightly once wet. Small price to pay for such an affordable line of brushes!
For your own personal use, it doesn't hurt to invest in a really good set of quality brushes. They feel better on your skin (and your skin deserves to be pampered!). As long as you properly take care of the brushes, they will last you a long time. You can find great quality brushes through Crown, Sephora, MAC and other department store brands. My first two professional brushes ever are by MAC and were given as a gift to me back in high school. The brushes are still in good condition to this day, and I’ve obviously gotten great use out of them as high school was a long time ago! For the larger sized brushes especially (i.e. powder, blush brushes), you'll feel and see the difference in how the make-up is applied. For that reason alone, quality brushes are definitely worth the investment!
Be sure to check out these sites/stores:
MAC Cosmetics
Industry Cosmetics (for Crown Brushes)
Sephora
Related posts:
PRODUCT REVIEW | Splurge vs. Steal Part I - Face Brushes
PRODUCT REVIEW | Splurge vs. Steal Part II - Eye Make-up Brushes
KIT ESSENTIAL | Essential Brushes
We've been discussing warm-weather make-up looks since my return from vacation, but you don't necessarily need to book a winter getaway to achieve that coveted bronze glow! There are some fabulous bronzer products in every price range, available both at your local drug or department store. Check out these tried and tested bronzer finds:
1. NARS Bronzing Powder (Casino) $30 USD
NARS is an all-around industry favourite for the line's high quality and pigmented products. The universally flattering and coyly named blush, Orgasm, has won several beauty awards and is at the top of many of an editor list. NARS bronzers follow in the same lead, with creamy and pigmented textures that are easy to blend, but leave your skin with an effortless glow. NARS bronzer is highly potent - use sparingly with a large dusting brush and distribute well all over the face. Once you run your fingers through the pigmented product, you'll see why one to two layers of this bronzer is more than enough to achieve that glowing look!
2. Tarte Mineral Powder Bronzer (Park Avenue Princess) $28 USD
This shimmery powder bronzer is made with good-for-your-skin mineral make-up ingredients! Tarte's Bronzer is free of unnecessary make-up synthetics and is oil and talc free. The bronzer is also infused with vitamins A and E that help rid the skin of toxins. The chic mock-croc container makes Tarte's bronzer a fun addition to your make-up stash.
3. MAC Mineralize $30 CAD
MAC's Mineralize collection is the brand's series of mineral make-up with products ranging from powders to eyeshadows to blushes. I have raved of MAC's Mineralize collection many-a-time before - the powders are essential for any make-up artist kit. Mineralize powders come in matte and shimmer textures and flatter the skin like a dream. Even the matte textures are multi-dimensional, and work great to deepen your skin tone with a bronzer without all the usual shimmer.
4. Physicians Formula Multi-Coloured Face Powder (Bronzer) $19.99 CAD
When mixed altogether, this mosaic of bronzer colours gives a natural tan finish to the skin. The coverage is sheer and without shimmer. The hypoallergenic formula is also oil-free, making it a great option for those with problematic skin.
5. Bonne Belle Powder Bronze (Golden Tan) $9 CAD
Bonne Belle's Bronzer is great value for product. The under-$10 priced bronzer, comes in several different shades to help you narrow in on one that's right for you. My favourite is Golden Tan, as I find it the most versatile across skin tones. For my fellow Canadian readers only, I was at Shopppers Drug Mart earlier this week and this bronzer was on sale for $3.99 (until the end of February). Super deal!
Either way you choose--splurge or steal--these prices are an easy way to get the bronzed look, without having to spend the price tag of that vacation!
ARTIST TIP | Winter Getaway? Beach Beauty.
2009-02-18Winter's nearly over, but summer can't come soon enough! For those planning a Reading Week/Spring Break retreat (or for those wanting to fast forward to warmer days but are stuck here at home), here are some tips for a low-maintenance beach-ready look to help heat it up!
1. peachy pink blush/highlighter
I love MAC's Mineralize Skinfinish in RedHead for achieving this part of the look. This highlighting powder comes in a spectrum of peachy pink. Its sheer but shimmery finish works beautifully to show off your tan in progress. Use a large powder brush to concentrate the application on the sides of the forehead, down the temples and atop the cheekbones. Now, just sit back and enjoy the sun...and you'll be glistening in all the right places!
2. a coral lipgloss
Add some punch to your lips with a coral coloured lipgloss. Coral is a universally flattering shade that will add a gorgeous complement to your tanned tone. To get the look, I like to keep MAC's Lipglass in Lychee Luxe (pictured above) handy.
3. clear mascara
Add some lift to your eyelashes by initially using an eyelash curler. Set the curl with a couple of light coats of clear mascara. You can very well use black (or any mascara colour of your choice), but just keep your plan to tan poolside, rather than in the water. Keep in mind that even "waterproof" formulas aren't necessarily made to withstand prolonged time in the water! In other words, stick to clear mascara and you're in the clear!
Lastly, don't forget your sunblock. Enjoy!
BEAUTY 101 | Contouring the Cheeks
2009-02-08I find contouring an indispensable method. The modern contoured look is a lot more subtle, and definitely not the harsh lines reminiscent of the 80s (i.e. think Grace Jones). The trick to make contouring work is to make it look like it’s not there. When applied right, the (untrained) eye shouldn’t be able to detect your contour make-up. It should look like the hollows of your cheekbones – only better and deeper! To sculpt your best face yet, choose a shade that’s not more than 2-3 shades darker than your own skin tone. Remember darker colours make areas of the face recede, while using lighter colours act as a highlight. Be sure to avoid orange colours, as in some bronzers, as these will scream unnatural! Opt for a matte product, as this flat texture helps to absorb light and deepen the illusion of shadow. (Shimmer textures tend to have light reflecting particles and won’t provide the same illusion of depth).
How to apply:
Use an angled blush brush for a flawless application. The angled brush will deposit the majority of the product at the back of the cheekbone and automatically taper the application as it goes inward. For a better view, suck your cheeks in (fish face time!) to get a better view of where the hollows lie beneath the cheekbone. Concentrate the brush right at the top of the hollow and just below the cheekbone. Blend in towards the nose, stopping at two fingers width away from the nose.
Recommended products:
MAC #168 Large Angled Contour Brush
MAC Mineralize Skinfinish powders
MAC Full Coverage Foundation
Related posts:
BEAUTY 101 | Contouring the Face
Q & A | Do I apply blush on the apples of my cheeks or do I contour?
Speaking of American Beauty, what an historic time for our neighbours south of the border with a welcome change in Office that will undoubtedly affect the rest of the world! On January 20th, 2009, the world watched as Barack Obama was sworn in as 44th President of the United States. Our attention was also captivated by the new First Lady, Michelle Obama. Broadcasts everywhere focused on what the style icon, Mrs. Obama, would be wearing.
To complete the look, Mrs. Obama brought on trusted Chicago make-up artist and friend Ingrid Myles-Grimes. Myles-Grimes used a palette of neutral colours for a look that would be "read as very natural and polished." The end result was a classy and gorgeous make-up finish fit for the new First Lady. To get your own polished First Lady look, try these tips:
1. If you haven't done so already, shape your brows.NOTE: Yes, the natural and polished look is actually a lot more work than it looks! But when done right, people will notice that you’re glowing...and think that it's effortless! Enjoy!
If you're unsure about doing it on your own, have them first shaped by a professional and then tweeze on your own to maintain the shape. Tamed brows frame the face and provide a more polished aesthetic.
2. Fill in brows with brow powder if necessary.
3. A key to Mrs. Obama's polished look is her glowing skin.
Use foundation to even out skin tone and surface and add concealer where necessary (undereye circles, blemishes).
4. Set face make-up with powder.
Use a multi-dimensional powder like MAC's Mineralize Skinfinish line to get rid of shine without looking dull and flat.
5. Skip the blush, but use a powder about 2 shades darker than your own skin tone as a contouring powder.
6. Apply liquid liner to the top lashes only.
7. Curl the eyelashes and apply two coats of mascara
8. Apply a nude coloured gloss.
Photo courtesy of Associated Press
Q & A | Applying Blush to a Round Shape Face
2009-01-21Q: Ok rhi, so where is the apple of your cheeks, and would doing so make a round shaped face look even rounder?
A: Great question! The apples of the cheeks are the rounded, fleshy areas that become more visible when you smile. Using a blush here can actually give the illusion of less surface area on the cheeks, and add dimension to a round shaped face. The trick is to keep the blush application higher on the apples and not blend too far downward. Smile as you're applying your blush for a better view of the apples.
Here are some pointers:
For a subtle, dewy look use your two fingers (index and middle) to blend cream blush in circular motions atop the apples of the cheeks. Or for a brighter matte look, try a powder blush and brush. Apply the blush in circular motions atop the apples, and blend so the look is soft and diffused.
ARTIST TIP: If you feel like you've applied too much, dust a bit of translucent powder atop the cheeks to tone the blush down.
Recommended products:
MAC 129 Blush Brush ($41 CAD)
Related posts:
Q & A | Do I apply blush on the apples of the cheeks or I contour?
BEAUTY 101 | All About Face


