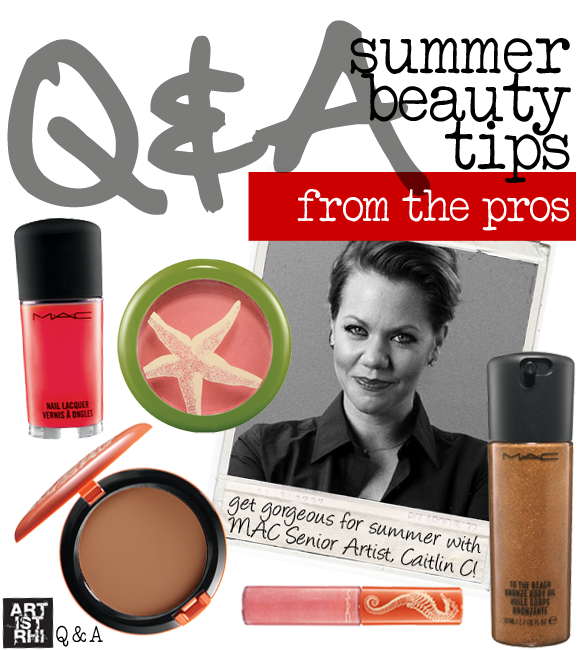
artistrhi had the chance to chat with MAC Senior Artist, Caitlin Callahan for some tips on getting gorgeous for summer! Check out the Q & A below!
1. What are some key products to a quick and easy beauty routine for the summer?
A cream bronzer, tinted moisturizer, lipgloss, waterproof mascara. In the summer I ease off the powders for my clients and myself – the sun reveals all. It’s like God’s own HDTV. Lets see what I have in my makeup bag…Tarnish Eye Kohl, To The Beach Cream Bronzer, Studio Moisture Tint (dark), #109 brush, Splashproof Lash Mascara and Viva Glam V lipglass. Perfect, low-maintenance summer face. For eye shadow, try a Paintpot instead of a powder (Waterproof!!)
2. What are some common make-up mistakes women make when the weather heats up?
Using too much foundation and powder. Lay off! If there’s something that really needs concealing (like the friend that pops up on your chin right before a big date), use concealer. If you’re super oily, use a matte primer before your makeup instead of powder on top.
3. Any make-up tips for those of us that are sensitive to the sun but want that bronzed glow?
Start with SPF 50. Then apply a sheer coat of tinted moisturizer (you can go one shade darker because it’s so sheer.) Then apply bronzer (the cream ones look most natural) – start under you cheekbones and sweep towards your nose. As the product wears off your brush, apply to forehead, apples of cheeks and a touch on the nose. Super sunkissed.
4. I've been told powder can look too "heavy" during the summer season, but I have a very oily T-zone so I feel like I need it especially during the summer. Can I improve my skin care routine or are there other products that can help me combat shine?
See above. Start with MAC Matte through the t-zone after you’ve applied moisturizer. You’ll see what happens…it’s amazing!
5. My make-up seems to slide off with the summer heat! Any tricks of the trade to help prevent my eyeshadow from creasing and my foundation from melting?!
Primers are magical. But I’d also recommend easing off on the foundations and powders. Choose a Paintpot that you love (faves: Indianwood, Rubenesque and Artifact).
The latest MAC collection, To the Beach, is summer inspired and available as of May 29th at MAC stores and MAC counters. Product reviews of the collection's Cream Bronzer to come! I'm loving it so far...I've been on a cream blush/bronzer kick as of late! :)
A huge thanks to Caitlin for answering our beauty questions! Be sure to follow Caitlin on Twitter for more beauty inspiration! :)
Images courtesy of MAC Cosmetics. Image layout by Rhia Amio.

Just in case you go a little overboard with the alcohol consumption this evening (it is New Year's after all!), here are a few quick make-up tips to help you nurse (and conceal) tomorrow's hang-over!
1. Moisturize!
If you didn't get the chance to do so the night (or early morning!) before, make sure you thoroughly cleanse the skin and remove any leftover make-up. Hydrate the skin by applying moisturizer, as alcohol dehydrates the body. Don't forget the lips - apply some lip balm to soften them for your lip application later.
2. Say bye to post-party eyes.
Use some eye drops to lessen any redness in the eyes, and an eye cream to help tone down any under-eye puffiness.
Concealer will make all the difference for telltale signs of a late party night (i.e. darkened undereye circles!). Use a peachy-pink concealer to brighten any dark undereye circles, and follow with your skin tone matching concealer to blend it all in.
Avoid eyeshadow colours that are red-based (like purple, mahogany and certain browns). Red-based tones tend to enhance any redness in sleep-deprived eyes. Instead, opt for a black or even a dark blue eyeliner to contrast the whites of the eyes, making them appear brighter. Top the eyes off by curling the lashes and adding 2 coats of mascara for a wide-eyed look.
3. Get (well, fake) glowing skin!
Apply bronzer in this prescribed 3-shape motion to build-up an even glow and bring life back to post-party dull and dehydrated skin. Smile and add some blush to the cheeks - this will help you look awake...even though you may not feel so awake right away!
4. Shine on with gloss.
As the finishing touch, apply a moisturizing gloss in a peachy-pink colour and you'll be ready for a new day...AND a new year!
Q & A | Toning Down Prominent Cheekbones
2009-11-05
Q: I have naturally prominent cheekbones which I would like to tone down. A lot of articles and videos out there are mostly focused on how to sculpt the cheekbones to make it pop. But in my case, I want it to appear more subtle and I can't seem to find any reference on how to do that. I wonder how you could achieve that? :)
A: First off, count your blessings - I'm sure you know that high, prominent cheekbones are considered an attractive attribute!! :) Those of us lacking prominent cheekbones spend plenty on products (and time!) trying to make our own cheekbones stand out...so, consider us all envious!
Ok, all envy aside, getting to your question...in order to "play down" your cheekbones, you have a couple of options:
1. Play up your other features to bring them 'forward' as well.
Add eyeliner to your top lashline, curl your lashes and add some mascara to make those eyes pop. Gloss the lips up with some shine to draw attention away from your cheekbones.
2. Add some blush.
I've heard this before where sometimes clients think they have "too much cheek". Although you may think it to have the opposite effect, applying blush can help to reduce a cheeky surface area. Depending on your skin tone, choose a peachy pink, soft pink or coral to complement your cheeks (as a reference, use the colour your cheeks turn when you're flushed).
3. If a blush is too bright for your liking, opt for a matte bronzer to accent the cheeks.
A deeper tone will create the illusion of this area of the face receding. Apply in this prescribed motion to avoid a streaky look (rather than a harsh contour, keep the bronzer soft and blended or else you'll end up drawing unwanted attention to the cheeks!)
Hope this helps, YT!
If you have a make-up related question you'd like to ask, shoot an email to me at rhia[at]artistrhi[dot]com. I look forward to hearing from you!
Q & A | Products for Back to School
2009-09-12Q: I’m going back to university in a week, and wonder if there are any products you would recommend that could help save some time but make me look great in the morning!
A: I am probably the worst person to talk to about a “quick” morning beauty routine. While I was away at university, I would purposefully sacrifice sleep or be late for class - all in the name of getting my full 40 minutes of make-up in the morning! But of course there are those days where you’re absolutely pressed for time and 40 minutes isn’t exactly reasonable. Fortunately, there are many products that do double-duty (and some steps you can skip) to help spare you time in the morning, and more importantly, get you looking fabulous and wide-eyed (even when that venti latte hasn’t kicked in just yet)!!
Try these get-ready tips when pressed for time in the morning:
1. Use a tinted moisturizer.
A tinted moisturizer adds a hint of colour and moisture to the skin in one easy step. No need for a brush - just blend the product well into the skin using your fingers!
Approximate time needed: under a minute
2. Use a concealer.
I find that with age (ahem, experience) and late nights of blogging my undereye circles can be quite pronounced come the morning. One of my absolute morning make-up must-dos is concealer – I look alien without it. Since my undereye circles are particularly complex, I actually use two products to help brighten the area up: a) Peachy-pink concealer to lighten the dark brown/purples undertones of the circles (try Laura Mercier's Secret Concealer)and then b). a flesh-toned concealer to blend the neutralized area with my own skin tone. I find using concealer makes the world of difference on my own face - if I had even less time to get ready, concealer is still one of those products that I would be sure to sneak in!
Approximate time needed: 3 minutes
3. Add some eyeliner + mascara.
Line the upper eyes to help open up the eye area and make the whites of the eyes appear brighter. (Big-eyed beauties can usually get away with just curling the lashes and adding mascara, but my eyes need a little more attention!). You can use whichever you prefer: a pencil, gel or liquid liner. I always recommend a gel or liquid liner simply because they last. Curl your lashes and top with 2-3 coats of your go-to mascara.
Approximate time needed: 5 minutes
ARTIST TIP: To keep the eyeliner long-lasting, apply a layer of eyeshadow primer in a neutral colour atop the eyelid.
Products to try: Cover Girl's Line Exact - the felt tip of this product makes lining the eyes as easy as using a marker! Recommended for novice to pro liquid liner users.
4. Add an instant glow with a luminscent bronzer.
I use a large-sized powder brush to apply bronzer in the 3-shaped motion along the forehead, cheekbones and underneath the jawline. Then, I dust any excess along the bridge of the nose. Keep the bronzer concentrated on the prominent areas of the face (think of where the sun hits the face first) and don't overdo it. Remember with bronzer, less is more and orange is just...bad.
Approximate time needed: under 1 minute
ARTIST TIP: Dust a layer of loose translucent powder on the face first for the bronzer to glide on smoothly.
Products to try: NARS Bronzers - these glide on like a dream! The product itself is highly pigmented so a couple of swipes with the brush is all you need.
5. Dust a peachy-pink blush on the apples of the cheeks.
Peachy-pink is a universally flattering colour (just think Orgasm by NARS - the much-loved product by industry insiders and beauty junkies!). Simply smile to make your apples of the cheeks more visible and add blush using a brush. Blend well. The effect is a soft and healthy glow that adds an instant warmth to your morning complexion.
Approximate time needed: 1 minute
Products to try: NARS Orgasm. Just like their bronzers, NARS blushes glide on smoothly, making them super easy and pretty much foolproof to blend.
6. Skip the lipliner and lipstick. Just gloss it up!
Use a gloss with a bit of colour instead of lipliner and lipstick, which can be way more time consuming. When choosing a gloss, opt for a colour that is two shades darker than your own lip colour. Remember that the gloss will glide on sheer, so a colour that looks darker as a gloss will work with your own natural lip colour and appear more transparent. As the day goes on, the gloss will be easier to touch up as well.
Approximate time needed: 1 minute
Products to try: MAC's Lychee Luxe, Maybelline Pink Sorbet. These peachy pink glosses are flattering on nearly all skin tones and will work well to complement your blush colour!
So there it is in about six (ok, more) steps. It’s not exactly a five-minute routine, but what I do like to stress is to focus on your favourite feature and make that stand out. If it’s your eyes that you like to draw attention to, focus on eyeliner, mascara and some gloss. If your lips are your favourite feature, go in with your lip brush, lip liner, lipstick or lip gloss (or all of the above!) and add some mascara to the lashes. If you’ve got great skin to show off, add some bronzer and blush for a gorgeous glow!
Beauty doesn't have to be complicated - just take a few minutes for yourself in the morning and you'll be amazed at how much better you can feel throughout the day!
MORE TIPS:Hope that helps!
Here are a couple of things you can do to ease the morning routine:
Groom your brows.
A well-maintained arch is sometimes all the make-up you need. Good brows frame the face and polish off any make-up look. To get good brows, check out this post.
Maintain a proper daily cleansing routine and apply moisturizer after washing your face.
You won’t feel the need to use foundation when your skin is naturally glowing. Maintaining a consistent cleansing routine is essential to glowing skin. (We all know the aftermath of not removing last night’s make-up: raccoon eyes + increased chance for break-outs!) Proceed to apply moisturizer after each time you wash your face.
Rhia
If you have a make-up related question, please feel free to email me at rhia[at]artistrhi[dot]com.
BEAUTY 101 | Benefits of Bronzer
2009-08-05
Last week the cancer research branch of the World Health Organization elevated the use of tanning beds to a "carcinogenic" risk - the organization's highest cancer risk category. Surprise, surprise.
Now, I'm just as guilty as the next person for sitting out in the sun for longer than recommended and I've done my share of bed tanning (couldn't get used to it though, the buzzing sound just made it seem all wrong!). I can't deny my love for how a tan gives you a healthy youthful glow, but of course I can't deny how overexposure to the sun increases the risks of melanoma and premature wrinkles! Makes for quite the trade-off.
Thankfully, there are make-up solutions around this scenario! Enter bronzers. I'm huge on bronzers for the instant glow and slimming effect they provide. I use my bronzer all year round, and especially in winter when my skin is at its palest!
Hands-down my favourite bronzers are from NARS. These bronzers glide on smoothly and evenly for a natural looking application. Long-lasting and well-pigmented - they're worth every penny! (See more of my favourite bronzers here).
To apply:
Use a large buffer brush (i.e. MAC's 182 Brush) or a large powder brush to distribute the bronzer on the face. A larger brush will help to evenly distribute the bronzer on the face and thoroughly blend it to avoid a streaky look.
Apply the bronzer on the areas of the face that are more prominent (where the sun would naturally hit). I like to use a "3-shape" motion: apply in a continuous swipe along the temple, back and forth across the cheekbone and then down along the jawline.
We haven't had much of a sunny summer in Toronto, so make the most of that bronzer sitting in your make-up stash! The benefits of bronzer are easy and instant without the risk to your skin!
We’ve all been patiently waiting for summer weather, and now that the warmer days have arrived, it’s a good time to re-evaluate our make-up routine. When summer rolls around, it usually means playing up the bronzer, while lightening up on the other products in our daily routine. After all, we should be spending less time indoors getting ready, and more time outdoors enjoying the weather! That being said, we still want to look fab all year round! Try these quick and easy tips to keep you looking and feeling fresh all summer long:
1. Switch to a lighter moisturizer.
Increased temperatures are directly proportional to increased oiliness! Increased oil production means you can either use less moisturizer on the face (just address the areas that are dry) or switch to a lighter moisturizer altogether. If you’re using a light moisturizer, switch to a serum whereas if you’re using a thicker cream, opt for a light moisturizer instead!
2. Don’t skip out on the sunblock.
You may not see the effects immediately, but sun exposure overtime can do a number on your skin. Use a moisturizer with a sunblock in it to help protect against harmful UVA and UVB rays. If your moisturizer is separate from your sunblock, skip on using the moisturizer to avoid a grease-fest on the face. Ideally, let the sunblock absorb into the skin for at least 30 minutes before applying any make-up.
3. Use a mattifier instead of (or before applying) foundation.
For those of us blessed with great skin, a mattifier works well to absorb and reduce excess shine throughout the day. When layered underneath foundation, a mattifier also helps make-up last longer and minimize the need for touch-ups! Use tried and tested Cargo's Blu-Ray HD Mattifier or MAC's Matte on the areas of the face that are most prone to shine.
4. Keep a pack of blotting tissues handy.
Rather than doing a repetitive routine of constantly applying powder whenever oil appears, use blotting tissues to combat shine. To keep your make-up looking fresh, absorb the excess oil with the blotting tissue first and then lightly pat with your powder to polish it off. This method also works best for helping to reduce the chance of break-outs!
5. Don’t overdo it on the powder.
When you pack on too much powder, especially atop an oily surface, it can approach a cakey look. Blot with an absorbing tissue first, and then use a puff or even a brush to lightly pat the powder on oil-prone areas (pay particular attention to the T-zone area). Avoid packing on the powder as your face will only get slicker (and quicker) before the next anticipated touch-up!
6. Don’t sweat it!
During the summer, the look is all about healthy, glistening skin and the bottom line is that it’s tough to keep up a routine of a matte face when the weather is warm. Instead play up the look by adding a spritz of MAC’s Fix+ for an instant dewy glow. Fix+ is also infused with vitamins and minerals that are a real treat for your skin!
We've been discussing warm-weather make-up looks since my return from vacation, but you don't necessarily need to book a winter getaway to achieve that coveted bronze glow! There are some fabulous bronzer products in every price range, available both at your local drug or department store. Check out these tried and tested bronzer finds:
1. NARS Bronzing Powder (Casino) $30 USD
NARS is an all-around industry favourite for the line's high quality and pigmented products. The universally flattering and coyly named blush, Orgasm, has won several beauty awards and is at the top of many of an editor list. NARS bronzers follow in the same lead, with creamy and pigmented textures that are easy to blend, but leave your skin with an effortless glow. NARS bronzer is highly potent - use sparingly with a large dusting brush and distribute well all over the face. Once you run your fingers through the pigmented product, you'll see why one to two layers of this bronzer is more than enough to achieve that glowing look!
2. Tarte Mineral Powder Bronzer (Park Avenue Princess) $28 USD
This shimmery powder bronzer is made with good-for-your-skin mineral make-up ingredients! Tarte's Bronzer is free of unnecessary make-up synthetics and is oil and talc free. The bronzer is also infused with vitamins A and E that help rid the skin of toxins. The chic mock-croc container makes Tarte's bronzer a fun addition to your make-up stash.
3. MAC Mineralize $30 CAD
MAC's Mineralize collection is the brand's series of mineral make-up with products ranging from powders to eyeshadows to blushes. I have raved of MAC's Mineralize collection many-a-time before - the powders are essential for any make-up artist kit. Mineralize powders come in matte and shimmer textures and flatter the skin like a dream. Even the matte textures are multi-dimensional, and work great to deepen your skin tone with a bronzer without all the usual shimmer.
4. Physicians Formula Multi-Coloured Face Powder (Bronzer) $19.99 CAD
When mixed altogether, this mosaic of bronzer colours gives a natural tan finish to the skin. The coverage is sheer and without shimmer. The hypoallergenic formula is also oil-free, making it a great option for those with problematic skin.
5. Bonne Belle Powder Bronze (Golden Tan) $9 CAD
Bonne Belle's Bronzer is great value for product. The under-$10 priced bronzer, comes in several different shades to help you narrow in on one that's right for you. My favourite is Golden Tan, as I find it the most versatile across skin tones. For my fellow Canadian readers only, I was at Shopppers Drug Mart earlier this week and this bronzer was on sale for $3.99 (until the end of February). Super deal!
Either way you choose--splurge or steal--these prices are an easy way to get the bronzed look, without having to spend the price tag of that vacation!
ARTIST TIP | Have Make-up. Will Travel.
2009-02-17While on vacation, we all still want to look fab without necessarily being worried about our usual make-up routine. Returning from vacation recently, I realize that I did it again - I had packed way too much make-up and used only half of what I actually brought! There are some definite make-up travel essentials that I'd likely still take to a deserted island with me! Here's my list of essential make-up items when traveling (and hopefully I'll be more efficient when packing the next time, but knowing me...probably not).
1. Multi-Purpose Cream: Embryolisse Lait-Crème Concentrè (24-Hour Miracle Cream)This multi-purpose cream is aptly named. Embryolisse can be used as a moisturizer, make-up primer and make-up remover. The cream also quadruples as an impromptu shaving cream (your boyfriend will thank you for thinking of him as well!). Items with multiple uses mean less to pack in that bag...and who doesn't love that?! Embryolisse is also an industry insider favourite - make-up artists and models are known to swear by this cream for its many uses.
2. Tinted Moisturizer: MAC Select Tint SPF 15
Select Tint doubles as a moisturizer and foundation in one handy bottle. The tinted moisturizer formula offers the most minimal amount of coverage in a foundation, while still helping to lightly even out skin tone. Select Tint also has a built-in SPF of 15, which makes it the practical and perfect choice in attaining that polished look. My forehead has a tendency to catch most of the sun, and by the end of the trip, there are two different shades on my face! I apply Select Tint just on the forehead to brighten the skin tone there, and then I dust some bronzer on my cheeks to deepen the skin tone and bring everything in balance.
3. Blotting Tissues: Tea Tree Oil Facial Blotting Tissues
To keep looking fresh in the hot vacation weather, there's no sense in touching up your shine with more and more powder (which could contribute to clogged pores and break-outs). Instead, scoop up a handy pack of blotting tissues to keep your shine in check. Simply dab a tissue wherever you see an excess of oil build-up, and watch the absorbent tissue do all the work.
4. Bronzing/Highlighting Powder Duo: MAC Mineralize (Dark/Natural & Shimmer)
Use a bronzer and highlighter combo to accentuate your glowing bronzed skin. With the MAC Mineralize Duo, I used the dark matte powder as a contour on the cheeks and as an impromptu eyeshadow to define the crease of the eye. With the shimmery half of the powder, I used a large powder brush to dust it atop the browbone and on the cheekbones. Spotlighted tan? Check!
5. Lip Balm: Burt's Bees Radiance Lip Shimmer
The hot weather was a welcome climatic change for my lips. My lips had seen more than their share of dry and cracked days, courtesy of our Canadian winter season. I usually throw my Kiehl's Lip Balm No. 1 into my purse for its reliable moisturizing and SPF properties, but found that the balm tended to liquify in the extreme heat. Fortunately, I had Burt's Bees Radiance Lip Shimmer as a back-up. The waxy stick withstood the heat better while adding a moisturizing shine to my lips.
6. Liquid Eyeliner: L'oreal Lineur Intense
My failsafe way to beat the heat while keeping my eyeliner in check is to use liquid liner. I've worn liquid liner in extreme heat, and found that nothing beats its lasting power. To help prolong its longevity, I apply a neutral-coloured cream eyeshadow base to tone down my oil-pone eyelids.
Check out my final write-up for Make-up Junkie!!
Fabulous Feel Liquid Colour glides on smoothly to give opaque colour with high shine. The formula is non-sticky and just like the name - feels quite fabulous on the lips! I test ran Amaretto, a pretty neutral pink-brown colour that works well on different skin tones. The colour stayed true for the most part, but I found a touch-up was required after about 3 hours. The one thing that took me a bit to get used to was the strong fragrance of the gloss. I like subtle scents to my glosses, but found this one initially overpowering. A minor setback, but the look and feel of this gloss is still a steal for $12 USD (approximately)!
Double Lush Mascara Plus Primer I'm not a usual fan of 2-step primer and mascara products, but I was pleasantly surprised by American Beauty's version. I found the formula gave my lashes much needed volume, versus other 2-step mascaras I've tried in the past. I tried out the mascara in Black, but Double Lush is also available in Brown and Midnight, which is a first that I've seen for primer plus mascara products (usually they're only available in Black). I love what Double Lush does for my lashes, and I'd definitely be willing to shell out the $12 US that this mascara retails for.
Ultra-Easy Automatic Eyeliner (Auburn) The simple twist-up and no-sharpen action of this eyeliner definitely makes it ultra-easy. I had the chance to try out Auburn, a gorgeous maroon brown with faint shimmer that looks particularly lovely on blue-eyed ladies. The creamy eyeliner glided on smoothly and lasted well throughout the day to keep my eyes defined (minor midday touch-up was required though!). This eyeliner is perfect for the no-fuss make-up junkie – no need for sharpening – just roll up and apply as desired!
Pretty Bronze Bronzing Powder (High Summer) Get that coveted bronze goddess look with American Beauty’s Bronzer months ahead of the summer season! The sheer tan brown powder accentuated with flecks of gold sparkle. With just a couple of swipes, you can instantly revive that glow and say goodbye to blah winter-skin (all my Canadians are saying amen right now!). The sheer consistency of the powder makes it very user-friendly to work with – it builds and blends well for a more of a natural appearing non-streaky glow. Dust some of the powder along the collarbones or atop the décolletage for the piece de resistance!
Be sure to check out Make-up Junkie for all the latest, greatest (and not so great) in beauty products!
GET THE HOLIDAY LOOK | Smoky Eyes
2008-12-13For the next few posts, we’ll be focusing on festive looks to get you dolled up for your holiday parties. So while you’re focusing on prepping for the parties you’ll be hosting and shopping for the people on your list, we’ve got your make-up tips covered here:
Smoky eyes are a gorgeous and effective way to prep for the office holiday party or for a night out. The application doesn’t have to be complicated – the look is meant to be messy so don’t worry about making it too perfect!! The intensity of the application is totally up to you. You can opt for a softer look and use brown eyeshadows (as in the example here), or go for a more dramatic look with grays and blacks. Once you have the smoky eye technique mastered, you can use any colour (even purples, blues and greens!) and even add texture (shimmer, glitter) to get the look. Try these application tips for a smoldering look that will get you noticed!
What you’ll need:
1. neutral cream eyeshadow (for use as a base)
2. black eyeliner
3. base (neutral/medium coloured) eyeshadow
4. contour (darkest coloured) eyeshadow (i.e. gray, chocolate brown)
5. highlight (lightest coloured) eyeshadow
6. black eyeshadow
7. black mascara
8. black cream eyeshadow (*optional)
Tools:
Medium dome eyeshadow brush
Crease eyeshadow brush
Blender eyeshadow brush
Eyelash curler
How to apply:
1. Use a base to prevent creasing.
Grab your base coloured cream eyeshadow and apply all over eyelid up to the eyebrow. Using a base is an integral component of the smoky eye – you want to make sure the shadow stays where you initially apply it and not travel south to give you a raccoon eye! A base will help to keep everything in check and prevent your eyeshadow from creasing.
2. Take the neutral coloured base eyeshadow and apply all over the eyelid (see area "a" above).
This part of the application doesn’t have to be too neat. Once the cream eyeshadow layer has set, take the medium dome brush and apply the neutral eyeshadow colour all over area "a". This will smooth out the eyelid for application making other eyeshadows applied atop of it easier to blend.
3. Use the crease brush with the dark coloured eyeshadow and push the brush into the crease of the eye, swiping back and forth to deepen the hollow of the eye (see area "b" above).
Concentrate the bulk of the dark colour on the outside corner of the eye and blend gently inward towards the centre of the eye. For added drama, build up the intensity of the dark eyeshadow by applying a couple of layers. Blend well and keep this dark colour concentrated in and below the crease.
4. To up the smoke factor, take the crease brush and dip it in some black eyeshadow and build up the shadow in area b.
Tap the brush to get rid of any excess flakes and apply it close to the lashline and blend it upwards into the crease.
*optional: For a super-smoky effect, layer on black cream eyeshadow atop and blend. Creams eyeshadows appear more vivid than powder eyeshadows and are perfect for those after a strong smoky look.
5. Use your tapered blending brush to soften the dark colour into the crease blending so there are no harsh lines.
6. Highlight atop the browbone to create the illusion of more depth.
Using a highlighting eyeshadow plays up the light and dark areas of the eye. It brings the most prominent part of the eyelid forward (the area just atop the browbone), while making the hollow of the eye seem deeper by contrast. You can also use the highlighter on the inner corner of the eye for a gorgeous light-catching effect.
7. Apply your liner keeping it tight to the lashline. Line the bottom keeping the line thicker on the outer corner and gradually tapering it off as it approaches the inner corner.
You can line the inside rim of the eyes for a full-on smoky effect, but as this area of the eye is wet, be prepared to check your eyes throughout the night to make sure the eyeliner hasn’t shifted downward.
6. Curl your eyelashes and add two coats of mascara.Balance the look:
Complete the look with a neutral coloured lipliner and some high-shine gloss. If you prefer to go deeper on the lips, try a coloured lip gloss or a lip stain. Avoid lip colours that are too dark and too matte, as pairing them with a dark eye will have a tendency to make you look aged. Add a bit of blush/bronzer to ensure the cheeks aren’t washed out and voila - you're ready to party and get noticed!
Artist tips:I prefer using a gel liner or liquid liner for a smoky eye, as they have greater staying power. A pencil works well and is super easy to work with, but unfortunately does not last as long.
Don't forget the importance of polished brows and concealed under-eyes for a completely polished look!
Pack a mini-touch up kit with q-tips, concealer, powder and eyeliner just in case you need to touch up the look.
Remember the diagram above is just a rough guideline of where colours should be placed on the eyelid. As long as you keep the darker eyeshadow colours in areas that recede, the lighter coloured eyeshadows in areas that come forward and blend in between, you'll be fine. So experiment and have fun with it to find your hottest smoky eye yet!
GET THE HOLIDAY LOOK | Red Lips
2008-12-12For the next few posts, we’ll be focusing on festive looks to get you dolled up for your holiday parties. So while you’re focusing on prepping for the parties you’ll be hosting and shopping for the people on your list, we’ve got your make-up tips covered here:
GET THE HOLIDAY LOOK | Red Lips
If you’re donning that little black dress for your holiday party, a pair of red lips is the perfect make-up match to complete the look. Red lips make a bold statement and can be an intimidating colour to buy (and wear!). But rest assured, there is a red out there for everyone!
How to apply:
Trace the desired shape of your lips with a matching red lipliner. Lipliner will help prevent lipstick from feathering into the fine lines around the mouth. Fill the lip in completely with lipliner to act as a base for the lipstick. Blot. For a sharp finish, use a lipbrush with your red lipstick and trace around the edges of the mouth. Then apply the lipstick directly to the mouth from the tube, swiping back and forth a couple of times on the top and bottom lip.
How to make it go the distance:
Once lipstick has been applied, blot with a one-ply tissue and reapply one more coat of lipstick. You can also take a large clean powder brush and while holding a tissue to cover your mouth, dust some translucent powder atop the mouth area using a brush. These methods will help stain the lips with some colour so if you end up caught under the mistletoe, you’ll still have some colour on the lips post-kiss!
Complete the look:
Keep the look balanced by going light on the eye make-up – a stroke of black liquid liner and neutral eyeshadow on the lids looks gorgeous with red lips. Red lips also have the tendency to make the face look washed out. Add blush/bronzer for colour and definition after applying lipstick, but use just a small amount so that the lips remain the strongest element of the make-up look.
Artist tips:
If red is still too bold, blot the colour slightly and apply a clear gloss atop to soften the look. If you're not a lipstick kind of girl, there are plenty of red lip stains or cherry coloured glosses to help you achieve that festive red look!
To avoid the dreaded lipstick-on-the-teeth look, take your index finger, place it in your mouth and pull it straight out. This technique will help remove any excess lipstick and keep your pearly whites in check!
It's best to first try on a red you plan on buying and looking at it outside of department store lighting. Use this as a guideline to narrow in on reds that will work best for you:
For pale skin tones, try a cool and bright cherry red. (Think Gwen Stefani, Christina Aguilera).
For medium yellow and olive skin tones, give a warm-toned fire-engine red a go.
For dark skin tones, try a berry colour or crimson red.
PRODUCT REVIEW | Bonne Bell Glimmer Bronze
2008-11-18
Today in Toronto, we had one of the coldest days yet this fall season which served as a quick reminder of the chilly winter months ahead. Winter weather is something that I (and my skin) can never get used to. The colder and drier temperatures tend to make my skin dull and dry. So to avoid the winter skin blues, other than diligently applying moisturizer, I use bronzer and/or highlighter to add a glow to otherwise lacklustre skin. Bronzers and highlighters aren't seasonal products that are only limited to the warmer summer months. Rather, they can be used all year-round, as glowing skin never goes out of season!
I love MAC Mineralize Skinfinish powders for achieving this effect, but another favourite product that's available at your local drugstore (at a fraction of the cost) is Bonne Belle's Glimmer Bronze. Glimmer Bronze goes for only about $6 per container, and the effect it achieves is priceless. You only need a tiny amount per application (remember starting off with less and building layers is always better than ending up looking like one of King Midas's victims!) . Use Glimmer Bronze with a clean blush brush (a powder brush will be too big). Sweep the powder atop the cheekbone to bring this area of the face forward and to get your glow on!
Q & A | Part IV: Auto-Pilot
2008-10-11Q: Rhia, what's in your make-up kit?
A: So now that I've disclosed ALL of the make-up products I use to get myself normal-looking under ideal conditions (i.e. when I have at least 40 minutes to get ready - yes, that long), here are the products for those mornings when I'm strapped for time and have to set my make-up routine on auto-pilot. I would love to have a 5 minute face, but I'm afraid this mug needs way more make-up lovin' than that! Here are the Big Ten products I use to help my face wake up with make-up:
Part IV | What’s in My Make-up Kit: Auto-Pilot
FACE
1. MAC Tinted Moisturizer NC35EYES
Moisturizes and adds colour in one
2. MAC Studio Fix C4
Adds more coverage and leaves a powdery finish
3. MAC Select Cover-up in Peach
Self-explanatory. During the work week, I average 5-6 hours sleep on a good night, and the peach concealer is a much-needed and much-loved step in the morning to play down the dark circles that characterize the past night's lack of rest. I add MAC Studio Fix in C4 above to blend this lighter layer in with the rest of my skin.
4. MAC Mineralize Skin Finish in Deep Dark
I use this powder with a big powder brush as a bronzer to help add colour and contour to my face.
5. Nars Orgasm Blush
Adding some blush is an instant way to make you look awake! I usually take my blushbrush and start blending from the ear in towards the nose, along where the cheekbone is. This deposits the most amount of colour closer to the hollows of the cheeks and helps add much-needed definition to my face!
6. MAC PaintLIPS
Still can't live without my MAC Paint! I would rather take a little extra time in the morning to do steps that keep my make-up long-lasting so I don't have to worry about it anytime throughout the day. I usually grab Paint in either Bare Canvas or Sublime Nature.
7. L'oreal Lineur Intense
Another day to day staple. Liquid liner can be a bit tricky initially, but once you master it, you're hooked. It's worth every bit the practice as it lasts all day! It's going to be tough to wean me off this product even later in life once my eyelids start drooping. My skin will be sagging, but I'll probably still be trying pull the eyelids up with my cateye sweep plus massive amounts of eyeshadow.
8. Inglot Eyeshadows
9. Eyelash Curler and Mascara
10. Inglot Lipliner in #63
Ok, ok so I cheated up there, grouped multiple products and didn't factor in brushes, moisturizer, lip balm etc. But you get the point - I love my make-up!
For all installments of the What’s in my Make-up kit Series, check out:
Part I | What’s in My Make-up Kit: Face
Part II | What’s in my Make-up Kit: Eyes
Part III | What’s in My Make-up Kit: Lips
Part IV | Auto-Pilot
What do you use? Feel free to comment and tell me what make-up products work (or don’t work) for you!
Q: Rhia, what's in your make-up kit?
A: I frequently get asked what I use on myself on a day-to-day basis, and the answer is that it really varies. It’s great to be a make-up artist, and to have so many make-up products at your disposal all the time! It gives you the freedom to change up your routine from day-to-day and the excuse of purchasing more products and rationalizing it by saying “I’m just buying it to add to the kit!” (Yeah right. My boyfriend has heard that one-liner so much that he no longer rolls his eyes!)
I wanted to write a bit about the products that I use on a frequent basis (why I use them and what they’re good for), but I realized that there are many to mention! I decided the best way to go about it to provide that type of detail was to post in a series of installments rather than one excessively long post.
Welcome to the first installment of the “What’s in My Make-up Kit Series”. You’ll see that most of the products may be familiar as I use them in my client applications and I’ve likely referred to them in past posts or product reviews.
In this installment, you will find my own Make-up Kit Essentials for the Face in the order that I use them (…along with further evidential proof that it takes efforts equal to that of a whole village to take me from just-woke-up to ready-to-face-the-world in the morning!):
Part I | What’s in My Make-up Kit: Face
MAKE-UP REMOVER
Inglot Make-up Remover
I swear by this stuff and am running low on my supply! The formula is heavy duty enough that it penetrates and breaks down my waterproof liquid liner and mascara without struggle and excessive rubbing, but the formula is not overly greasy and leaves the skin with a smooth baby's bum feeling.CLEANSER
Biore Ice Cleanser for Blemish Prone Skin and Neutrogena Oil-Free Acne Wash
I like to change up my cleansers from day to day. Otherwise, I feel like my skin gets too used to them and it has no effect. I usually go back and forth between the two bottles, alternating between day and night.LOTION
Neutrogena Moisture for Combination Skin
I always follow cleansing with some moisturizing. I am a longtime devotee to Neutrogena Moisture. Neutrogena Moisture also has formulas for sensitive skin and another with an SPF so you can save time in the morning by having a moisturizer and sunscreen in one!PRIMER
Smashbox Photo Finish Foundation Primer

You'll see this product is highly celebrated throughout the make-up industry and is at the top of many "best of beauty" lists. I turned to this Smashbox primer after I ran out of the Inglot Primer that I had (can only get that in Montreal now!) The Smashbox primer was a bit more heavy and greasy than I was used to, but it did help my foundation to glide on smoothly and help it to last longer throughout the day. I recently purchased the Smashbox Photo Finish Foundation Primer Light that is a reinterpretation of the original but better-suited for more oily and sensitive skin types.FOUNDATION
MAC Studio Fix in C4 + sponge
I have sworn by MAC ever since high school mainly because of the range of foundation colour selection (and the affordable price range). Studio Fix is a foundation and powder two-in-one that leaves your skin with an even matte finish. It's quick and easy - with a couple of swipes of the sponge, you're all done! Depending on the day and where I’m going, sometimes I like to use liquid foundation. I usually opt for MAC Face and Body in C4 whenever I'm going for more of a finished look.CONCEALER
MAC Select Cover-up in Peach (limited availability)

MAC Full Coverage in NC 30, NC 35
MAC Concealer Brush 194
I layer the peach concealer first using the concealer brush to brighten the dark circles under my eyes (seriously dark even with bright flash like in this pic at the end of the wedding slideshow). MAC Full Coverage is actually equivalent to their Studio Finish concealer (paste-like consistency), and like the name implies, is very heavy duty. Since I need more coverage but don't want it to be cakey, I mix the two colours NC 30 and NC 35 with some of my moisturizer to get the perfect colour, but still the opaque consistency required to cover up my bags!
POWDERMAC Mineralize SkinFinish in Medium Plus with MAC Large Powder Brush 150
I use the large powder brush to dust my face with powder and set my foundation to help it last longer throughout the day. I lightly pat Vichy Dermablend Loose Translucent Powder under the eyes using either a sponge of a clean small eyeshadow brush. I don't blend this in until later when my eyeshadow is done. See tip here.BRONZER
MAC Mineralize Skin Finish in Medium Dark or Deep Dark
Tarte Powder Bronzer
MAC Large Powder Brush 134
Bronzer helps bring my face to life! I would not leave the house without it. I use it with the large brush stroking along the sides of the face, just slightly below the cheekbone, and underneath the contours of the face for a trimmed, sun-kissed look!

BLUSH
NARS Orgasm
MAC Blush Brush 129
Another highly celebrated product throughout the world of beauty. It gives a great peachy pink instant glow to the cheeks that helps make you look healthy and awake. Just smile and blend away on the apples of the cheeks!
Check back to see all installments of the What’s in my Make-up kit Series for:
Part I | What’s in My Make-up Kit: Face
Part II | What’s in my Make-up Kit: Eyes
Part III | What’s in My Make-up Kit: Lips
Part IV | Auto-Pilot
What do you use? Feel free to comment and tell me what make-up products work (or don’t work) for you!
Q: There seem to be tons of brushes out there to choose from. Do I really need make-up brushes to apply my make-up?
A: No matter what a salesperson may tell you, it really depends. If you have a basic make-up kit or use a minimal amount of make-up (i.e. a routine of powder, lip gloss and mascara), then brushes will just be added fuss and useless to you.
If you do anything more, a good set of brushes is an absolute necessity in my opinion. The product glides on better when you use good-quality brushes. Brushes can last you a long time provided that you take care of them properly - I've had some of mine for ten years! It may seem like a lot of money to spend initially, but it pays off long-term, as you won't have to spend on little applicators, sponges, etc.
Some basic brushes that you need:
1. powder/bronzer brush
2. blush brush (i prefer an angled type)
3. eyeshadow brush - medium, dome-shaped
4. eyeshadow brush - crease, smudging brush
5. eyeshadow brush - slanted (for filling in eyebrows or doing eyeliner)
6. lip brush
See here for more details.
KIT ESSENTIAL | Essential Brushes
2008-09-14The choice in make-up brushes out there is endless. If I had to narrow it down to only a few (I could only trim it down to six), here would be my 'essential' brush kit:
1. Powder Brush / Bronzer Brush
A large, natural-hair fibre brush that is used for applying powder or distributing bronzer all over the face. With loose powder, press the brush against the product and then tap twice to get rid of excess powder. Follow the natural contours of the face and blend using the brush.
2. Blush Brush
A medium-sized natural fibre brush that is used for distributing colour to the cheek area. Blush brushes can come in different cuts, including a tapered or a full edge. I prefer a rounded fuller edge for the one I regularly use.
Two ways to use the blush brush:
- Start at the ears and concentrate colour from the hollow of the cheek in towards the nose (don't go further than two fingers in).
- Smile and highlight the apples of the cheeks.
3. Crease Eyeshadow BrushA pointed-tip eyeshadow brush made of natural fibres that allows for precise application of eyeshadow into the crease of the eye. I find these especially useful on Asian eyes for creating definition and dimension around the eye.
4. Tapered Blending Eyeshadow BrushA second eyeshadow brush made of natural bristles that is great for blending eyeshadow colours, applying base colours, and applying a highlighting eyeshadow shade atop the browbone.
5. Angled Eyebrow BrushA slanted natural bristled brush that is useful for sketching in eyebrows with eyebrow powder. If used wet, an angled brush can also be used as an eyeliner brush when mixed with eyeshadow. Be sure to clean the brush between each application, as the eyes are very sensitive.
6. Lip BrushA synthetic fibre brush that is used to apply lipsticks or lip glosses. Using a synthetic bristled brush allows for maximal product transfer from the product to your lips; a natural bristled brush would absorb the product rather than distribute it.
ARTIST TIP | Summer Proof Your Make-up
2008-07-271. USE LESS. Go lighter on the application.
• Apply moisturizer (for summer, try something lightweight, oil-free that has an SPF to protect against the sun).
2. FAKE A GLOW (without spending an excessive amount of time in the sun, which we all know has its damaging effects).
3. WATERPROOF Your Make-up
4. MOISTURIZE/PROTECT lips and skin (against sunburn and harmful UV rays).
i.e. SKIN
• Use an SPF of at least 15. Formulas have improved considerably and are less greasy than in the past. Distribute evenly to any exposed areas of the skin.
---


