Showing posts sorted by date for query foundation. Sort by relevance Show all posts

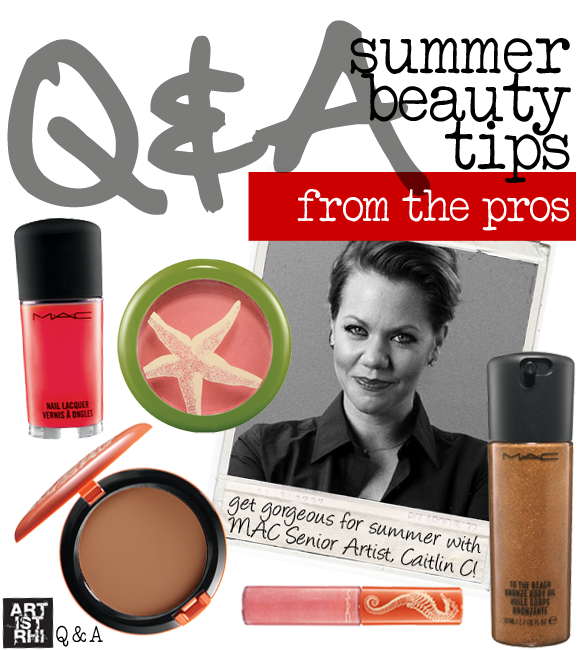
artistrhi had the chance to chat with MAC Senior Artist, Caitlin Callahan for some tips on getting gorgeous for summer! Check out the Q & A below!

1. What are some key products to a quick and easy beauty routine for the summer?

A cream bronzer, tinted moisturizer, lipgloss, waterproof mascara. In the summer I ease off the powders for my clients and myself – the sun reveals all. It’s like God’s own HDTV. Lets see what I have in my makeup bag…Tarnish Eye Kohl, To The Beach Cream Bronzer, Studio Moisture Tint (dark), #109 brush, Splashproof Lash Mascara and Viva Glam V lipglass. Perfect, low-maintenance summer face. For eye shadow, try a Paintpot instead of a powder (Waterproof!!)

2. What are some common make-up mistakes women make when the weather heats up?
Using too much foundation and powder. Lay off! If there’s something that really needs concealing (like the friend that pops up on your chin right before a big date), use concealer. If you’re super oily, use a matte primer before your makeup instead of powder on top.

3. Any make-up tips for those of us that are sensitive to the sun but want that bronzed glow?
Start with SPF 50. Then apply a sheer coat of tinted moisturizer (you can go one shade darker because it’s so sheer.) Then apply bronzer (the cream ones look most natural) – start under you cheekbones and sweep towards your nose. As the product wears off your brush, apply to forehead, apples of cheeks and a touch on the nose. Super sunkissed.

4. I've been told powder can look too "heavy" during the summer season, but I have a very oily T-zone so I feel like I need it especially during the summer. Can I improve my skin care routine or are there other products that can help me combat shine?
See above. Start with MAC Matte through the t-zone after you’ve applied moisturizer. You’ll see what happens…it’s amazing!

5. My make-up seems to slide off with the summer heat! Any tricks of the trade to help prevent my eyeshadow from creasing and my foundation from melting?!
Primers are magical. But I’d also recommend easing off on the foundations and powders. Choose a Paintpot that you love (faves: Indianwood, Rubenesque and Artifact).

The latest MAC collection, To the Beach, is summer inspired and available as of May 29th at MAC stores and MAC counters. Product reviews of the collection's Cream Bronzer to come! I'm loving it so far...I've been on a cream blush/bronzer kick as of late! :)

A huge thanks to Caitlin for answering our beauty questions! Be sure to follow Caitlin on Twitter for more beauty inspiration! :)


Images courtesy of MAC Cosmetics. Image layout by Rhia Amio.

Posted by Rhia Amio, Make-up Artist www.artistrhi.com | 1:30 PM | , , , , | 0 comments »


Q: I have eczema on my face, especially above my upper lip, and around my cheeks. When I apply make up, especially powder (I use MAC Studio Fix powder plus foundation) it goes a little flaky. I moisturize my face quite well with Lancome Aqua Fusion and only when I apply make up do these parts of my face flake up. Also, sometimes when I apply eye shadow (I use Lancome eyeshadows) you can tell that they're dry. Do you have any suggestions to what I could do?

A: With eczema, (as you probably already know!) you have to be especially careful in what products you use. Look for key descriptors like "sensitive skin", "non-comedogenic" and "non-scented" when buying. The less the amount of synthetic ingredients that a product has, the less of a chance of a flare-up for eczema-prone skin. As with any type of skin, be sure to moisturize thoroughly before applying your make-up, as a great face always starts with a great base (of hydrated skin!)!

Foundation
For foundation, the MAC Studio Fix powdered foundation is likely too dry of a formula for eczema prone skin. The trick with applying foundation on eczema-prone skin is finding a formula that provides coverage without looking dry/cakey. If you use a product that's too drying in nature, you can end up drawing more attention to any irritation/dry spots from eczema.

Instead of a powdered foundation, try one of the following options:
i). mineral powder
Mineral make-up is derived from natural ingredients, which versus other foundation can greatly help to reduce the chance of a flare-up. A couple of layers leaves the skin feeling lightweight, but mineral formulas are also quite buildable so moderate coverage is easily achieved. Use a soft (and clean!) large-sized kabuki brush to gently apply the make-up on the face. Bonus: The soft bristles of the kabuki massage will feel like a well-deserved mini-massage for the face!

ii). water-based foundation
Water-based foundations are non-comedogenic, making it a better choice for sensitive skin types. You can apply a non-comedogenic water-based foundation on its own using a brush or a sponge. Use a stiple motion to build up coverage and blend evenly over face. If you only need minimal coverage, add an equal-sized drop of the foundation to a pump of your moisturizer. Mix well and you'll instantly have a lightweight tinted moisturizer. Once your base is done, set your foundation with only a light dusting of powder. For eczema prone skin, always avoid over-applying powder as too much powder will only accentuate dry spots.

Products to try: CoverFx foundations - their entire line is developed for the most sensitive of skins, and also includes skin primers, concealers, bronzers and blushes

Redness
Redness from irritation often goes hand in hand with eczema. You can easily create an even canvas by applying a few layers of foundation. But for more prominent redness, target a creamy yellow colour corrector atop the red areas to neutralize them. Follow with your skin tone foundation for an even complexion and set with a light dusting of powder.
Note: You can also use a green corrector to conceal the redness, but I personally prefer the warm finish that applying the yellow corrector gives rather than the typically white-ish cast (I know, 'white-ish' not a word!) that a green concealer leaves behind. Whichever colour corrector you choose, be sure to blend your skin tone matching concealer atop to camouflage the area!

Products to try: Physicians Formula Mineral Wear Talc-Free Mineral Cream Concealer

Eyes
Make sure you are also moisturizing your eyelids as you do the rest of your face at the start of your beauty routine; smooth skin on the eyelids is a prerequisite for blending eyeshadows with ease. For eczema-prone skin, opt for mineral-based and matte eyeshadows rather than heavy shimmer or glitter textures. Particles of shimmer and glitter eyeshadows can irritate sensitive skin, and also draw attention to to any dry spots around the eyes.

Overall when it comes to eczema, use a 'less is more' approach and make sure you always read the packaging. Hope this helps and let me know how it goes! :)

Posted by Rhia Amio, Make-up Artist www.artistrhi.com | 7:00 AM | , , , | 1 comments »

Nicole...what a beauty! As you can see from her before, she has such stunning features to work with (making it basically impossible for me to make her look bad! lol!). We focused on a stronger eye look with a neutral lip for her engagement shoot today (with photography by the talented Miss Geehae!).

Here are the before and after pics from our make-up session earlier. I can't wait to see how her e-shoot pics with Geehae turn out!! ...and of course for Nicole's Big Day in May!! :)
To get Nicole's look, here are the products that I used:

FACE

Skin Prep:
Cargo HD Primer

Foundation/Powder:
MAC Full Coverage (NC35)
MAC Mineralize Powder in Medium Dark
Kett Hydro Foundation - 6 drops of O5, 1 drop of O7, 1 drop of R5 (airbrush)

Concealer:
CoverFx ConcealFx in Light
CoverFx ConcealFx in Light Medium

Cheeks:
MAC Tantone (as contour)
MAC Notable
NARS Orgasm
EYES
Eyeshadow Base:
MAC Paint in Sublime Nature

Eyeshadows:
MAC Eyeshadow in Smoke and Mirrors, Brun, Pink Freeze
Inglot eyeshadow (light peach highlight)

Eyeliner:
MAC Gel Liner Blacktrack (bottom lashline)
L'oreal Lineur Intense in Black

Mascara:
Cover Lash Blast Mascara in Black
LIPS
MAC Cremesheen Glass Deelight
MAC Viva Glam VI (Lustre)
MAC Subculture Pencil

Posted by Rhia Amio, Make-up Artist www.artistrhi.com | 7:50 PM | , , , | 3 comments »

Marcelle's New Age Anti-Wrinkle Make-up Foundation is targeted towards the 35+ crowd, but after passing a recent bday and entering that next age bracket, I figured....it doesn't hurt to be pro-active, right? :)I've shied away from drugstore brand foundations in the past while, as I'm a firm believer on it being ok to splurge on quality foundation and concealer products (and of course, I've needed the more reliable stuff for my kit!). Certainly, drugstore make-up brands have come a long way and today you can get quality products at affordable prices. Marcelle is one of those lines that balances quality and value really well, and I've been pleasantly surprised by their latest foundation.

Marcelle's Anti-Wrinkle Make-up Foundation contains Dermaxyl (an anti-aging agent known to diminish the look of fine lines and wrinkles) and other key ingredients that help to improve the skin's radiance. It's definitely an easy-to-use foundation, as it blends easily and absorbs quickly into the skin. I'd recommend it more for women with healthy skin that just needs that quick pick-me-up, as it provides light to moderate coverage. Women that usually need more coverage (for blemishes, uneven skin tones) will want to try something other than this formula.

I've been using the foundation for about a month, but (unfortunately!) can't see a visibile difference in it minimizing my own fine lines ('of experience'). I do like how the lightweight formula doesn't cake into my fine lines and crepey undereye area - anything that doesn't make these areas more noticeable is an immediate winner in my book!

The one shortage of this foundation is the limited range of six skin tones. I do hope they expand the choice of skin tones, as Marcelle products seem to work great with all skin types (including sensitive skin).

Overall, a good foundation, but the Anti-Wrinkle part? Jury's still out on that one (and hopefully the prominent wrinkles will stay out with it!)....

Posted by Rhia Amio, Make-up Artist www.artistrhi.com | 8:00 AM | , , , | 0 comments »

Meet lovely Melody, one of my June 2010 brides! Similar to Caroline, Melody wanted a fresh and clean bridal make-up look.
Here are the keys to getting Melody's fresh and pretty bridal look:
1. Balance out the skin tone with foundation and concealer. Blend well and set it with powder.

2. Smile and dust a peachy-pink blush on the cheeks (i.e. NARS Orgasm, Benefit Coralista)

3. Fill in the eyebrows. (I like to use a pencil and lightly fill in the brows, and then reinforce the pencil with a light application of eyebrow matching powder).

4. Add false eyelashes + mascara.
Wearing falsies is one of those simple things you can do to give the illusion of bigger eyes, without having to overdo your eyeliner/eyeshadow (more eyeliner and eyeshadow can make it look more obvious that you're wearing make-up). It's similar to when you highlight your hair, and people suddenly notice there's something different about you, but they can't put their finger on what...or maybe it's the fact that you'll be batting those lashes more? :)

5. Finish the look with a coral lipstick topped with gloss.
The coral lipstick was actually Melody's own that she uses everyday. We did try other lip colours, but understandably Melody felt best in her coral shade. She asked that we use it during the session, as she wanted to 'look like herself' on the Big Day....and that's absolutely important!! For brides-to-be out there, if you're scheduling your bridal make-up trial and there are certain make-up items you swear by, I encourage you to bring your tried and tested products to your session. It will help you collaborate with your artist on your Big Day look and you'll get better results from the session!

Posted by Rhia Amio, Make-up Artist www.artistrhi.com | 9:00 AM | , , , | 0 comments »

WCH Women by Claudia Hung
Make-up by Rhia Amio


I'll be working with my friend triple threat Tina (that's a lot of T's!) tomorrow doing her make-up for a photoshoot. The photoshoot is for headshots for promotional use and for Tina's website. In preparation for tomorrow's shoot, we've been chatting back and forth on what the look should be. In that sense, make-up for headshots is very similar to bridal make-up - you want a natural and classic look, that still looks like you, but essentially your best-you. If a casting director decides to call you in, he/she will expect you to look as your headshot portrays you.

Here are some make-up tips to help get you picture perfect for that headshot (or even just as an easy everyday look!):

1. Groomed brows.
The power of a good brow should never be underestimated! A well-defined and well-kept brow frames the face, makes it look slimmer and also means you don't have to wear as much eyeliner! Eyebrows that are too thin can make you look aged, while brows that are too thick can be distracting from your best features. Finding that happy medium? See this post for some brow-know-how.

2. Even out skin tone with foundation and concealer.
A photograph can tend to highlight and saturate any uneven tones in the skin (i.e. undereye circles, redness, etc.). For undereye circles, use a peach or a pink based concealer to lift the dark tone and then top it off with your skin tone matching concealer to blend it with the skin.

3. Set with powder and touch-up.
Set your foundation and concealer with powder to help keep it in place. Be prepared to powder the T-zone in case it gets shiny under hot studio lights.

4. Contour the cheekbones with a darker shaded powder and apply a peachy-pink blush for a healthy glow.
Use a contouring powder (or a shade of matte powder that's 2-3 shades darker than your skin tone) and apply it just under the cheekbone to define the face. Blend well. Finish the cheeks off with some blush: a little blush adds contrast and helps to make sure you don't look washed out in the finished photo. With blush, avoid shimmer textures and also blend well (blending...that's key!).

5. Avoid heavy eyeliner and eyeshadow.
Heavy eye make-up can look dated, but ultimately it draws attention away from the overall picture and what should be the focus of the shot (you!). With heavy eye make-up, suddenly your photo can become 'look at this nice make-up' rather than 'look at this pretty face'. To avoid being overpowered by eyeliner, keep any eyeliner thin and tight to the eye. You can even skip lining altogether, and instead simply push the eyeliner into the base of the lashes to define the lashline and make the lashes appear fuller. Use eyeshadow colours that closely match your skin tone and definitely avoid shimmery/frosty textures. Curl your eyelashes and apply two coats of mascara.

6. Keep the lips neutral and avoid colours that are too 'unnatural' looking.
A safe shade is always no more than 2 shades darker than your own colour. Apply your lip colour and add a hint of lip gloss to add dimension and a healthy shine to the lips.

Now, all you have to do is smile...because that's always gorgeous! :)

Posted by Rhia Amio, Make-up Artist www.artistrhi.com | 10:00 PM | , , , , | 0 comments »

I first came across CoverFx BritePrep while doing wedding make-up for the mom of a bride-to-be. The mom had beautiful skin for a mature (50 years old+) lady, but also had slight hyperpigmentation that was of concern to her, especially since she felt it had recently become darker and more noticeable. She asked me to use CoverFX Brite Prep that she had in her own make-up bag, as she said it was the "only" thing she's tried over the years that has helped to brighten the hyperpigmentation.

BritePrep Fx has a serum-like consistency that quickly absorbs into the skin, without being greasy or oily. What I love about the primer is its shimmer appeal - it leaves the skin with a radiant glow that isn't too sparkly. I love using it for clients that need a pick-up from dull, sallow skin (and whose skin doesn't need a little pick-up during the cold winter?) The shimmer finish also works well to brighten dark circles under the eyes - just apply BritePrep Fx first and then finish with your usual undereye concealer.

BritePrep Fx also does the usual helping foundation to glide on and look better, but it doesn't extend the wear of my foundation any longer than other quality primers I've tried. (I typically still have to powder at my 4-hr check-in to look 'fresh' and non-shiny again). The primer boasts advanced anti-aging properties plus an SPF 50. From my own experience, the high SPF does not reflect white with flash photography (making the skin tone appear lighter on the face) as many foundations with SPF do. Mind you, I have yet to try the primer on darker skin tones than on my own (...and just to be safe, I would ask for a sample before fully investing in the product!)

Speaking of price, here we come to the product's main downfall for me -a 30 mL tube of BritePrep Fx retails for approximately $40! In all honesty, the hefty price would likely prevent me from purchasing it again for the personal vs. client kit. Yet given the testimonial of my client and how it worked for her hyperpigmentation along with it's multiple uses (priming, anti-aging and SPF!), BritePrep Fx may prove worth it for some.

Posted by Rhia Amio, Make-up Artist www.artistrhi.com | 7:32 PM | , , , , | 0 comments »

Check out my latest Q & A on Applying Mineral Foundation, now on wnetwork.com! :)

Posted by Rhia Amio, Make-up Artist www.artistrhi.com | 6:27 PM | , , , | 0 comments »

I recently held a make-up lesson with two amazing and quick-learning clients (thanks A. and S.!). We focused on doing a smoky eye look for the lesson, and it reminded me how (understandably!) many women have questions on how to do it or how to improve on it.

The template at right (an oldie but a goodie!) is meant to be an approximate guideline for where the shades of eyeshadow go. Keep it in mind (and click it to enlarge it) - we'll refer back to it frequently throughout the next few posts we do on the smoky eye technique.

-----

Smoky Eye FAQ #5: How do I prevent my smoky eye from smudging?
Once you have carefully applied and perfected your application, the next challenge is getting the smoky eye look to last. The last thing you want is a smoky eye that bleeds underneath the eye and smudges where you don't want it to, inevitably drawing attention to undereye circles! I know, grrr.

So, now that you've gone through the past few posts and are on your way to becoming an expert in achieving the look, here are even more artist tips to get a smoky eye that lasts!
1. Apply make-up in layers.
Make-up always works better in layers. For instance, think of your face make-up: for a long-lasting look, you apply primer, then your foundation and then you set it with your powder. The same principle applies when doing a smoky eye - doing it in layers will help it to go the distance.

  • Use an eyeshadow primer or a neutral coloured cream eyeshadow as a base.
    Depending on the skin tone, I like to use MAC Paint (in Bare Canvas for light to medium skin tones or in Sublime Nature for deeper medium to dark skin tones) and apply it all over the eyelid. You can also use a cream eyeshadow that co-ordinates with the colour of eyeshadow you're applying - doing so will kick up its intensity and make it longer-lasting. Other products that work well as a base include the gorgeous cream eyeshadows of Laura Mercier's Creme Eye Colour collection, and Urban Decay's Eyeshadow Primer Potion, a product held in high regard by beauty enthusiasts.

  • Layer, blend, layer, blend, blend, etc.
    Use a cream eyeshadow but set it by applying a matching eyeshadow colour or dusting some loose translucent powder atop. The powder will help to reduce any creasing of the cream eyeshadow and can dually intensify the look. If you're using a pencil eyeliner to rim the eyes, you can also apply a matching eyeshadow or set it with powder to help to lock it in.
2. Use waterproof products.
I've mentioned it here on the blog before, but I have some seriously oily lids that give any 'smudgeproof' product a run for its money! To get my eye make-up to last, I always have to wear a cream eyeshadow as a base and stick to using waterproof eye make-up products only. That application of cream eyeshadow helps to act as a barrier for when the natural moisture of my oily lids eventually builds up throughout the day. At the end of the day, there's noticeably less creasing and my eyeliner remains intact!

When I work with brides that need their make-up to last through tears, sweat and a 16+ hour day, I'll opt to use either a liquid liner or a gel liner for their ability to be long-lasting and waterproof. If you prefer pencil, choose waterproof eyeliners vs khol eyeliners. Same deal with mascara - choose a smudgeproof/waterproof formula to help keep it all in check!

3. Avoid wearing eyeliner on the bottom lashline and lining the inner rim.
Lining the inner rim (aka the waterline) of the eye is such a gorgeous, sultry look, but the trade-off is that the look becomes more prone to smudging. The 'waterline' borders the eye and is wet by nature - any type of eyeliner (even waterproof ones) will have trouble holding to a surface that's wet rather than dry. (Note: I would avoid lining the inner rim altogether if you have watery eyes). If you must wear eyeliner on the bottom, concentrate it on the outer corner of the eye. Remember the layer principle and set the line by applying a matching eyeshadow or dust some translucent powder atop of it.

Overall the smoky eye look isn't meant to be a perfect, straight-edge look so there's no need to fret. Some smudging can actually add to the effect of a smoky eye! Of course, just make sure that the smudging doesn't stray too far south of the eye (i.e. undereye circle territory!). Keep yourself prepared and carry some q-tips along with your concealer and powder to easily tidy up any smudges that may occur!

Got any more smoky eye questions? Always feel free to email me at rhia[at]artistrhi[dot]com. I hope these Smoky Eye FAQ posts have led to more answers than questions!! :)

Posted by Rhia Amio, Make-up Artist www.artistrhi.com | 10:47 PM | , , , , , | 0 comments »

Q: hi Rhia,
Hoping you can help...the tip of my nose and the skin right below it are really prone to turning red, and the cold weather (and cold/flu season) isn't helping! Are there any products you can recommend to help hide the redness? I have heard that using green concealer works?

A: Tell me about it - I get a case of "Rudolph" nose during this colder time of the year too! Fortunately, we have make-up on our side to help us camouflage the redness we get from irritation. :)

First off, with all the nose wiping and blowing, make sure you moisturize the tips of your nose well. Treat yourself to at least 2-ply tissue...and hey spoil yourself with 3-ply if you're blowing your nose constantly! Softer tissue will help to reduce the irritation that comes from the constant friction of you rubbing your nose.

Now in terms of using green concealer, I always advise clients to use a light hand, as it's one of those tricky colours to work with. The use of green concealer is based on colour wheel theory: green is the opposite colour of red so once applied, green helps to neutralize and reduce redness. In the past, I have used green concealer to combat redness whether it be around the nose, for a rash or for a pimple! You do have to be careful to blend it properly....otherwise the green concealer can leave a pale white-green cast on the area applied...and you may end up drawing unwanted attention to that same area you're trying to hide! An easier and more user-friendly colour to work with is a creamy yellow concealer. Apply the yellow in the same manner as you would with the green concealer (start off light because it's always easier to add more!).

How to apply:
1. Distribute the colour correcting concealer over the redness and blend.
2. Apply your skin-tone matching concealer and/or foundation atop.
3. Set the application with a dusting of powder.
4. Pack the concealer in your make-up kit, as you may need to touch up the area once you blow your nose again.

Colour Correctors to try:
Benefit You're Bluffing Concealer Wand (approx $22)
The tube applicator makes it easy to lightly apply the concealer where needed. The formula glides and disguises redness well.

Physicians Formula Gentle Cover Concealer Stick (approx $8)
Physicians Formula concealer comes in Green, Yellow or Pale Yellow. The formula glides on smooth, is non-drying and blends easily into the skin.

Marcelle Universal Concealer Palette ($16)
Use the yellow of this palette to colour correct and then blend with one (or a mix of the skin tone colours). I love this palette - see my review here (oh yeah, and enter the contest to win one!)

Thanks for the great question - especially at this time of the year!

If you have a make-up related question you'd like to ask, drop me an email: rhia[at]artistrhi[dot]com. I look forward to hearing from you!

Posted by Rhia Amio, Make-up Artist www.artistrhi.com | 9:00 AM | , , , , | 0 comments »

Oh Old Man Winter! Ok, I know we're not officially into winter just yet, but we might as well be with the colder weather AND the summer tan long gone by now!! If your skin is feeling a little lacklustre and you're in need of a little make-up pick-me-up, a cream highlighter is a great make-up product to insert into your routine! Here's my take on some tried and tested highlighters:

Laura Mercier Secret Brightener ($30 US)

Love this multi-purpose highlighter that has a slight touch of shimmer. Use it to highlight atop the browbone, blend down the temple and atop the cheekbone for shimmer kissed look. Secret Brightener blends with ease and leaves a smooth finish - use it underneath the eyes to instantly brighten the darkest of undereye circles (yes, even mine) and top off with your concealer.

Yves St. Laurent ($40 USD)
photo: YSL

Industry celebrated and award winning Yves St. Laurent's Touche Eclat is a staple in the bags of make-up artists, beauty editors and models! This creamy highlighter gives smooth beautiful coverage in 4 different shades. Touche Eclat is marked at a hefty pricepoint of $40 USD, but the tube goes a long way (you only need to use a small amount per application!) Besides for a product touted as "8 hours sleep in a pen", the benefits of having it far outweight the costs! What I love about this cream highlighter is that it doesn't have any shimmer to it. I even like to swipe a stripe of it down the middle of the nose and blend it for a streamlined look!

Face Atelier
I swear by Face Atelier's foundations. The silicone-based formula is universally flattering to all skin types, but particularly a great choice for those with dry skin (and we all know with winter, everyone's skin is feeling a bit tighter/drier!). FACE Atelier's Ultra Sheer Pro highlighters are equally as lovable. The silicone-based formula glides on lightweight and blends easily into the skin. You can easily incorporate it into your routine by applying it overtop your foundation or adding it to either your foundation or moisturizer! Mix it with your foundation (ideally also silicone-based) for an instant dewy finish...or add a bit to your moisturizer and apply all over for a healthy and luminous skin glow! Ultra Sheer Pro comes in several tones including Opal (a pearl highlighter), Champagne (a pinky tone that can double as a blush), Peach (can also double as a blush) and Bronze (for a bronzed glow! self-explanatory!). Endless options, but always gorgeous looking skin!!

Benefit's Moon Beam
photo: Sephora

Ok as much as I try to be objective...or at least highlight the positive points about a product, I don't know what all the hype is about with Benefit's Moon Beam highlighter! (Moon Beam is always a feature product in beauty mags, and was even garnered the coveted Allure's Editor Choice Award). It takes a good amount of practice to get the hang of Moon Beam's consistency. Mind you, I do like the nail polish applicator that makes the product easy to apply...and the formula is potent - we're talking high-shine (I'll give Benefit props on that!) But in terms of overall usability, this product is not for the beauty novice, nor for the slow-fingered. Best technique of application: use the nail-polish like applicator to apply a series of tiny dots along the area you want to highlight, and then blend thoroughly (and immediately!). Moon Beam can be great for photoshoots because of the stark and concentrated highlighting contrast, but for an everyday routine, a little goes a long way!!

Important note:
Remember, a highlighting product will only work well on hydrated and healthy skin - it's not meant to replace a good moisturizer! :)

Posted by Rhia Amio, Make-up Artist www.artistrhi.com | 9:01 AM | , , , | 0 comments »

WEDDING | Ellen

2009-11-10

artistrhi weddings update: photos from gorgeous bride Ellen's Big Day are now up on the site! For Ellen's bridal look, I airbrushed her foundation on to give her skin natural and flawless coverage. The eyes were enhanced with a subtle glam look using a combo of grey eyeshadows (like MAC's current 4-pan palette in "Grey") plus the always reliable go-to liquid liner. I opted for shimmer products, rather than frosty eyeshadows for subtle shine. The final results = a smashing bride!

Congrats Ellen - thanks for letting me share in your wedding day! :)

Posted by Rhia Amio, Make-up Artist www.artistrhi.com | 8:26 AM | , , , | 0 comments »

BEAUTY SHOT | Ellen

2009-10-16

I'm excited about Ellen's wedding this weekend! There's something quite beautiful about fall weddings...yes, the weather is way cooler than the summer, but the colours of fall are such a beautiful backdrop to a bride in her white dress. I can see more and more why many brides are opting for fall rather than summer weddings.

For Ellen's bridal look, I did airbrush foundation as she wanted her make-up to be as long-lasting as possible. Following our initial bridal trial, she told me how she actually slept with the make-up on to see how long it would last. The next day all she had to do was tidy up a 'tiny bit underneath the eyes' - the rest of the make-up was still in tact!! Not that I condone sleeping with make-up on, but isn't that an awesome testimonial to the benefits of airbrushing?! Think about it...you can wake up looking perfect...just like those soap opera stars!!

Stay tuned for more pics from Ellen's wedding day prep. For now, it's time to pack the kit and get a good night's rest in preparation for tomorrow ;)

Posted by Rhia Amio, Make-up Artist www.artistrhi.com | 9:00 PM | , , , | 0 comments »

Looking at these photos of Carissa's Bridal Party taken in August makes me miss the (short-lived) summer! Even though colder weather is just around the corner here in Toronto, getting this sunkissed look all year-round is easy. Try this shortcut version to getting the look:

1. Even out your skin tone with foundation + concealer.
2. Use a multi-purpose product like NARS The Multiple (try Palm Beach or Malibu) atop eyelids, along cheekbones and blend upwards toward temples to soften. You can even add a bit to the lips for a kick of colour (hence, the aptly named Multiple!).
3. Dust a light layer of translucent powder all over the face to set.
4. Gloss up the lips.
5. Curl those lashes and a add a couple of coats of mascara.

Total get-ready time: under 5 minutes! This look is perfect for those mornings when you're pressed for time, and need an instant wake-up (yes, sometimes that morning coffee just isn't enough!). I did a few (ok, alot) more steps to achieve the same look for Carissa's bridesmaids - not that they needed 'more' make-up, but just to make sure it lasted them well into the evening!

To see more of the beautiful sunkissed bridal party, check out artistrhi weddings!

Posted by Rhia Amio, Make-up Artist www.artistrhi.com | 11:20 PM | , , , | 0 comments »

Q: What is the best primer?

A: In terms of what the "best" primer is, I can only speak from experience with primers that I have used on myself and/or clients. Usually, I test run everything on myself (I have fairly normal skin on good days) as a measuring stick because:

1) I’m a beauty junkie so I have to!
2) so I know how (well, if) the product works and
3) so I can describe it to clients.

I like to do my research, read up on products through magazines, make-up artist boards and online reviews and also ask other fellow make-up artists and beauty junkie pals before I set out to buy something. I have tried a few primers in my lifetime, but usually once I find something that I like, I’m pretty faithful to it until it gets discontinued or until it doesn't work the same.

The two primers currently in rotation for my own use and for clients are:

1. Cargo blu_ray™ High Definition Mattifier (approx. $28 CAD)
This mattifier became my trusted everyday primer when my previous go-to, Smashbox's Photo Finish Foundation Primer, just wasn't doing it for me anymore. Although Smashbox's primer had worked well before, I was beginning to find that my skin would get shiny nearly right after I had just finished my morning application.

Cargo's mattifier comes from the line's range of products specialized for use under the scrutiny of HD and blu-ray lenses. The result is a line of products that gives flawless and natural results, so even when enlarged to full resolution, the skin (and not the make-up) appears only better.

When applied initially, Cargo's mattifier works well as a primer. It smoothes out the skin, minimizes pores and fine lines, and tones down excess shine. You can also use it instead of powder - atop bare skin or atop your foundation. Most importantly, it keeps the T-zone in check until the usual midday touch-up. This primer has become a personal favourite, and a favourite of my bridal clients who need their make-up to go the absolute distance.

2. Embryolisse Lait-Crème Concentrè / 24-Hour Miracle Cream (approx $30 CAD)
Embryolisse is a fashion industry favourite with fans that include models to make-up artists! This multi-purpose cream quadruples as a moisturizer, primer, make-up remover and shaving cream! (Yes, even your boyfriend can use it. Multi-purpose indeed!)

The primer and moisturizer combo is perfect for when I'm in a rush, and it's a definite must-have when I'm travelling. It hydrates the skin, leaving it with a soft and silky smooth feel while not being greasy. A touch-up isn't needed til the usual midday expiration and it easily removes my make-up come nightfall - all this from one nifty bottle! Definitely recommend this one for its quality and practicality.

My take on other primers that I've tried:

Smashbox's Photo Finish Foundation Primer (approx. $40 CAD)

You only need a tiny amount of this primer, which in past years has been a favourite of beauty fanatics (including the big guys like Allure and Sephora). I personally find the formula too greasy and that my foundation looks the same later in the day when I don't apply it. At about $40CAD for the bottle, I'd definitely pass on this one.

Smashbox Photo Finish Foundation Primer Light (approx. $40 CAD)
In an attempt to give Smashbox's primer a chance to redeem itself (there must be all the buzz about it for some reason, right?), I decided to give the Light version of the formulation a try. The results were definitely less greasy than the original formula, but no great difference in lasting power of my foundation throughout the day. Another pass on this one!

MAC Prep + Prime Skin

This MAC primer contains silicones that sit atop the skin and help to smooth out the surface and minimize pores. Also works well for toning down oily skin, but doesn't really help with redness control as the product description says (you need some cover-up make-up for that one!). Overall, a decent primer, but at that price, I'd still opt for something that wows me :)

MAC Matte
MAC Matte's a staple in my kit. The clear gel formula works great to instantly tone down excess oil, such as in the T-zone and cheeks. It can be used before or even after foundation, in place of powder. Great to use on-set too - when in studio under hot camera lights, the skin (especially the T-zone) can tend to get shiny. To combat this, use a sponge to lightly pat MAC's Matte on the shiny area and let it set...alleviating the need to constantly reapply powder for touch-ups and risk looking cakey!

Conclusion (of sorts...):
The best primer can really vary with skin type. If you have normal skin, you'll be compatible with nearly all of the primers mentioned. If your skin tends to be on the oily side, I would stick to the primers with more of a mattifying formula, such as Cargo's blu_ray™ HD Mattifier or MAC's Matte. If your skin is on the dry side, Smashbox's Photo Finish or Embryolisse would be good options.

Whatever you choose, most places offer samples so don't be afraid to ask. Remember, if a product's worth buying, it's worth trying so samples should be readily available!

Hope that helps!

If you have a make-up related question you'd like to ask, shoot an email to me at rhia[at]artistrhi[dot]com. I look forward to hearing from you!

Posted by Rhia Amio, Make-up Artist www.artistrhi.com | 11:30 PM | , , , , | 0 comments »

The lovely Maggie wanted her bridal look to reflect the natural beauty that she is. To get the look, I concentrated on evening out the skin tone by using foundation (Maggie's own custom-made Prescriptives) and concealer. I stuck to a palette of neutral colours to naturally enhance Maggie's beautiful features, but give her a polished look fit for her wedding day.

I'm looking forward to Maggie's wedding day which is fast approaching next weekend...I'll be sure to post pics of this beauty as soon as I can...for now, back to working on pics from August!

Posted by Rhia Amio, Make-up Artist www.artistrhi.com | 1:15 AM | , , , | 0 comments »

Q: I’m going back to university in a week, and wonder if there are any products you would recommend that could help save some time but make me look great in the morning!

A: I am probably the worst person to talk to about a “quick” morning beauty routine. While I was away at university, I would purposefully sacrifice sleep or be late for class - all in the name of getting my full 40 minutes of make-up in the morning! But of course there are those days where you’re absolutely pressed for time and 40 minutes isn’t exactly reasonable. Fortunately, there are many products that do double-duty (and some steps you can skip) to help spare you time in the morning, and more importantly, get you looking fabulous and wide-eyed (even when that venti latte hasn’t kicked in just yet)!!

Try these get-ready tips when pressed for time in the morning:
1. Use a tinted moisturizer.
A tinted moisturizer adds a hint of colour and moisture to the skin in one easy step. No need for a brush - just blend the product well into the skin using your fingers!
Approximate time needed: under a minute

2. Use a concealer.
I find that with age (ahem, experience) and late nights of blogging my undereye circles can be quite pronounced come the morning. One of my absolute morning make-up must-dos is concealer – I look alien without it. Since my undereye circles are particularly complex, I actually use two products to help brighten the area up: a) Peachy-pink concealer to lighten the dark brown/purples undertones of the circles (try Laura Mercier's Secret Concealer)and then b). a flesh-toned concealer to blend the neutralized area with my own skin tone. I find using concealer makes the world of difference on my own face - if I had even less time to get ready, concealer is still one of those products that I would be sure to sneak in!
Approximate time needed: 3 minutes

3. Add some eyeliner + mascara.
Line the upper eyes to help open up the eye area and make the whites of the eyes appear brighter. (Big-eyed beauties can usually get away with just curling the lashes and adding mascara, but my eyes need a little more attention!). You can use whichever you prefer: a pencil, gel or liquid liner. I always recommend a gel or liquid liner simply because they last. Curl your lashes and top with 2-3 coats of your go-to mascara.
Approximate time needed: 5 minutes

ARTIST TIP: To keep the eyeliner long-lasting, apply a layer of eyeshadow primer in a neutral colour atop the eyelid.

Products to try: Cover Girl's Line Exact - the felt tip of this product makes lining the eyes as easy as using a marker! Recommended for novice to pro liquid liner users.

4. Add an instant glow with a luminscent bronzer.
I use a large-sized powder brush to apply bronzer in the 3-shaped motion along the forehead, cheekbones and underneath the jawline. Then, I dust any excess along the bridge of the nose. Keep the bronzer concentrated on the prominent areas of the face (think of where the sun hits the face first) and don't overdo it. Remember with bronzer, less is more and orange is just...bad.
Approximate time needed: under 1 minute

ARTIST TIP: Dust a layer of loose translucent powder on the face first for the bronzer to glide on smoothly.

Products to try: NARS Bronzers - these glide on like a dream! The product itself is highly pigmented so a couple of swipes with the brush is all you need.

5. Dust a peachy-pink blush on the apples of the cheeks.
Peachy-pink is a universally flattering colour (just think Orgasm by NARS - the much-loved product by industry insiders and beauty junkies!). Simply smile to make your apples of the cheeks more visible and add blush using a brush. Blend well. The effect is a soft and healthy glow that adds an instant warmth to your morning complexion.
Approximate time needed: 1 minute

Products to try: NARS Orgasm. Just like their bronzers, NARS blushes glide on smoothly, making them super easy and pretty much foolproof to blend.


6. Skip the lipliner and lipstick. Just gloss it up!
Use a gloss with a bit of colour instead of lipliner and lipstick, which can be way more time consuming. When choosing a gloss, opt for a colour that is two shades darker than your own lip colour. Remember that the gloss will glide on sheer, so a colour that looks darker as a gloss will work with your own natural lip colour and appear more transparent. As the day goes on, the gloss will be easier to touch up as well.
Approximate time needed: 1 minute

Products to try: MAC's Lychee Luxe, Maybelline Pink Sorbet. These peachy pink glosses are flattering on nearly all skin tones and will work well to complement your blush colour!

So there it is in about six (ok, more) steps. It’s not exactly a five-minute routine, but what I do like to stress is to focus on your favourite feature and make that stand out. If it’s your eyes that you like to draw attention to, focus on eyeliner, mascara and some gloss. If your lips are your favourite feature, go in with your lip brush, lip liner, lipstick or lip gloss (or all of the above!) and add some mascara to the lashes. If you’ve got great skin to show off, add some bronzer and blush for a gorgeous glow!

Beauty doesn't have to be complicated - just take a few minutes for yourself in the morning and you'll be amazed at how much better you can feel throughout the day!

MORE TIPS:
Here are a couple of things you can do to ease the morning routine:

Groom your brows.

A well-maintained arch is sometimes all the make-up you need. Good brows frame the face and polish off any make-up look. To get good brows, check out this post.

Maintain a proper daily cleansing routine and apply moisturizer after washing your face.
You won’t feel the need to use foundation when your skin is naturally glowing. Maintaining a consistent cleansing routine is essential to glowing skin. (We all know the aftermath of not removing last night’s make-up: raccoon eyes + increased chance for break-outs!) Proceed to apply moisturizer after each time you wash your face.
Hope that helps!
Rhia

If you have a make-up related question, please feel free to email me at rhia[at]artistrhi[dot]com.

Posted by Rhia Amio, Make-up Artist www.artistrhi.com | 2:00 PM | , , , | 0 comments »

The "no make-up" look actually takes a little effort to achieve, but the results are simple and stunning. To get Kristine's natural flawless finish, try the following tips:

1. Balance out the skin.
Great make-up always starts with a great base. When your skin is glowing, the rest of your make-up shines as well! Use a foundation to balance out the overall skin tone and a concealer to camouflage those areas that need a little more attention (i.e. undereye circles, blemishes - which in Kristine's case - I didn't have to worry about at all!)

2. For eyes, cheeks and lips, stick to pinks and neutral (close to skin tone) shades.
Pinks and neutrals are great shades for achieving the natural look. Pinks brighten the eye area, give a rosy glow to the cheeks and highlight naturally kissable lips. Neutral colours work well to subtly define the eye area and add contour without looking harsh.

ARTIST TIP: For professional photos, your make-up will stand out better if you get a little heavy-handed. In the photo above, I could have gone a couple of tones darker to really make things pop. Always try to get a sense of your photographer's style and take note of the lighting being used, so you know how intense to do the make-up.

See more:
ENGAGED | Kristine & Gino

Posted by Rhia Amio, Make-up Artist www.artistrhi.com | 11:30 PM | , | 0 comments »

WEDDING | Mary

2009-07-07

Here's a glimpse of a wedding I did in June (almost up to speed with wedding pics!) with the beautiful Mary and her gorgeous bridal party. I have to thank these ladies again and again for waking up at 5:30AM so that I could get them all dolled up in time! Despite the lack of sleep and extremely early morning, everyone was in such great spirits!

On the lovely bride-to-be, Mary (pictured below), we kept the look classy and used airbrush foundation to last her throughout the day (and throughout any potential tears!).
Congratulations, Mary - thank you for letting me share in your Big Day!!

To see the full set along with before-and-after pics, go to artistrhi.com.

Related posts:
BEAUTY SHOT | Mary
WEDDING | Finding a Make-up Artist
WEDDING | Do It Yourself Bridal Make-up

Posted by Rhia Amio, Make-up Artist www.artistrhi.com | 11:30 PM | , , , | 0 comments »

We’ve all been patiently waiting for summer weather, and now that the warmer days have arrived, it’s a good time to re-evaluate our make-up routine. When summer rolls around, it usually means playing up the bronzer, while lightening up on the other products in our daily routine. After all, we should be spending less time indoors getting ready, and more time outdoors enjoying the weather! That being said, we still want to look fab all year round! Try these quick and easy tips to keep you looking and feeling fresh all summer long:

1. Switch to a lighter moisturizer.
Increased temperatures are directly proportional to increased oiliness! Increased oil production means you can either use less moisturizer on the face (just address the areas that are dry) or switch to a lighter moisturizer altogether. If you’re using a light moisturizer, switch to a serum whereas if you’re using a thicker cream, opt for a light moisturizer instead!

2. Don’t skip out on the sunblock.
You may not see the effects immediately, but sun exposure overtime can do a number on your skin. Use a moisturizer with a sunblock in it to help protect against harmful UVA and UVB rays. If your moisturizer is separate from your sunblock, skip on using the moisturizer to avoid a grease-fest on the face. Ideally, let the sunblock absorb into the skin for at least 30 minutes before applying any make-up.

3. Use a mattifier instead of (or before applying) foundation.
For those of us blessed with great skin, a mattifier works well to absorb and reduce excess shine throughout the day. When layered underneath foundation, a mattifier also helps make-up last longer and minimize the need for touch-ups! Use tried and tested Cargo's Blu-Ray HD Mattifier or MAC's Matte on the areas of the face that are most prone to shine.

4. Keep a pack of blotting tissues handy.
Rather than doing a repetitive routine of constantly applying powder whenever oil appears, use blotting tissues to combat shine. To keep your make-up looking fresh, absorb the excess oil with the blotting tissue first and then lightly pat with your powder to polish it off. This method also works best for helping to reduce the chance of break-outs!

5. Don’t overdo it on the powder.
When you pack on too much powder, especially atop an oily surface, it can approach a cakey look. Blot with an absorbing tissue first, and then use a puff or even a brush to lightly pat the powder on oil-prone areas (pay particular attention to the T-zone area). Avoid packing on the powder as your face will only get slicker (and quicker) before the next anticipated touch-up!

6. Don’t sweat it!
During the summer, the look is all about healthy, glistening skin and the bottom line is that it’s tough to keep up a routine of a matte face when the weather is warm. Instead play up the look by adding a spritz of MAC’s Fix+ for an instant dewy glow. Fix+ is also infused with vitamins and minerals that are a real treat for your skin!

Posted by Rhia Amio, Make-up Artist www.artistrhi.com | 10:16 PM | , , , , | 0 comments »
Related Posts with Thumbnails